x
Procedure: How to Create the HTML Page
In this
procedure, you create the new HTML page using the HTML/Document
Wizard. You can also create a new HTML page from the Application
menu, Quick Access Toolbar, or the Environments Tree panel.
-
On the Home tab,
in the Content group, click HTML/Document.
The HTML/Document Wizard opens.
-
Confirm
that HTML Page is selected in the File Type area, and Retail is selected
in the Navigate to location for new item area.
-
Click Finish.
The following open:
- HTML canvas
- Tasks &
Animations panel
- Request & Data sources panel
- Thumbnails
panel
- Settings
panel
- Properties
panel
x
Procedure: How to Add the salesreport Procedure to the HTML Page
In this
procedure, you will add the salesreport.fex procedure, that you
created earlier in this tutorial, to the HTML page.
-
On the Components tab,
in the Reports group, click Report.
-
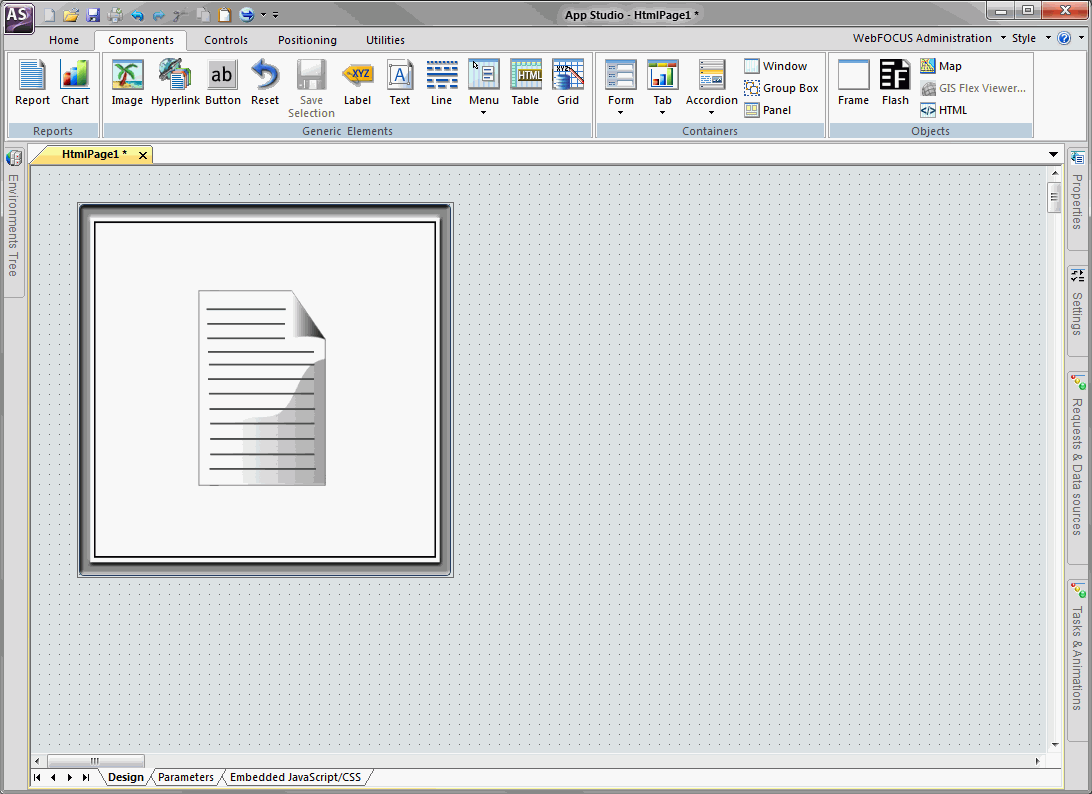
Drag your
pointer across the HTML canvas to create a Report container, as
shown in the following image.
-
Click the
Report container, and open the Properties panel.
-
In the Style
attributes area, under Basic, make the Left attribute 75px,
and the Top attribute 220px.
This changes the placement of the report container on your
HTML page.
-
Right-click
the Report container and click Reference existing procedure.
The Open File dialog box opens.
-
Scroll through
the list of procedures, click salesreport.fex,
and then click OK.
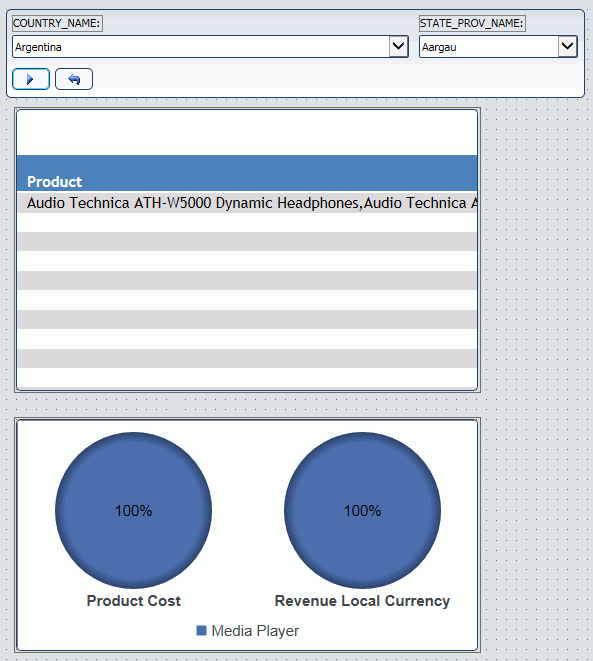
The New Parameters dialog box opens. Use this dialog box
to chain the controls for COUNTRY_NAME and STATE_PROV_NAME, as shown
in the following image.
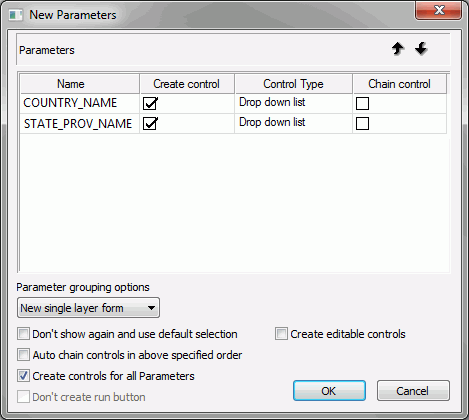
You
can select the check box next to the control, in the Chain control
column, or you can select the Auto chain controls in above specified
order check box.
-
Click OK.
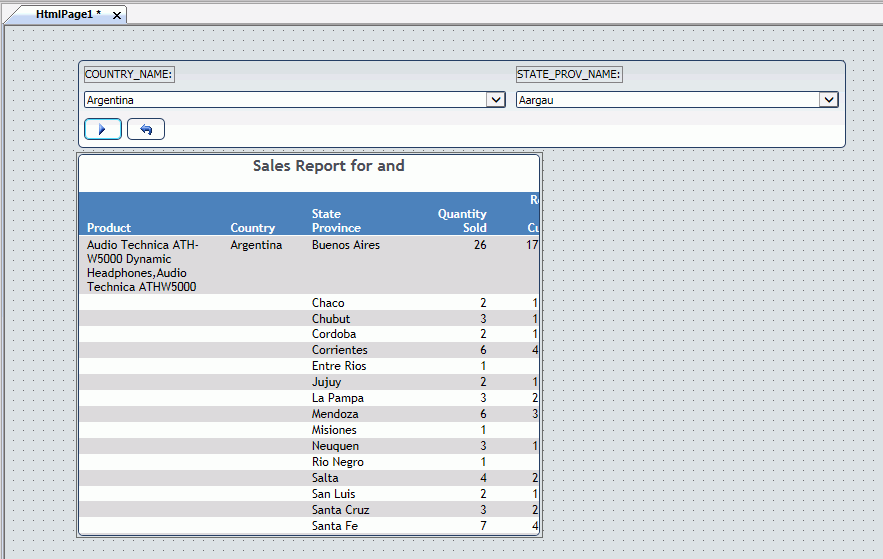
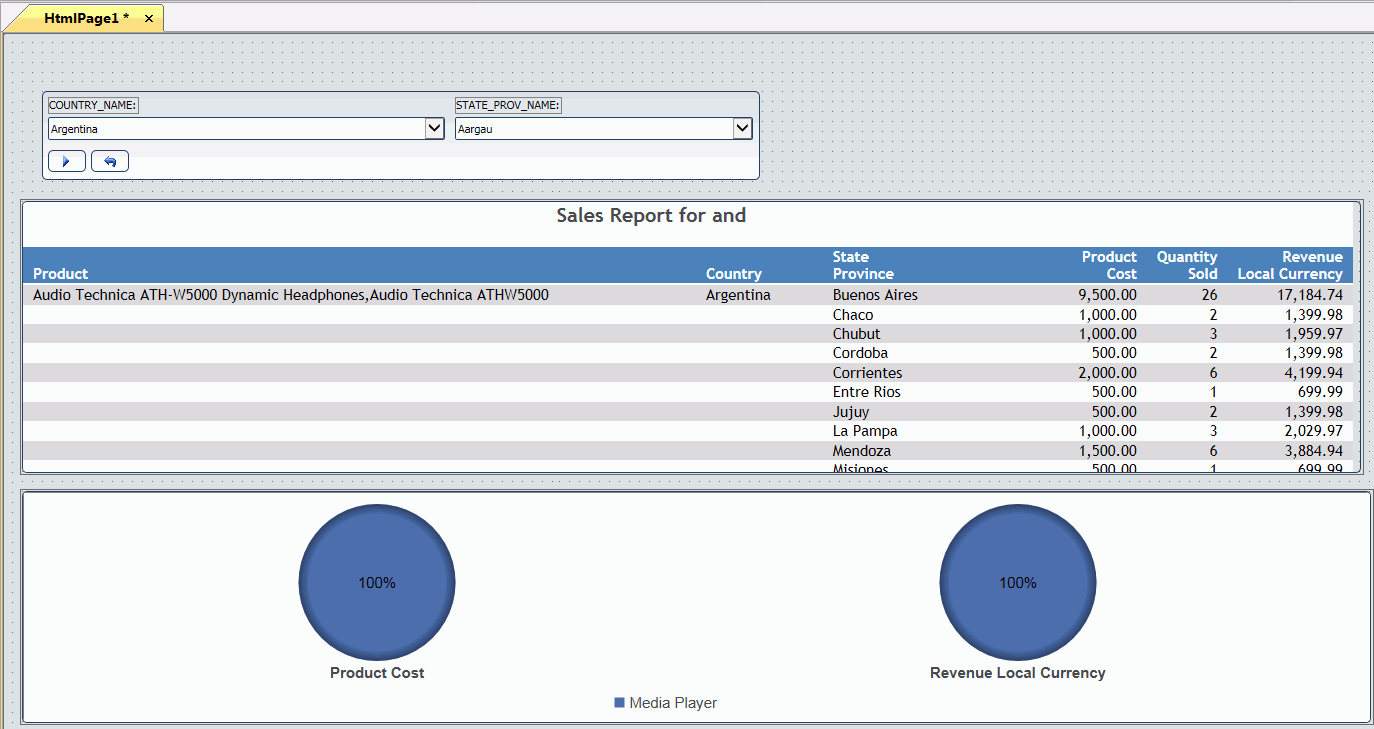
The salesreport.fex and a form object that contains controls
open on the HTML page, as shown in the following image.
-
Resize the
width of the Report container as necessary to accommodate the entire
report.
-
Look at
the report in Preview to make sure that you are satisfied with it. Move
and resize components of the report if needed.
x
Procedure: How to Add a New Chart From the HTML Page
In this procedure, you add a pie chart
to the HTML page. You add one dimension (Product Category) and multiple
measures (Product Cost, Revenue) to the Y Axis.
The chart
uses the same parameters as the report, so controls (Where=Region, Where=State)
govern both the report and the chart procedure. Therefore, the New Parameters
dialog box does not open when you save the chart back to the HTML
page.
By the end of this section in the tutorial, you will
have created two controls, a report and a chart, and you have chained
the COUNTRY_NAME field to the STATE_PROV_NAME field.
-
On the Components tab,
in the Reports group, click Chart.
-
Drag your
pointer across the HTML canvas to create a chart container, as shown
in the following image.
-
Right-click
the chart container, and click New chart.
The Open File dialog box opens.
-
Click Cancel.
A blank canvas, named HtmlPage1_chart1, opens.
-
In the Procedure
View panel, right-click the File HtmlPage1_chart1 components folder,
point to New, and then click Join.
-
To use the
same fields that were joined for the report, follow the steps in How to Add the Join Component.
-
In the Procedure
View panel, click the Join component, point to New,
and then click Chart.
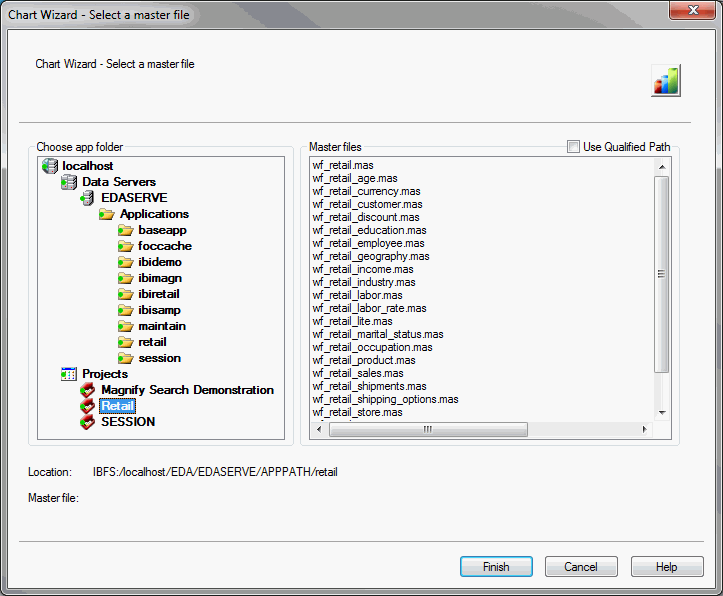
The Chart Wizard - Select a master file pane opens, as
shown in the following image.
-
Click wf_retail_product.mas,
and then click Finish.
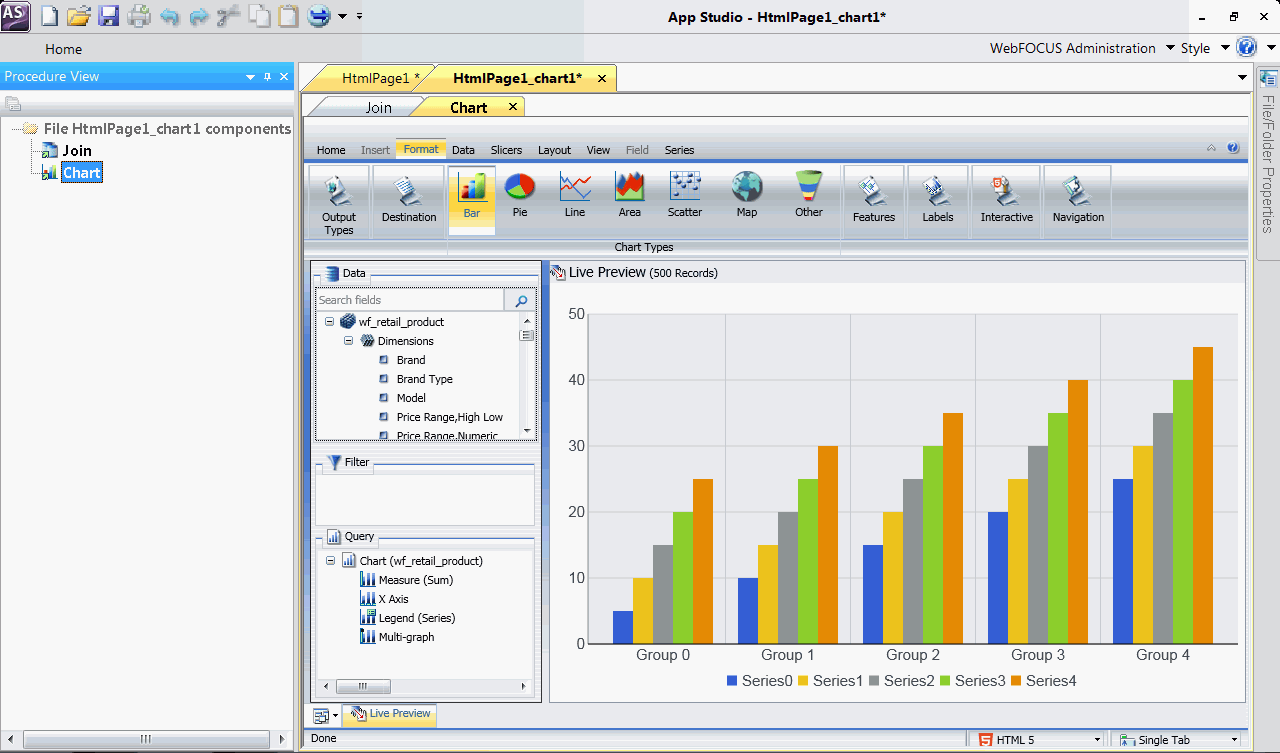
The Chart canvas opens, previewing a sample chart, as shown
in the following image.
-
Add the Product
Category, Product Cost, and Revenue,
Local Currency fields to the chart.
-
Create the
same WHERE clauses you created in the report. Drag Country from
the Data pane to the Filter pane. Repeat for State, Province.
-
On the Format tab,
in the Chart Types group, click Pie.
-
On the Home tab,
in the Report group, click Theme.
The Templates - Browse predefined template files dialog
box opens.
-
Select ENBlue_Medium2.sty from
the available templates and click Open.
-
Close the
HtmlPage1_chart1 canvas and click Yes when
you are prompted to save the procedure.
The chart is displayed on the HTML page, as shown in the
following image.
x
Procedure: How to Style the HTML Page
In this procedure, you add styling to
the HTML page using the Properties panel.
Note: You
can sort the display of properties in the Properties panel by category
or in alphabetical order. If you cannot locate a property in your
display, select a different sorting option from the Properties panel
toolbar.
-
Make the
report component and chart component the same size.
-
Click the chart component, press the Ctrl key on your keyboard,
and then click the report component.
-
On the Positioning tab, in the Positioning group,
click Same Size.
Note: The first selected component is the component
whose size will change. The size will change to that of the second
selected component, as shown in the following image.
-
Add a title
to the HTML page.
-
On the Components tab, in the Generic
Elements group, click Text.
-
Drag your pointer across the HTML canvas to create a text container.
-
Double-click the text container.
-
Delete the default text, and then type Retail Product Summary.
-
Change the
font color.
-
On the canvas, click the text container.
-
In the Properties panel, under Basic in the Style Attributes
area, click the Color property.
An arrow appears.
-
Click the Color property arrow.
The Color Picker dialog box opens.
-
From the Web Palette tab, select the color yellow (#ffff66).
-
Click OK.
-
Change the
font size.
-
On the canvas, click the text container.
-
In the Properties panel, under Basic in the Style Attributes
area, click the Font-size property.
An arrow appears.
-
From the list, click xx-large.
-
Click the text container.
-
On the Positioning tab, in the Text
Alignment group, click Center.
-
Change the
background color of the HTML page.
-
Click a blank area of the canvas to activate the document object.
-
In the Properties panel, under Basic in the Style Attributes
area, click the Background-color property.
An arrow appears.
-
Click the Background-color property arrow.
The Color Picker dialog box opens.
-
From the Web Palette tab, select the color navy blue (#000099).
-
Click OK.
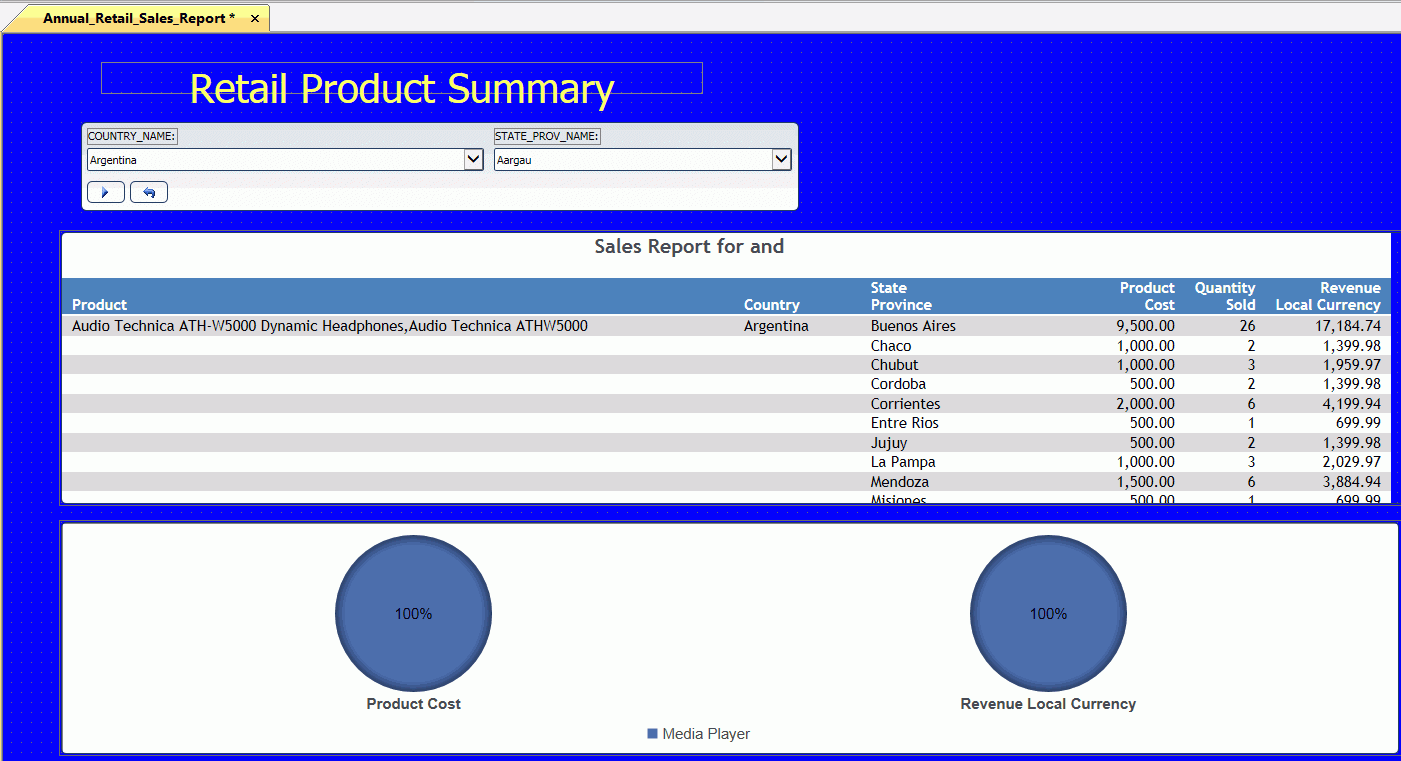
Your HTML page will now have a report and chart that are
the same size, a large yellow title, and a navy blue background,
as shown in the following image.
-
On the Quick
Access Toolbar, click Save.
The Save As dialog box opens.
-
Type Annual
Retail Sales Report.
Note: App Studio automatically replaces each space
with an underscore, since file names cannot contain spaces.
-
Click OK.