To manually define web server connection settings for WebFOCUS Quick Data:
- Launch Excel.
-
On the Add-Ins tab in the Menu Commands group,
click WebFOCUS, and then click Create
Query.
The Web Server Connection dialog box opens, as shown in the
following image.
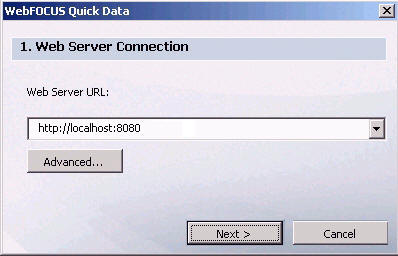
Note: The Web Server URL must not end with a slash mark (/).
-
In the Web Server URL field, type the URL for the server
on which WebFOCUS is installed. The URL includes the protocol (http:
or https:), the server name (for example, localhost), and the server
port number (for example, 8080).
Tip: When you enter a web server URL correctly, the next time that you use WebFOCUS Quick Data, that server will be displayed in the Web Server URL field, or it will be a selection in the drop-down list.
-
To provide a custom alias, click Advanced.
The Advanced Connection Options dialog box opens, as shown in the
following image.
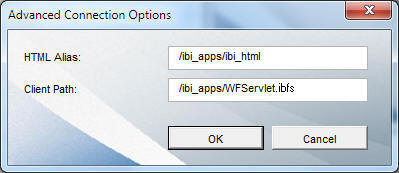
If your WebFOCUS environment has been customized, you can configure the following attributes in the Advanced Connection Options dialog box:
- HTML Alias. Specifies the alias, defined on the web server, for the ibi_html directory. If your WebFOCUS environment does not use the default /ibi_apps/ibi_html alias, specify the custom alias defined on the remote web server.
- Client Path. Specifies how calls are made to the web server. Your WebFOCUS environment uses the WebFOCUS Servlet with the ibi_apps context path. As a result, the client path is set to /ibi_apps/WFServlet.ibfs by default.
Note: The following connections are supported:
- Anonymous web servers.
- HTTP and HTTPS.
- Reporting Servers with and without security.
- Context paths other than the standard /ibi_html and /ibi_apps
context paths.
You can specify a non-standard context path in the Advanced Connection Options dialog box.
- In the Advanced Connection Options dialog box, click OK.
- In the Web Server Connection dialog box, click Next to establish a connection to the web server and to start creating reports.