Use Color Models

In this section:


x
Managing Color Models

In this section:

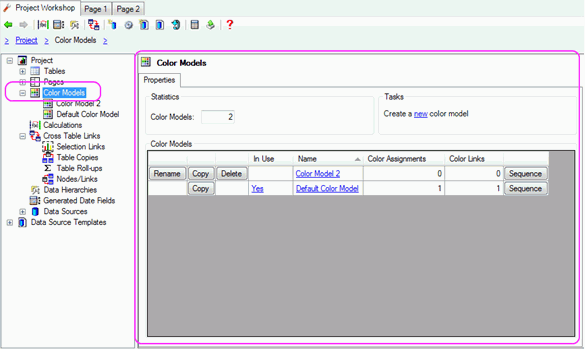
Clicking on the ‘Color Models’ node will show a list of color models in the right pane.


x
Add a New Color Model
  1. Open the Project Workshop by clicking on the option in the Task View under "Step 3: Work with Data" or by selecting Project Workshop from the View menu
  2. Right click on the 'Color Models' node and select “New Color Model” or click 'new' under Tasks in Color Models Properties.
  3. Name the new color model and click 'OK'


x
Configure a Color Model

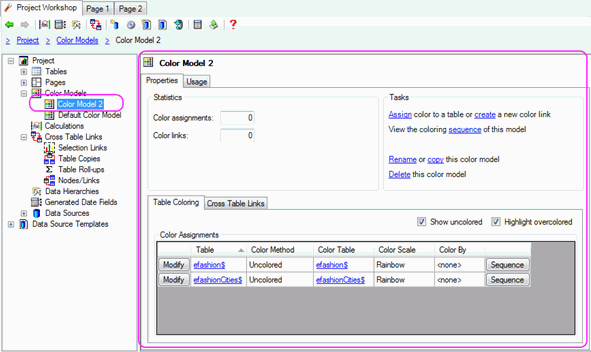
To configure a color model open the Project Workshop, click on the "+" next to the "Color Models" node to see all color models, and select the color model you want to configure.

Assigning color (“Color By”) to a table:

  1. Click 'Assign' under Tasks in the Color Model's Properties.
  2. Choose the table, field, and scale of the color assignment and click “OK”

To modify or remove a table color assignment:

  1. Click the 'Modify' button next to the table with the color assignment you want to change.
  2. Change the field and color scale and click “OK”. If you do not want a color assigned to the table, set the field to "<none>".

To create a color link:

  1. Click 'create' under Tasks in Color Model's Properties.
  2. Select the origin table and key field and the destination table and key field and click “OK”.

To modify a color link :

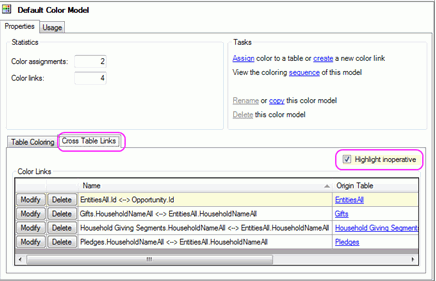
  1. Select the "Cross Table Links" tab
  2. Click the 'Modify' button next to the link you want to change.
  3. Select the origin table and key field and the destination table and key field and click "OK".

To remove a color link :

  1. Select the "Cross Table Links" pane
  2. Click the 'Delete' button next to the link you want to change


x
Delete a Color Model
  1. Open the Project Workshop by clicking on the option in the Task View under "Step 3: Work with Data" or by selecting Project Workshop from the View menu
  2. Click on the "+" next to the "Color Models" node to see all color models, and select the color model you want to delete.
  3. Click the 'Delete' button next to the color model in the Color Models Properties pane or right click on the color model's node and select “Delete Color Model”.
  4. Click “Yes”.


Top of page

x
Assign Color Models to Pages

  1. Open the by clicking on the option in the Task View under “Step 3: Work with Data” or by selecting Project Workshop from the View menu.
  2. Click on the “+” next to the “Pages” node to see all pages, and select the page you want to color.
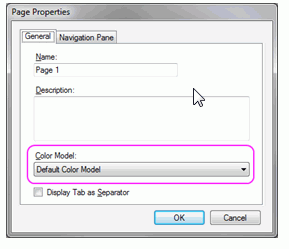
  3. Under the ‘Pages’ node, right click the page you are assigning the model to and click “Modify Page Properties”. Alternatively, you can click on the page’s tab and click “Page Properties”.
  4. Select the model from the Color Model drop-down menu and click “OK”.


Top of page

x
Color Sequence: How is Color Being Applied to the Data

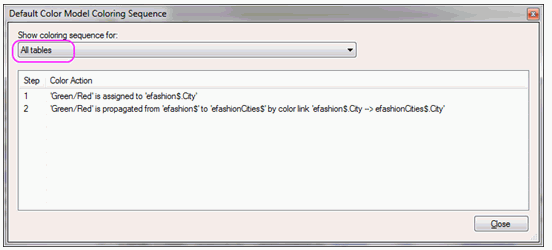
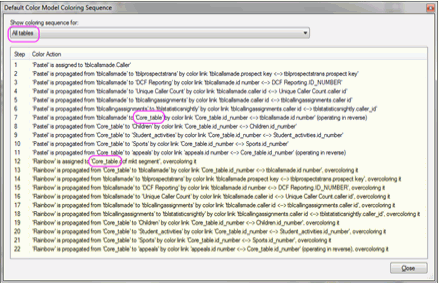
The Color sequence allows you to see exactly how color is applied in a color model. You can view the color sequence for the whole model or a specific table.

  1. Open the by clicking on the option in the Task View under “Step 3: Work with Data” or by selecting Project Workshop from the View menu.
  2. Click on the “+” next to the “Color Models” node to see all color models, and select the color model for which you want to display the color sequence.
  3. Click on ‘Sequence’ under ‘Tasks’ in the color model’s properties.
  4. By default the color sequence for the entire model will be displayed. Use the ‘Show coloring sequence for’ dropdown menu to select a specific table.

Or click the ‘Sequence’ button next to a table to see the color sequence for that particular table.


Top of page

x
Issues with Legacy Projects

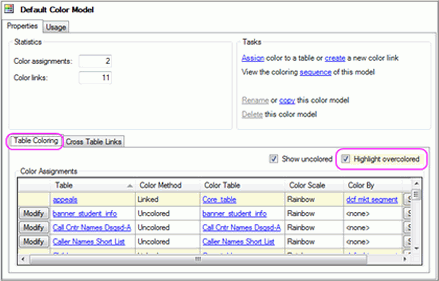
Two issues pertaining to coloring have been identified in projects authored in versions previous to 6.0: overcoloring and inoperative color links (i.e. no matching keys). Two features in the color model view can help you easily correct coloring in legacy projects. To view issues within a color model, open the Project Workshop and select a color model from the tree nodes.

Tables that are overcolored are easily identified by checking the 'Highlight overcolored' box.

The color sequence will also highlight the steps in the sequence that cause overcoloring.

Links that are inoperative or have no matching keys are identified in the 'Cross Table Links' list by checking the 'Highlight inoperative' box

Once you have identified the issues you can configure the color models to get rid of links, or assignments causing problems


WebFOCUS