-
Create a new subfolder in the following
directory:
WebFOCUS Visual Discovery Server AE\Projects
In this example, the folder is called Client_test
- Open WebFOCUS Visual Discovery Workbench AE.
-
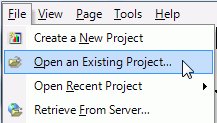
From the File menu, select Open an Existing Project,
as shown in the following image.
The Open Project dialog is displayed.
-
Navigate to the following folder:
WebFOCUS Visual Discovery Workbench AE\Demo
Select either the Customers or Mutual Funds demo.
-
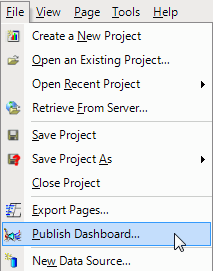
From the File menu, select Publish Dashboard, as
shown in the following image.
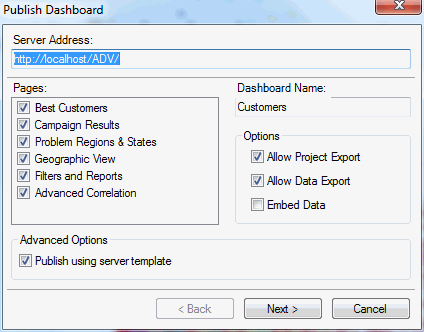
The Publish Dashboard dialog opens, as shown in the following image.
-
Accept the defaults and click Next.
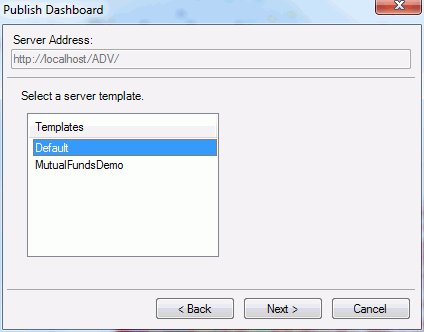
The server template dialog opens, as shown in the following image.
-
Select a template from the list and click Next.
The destination dialog is displayed.
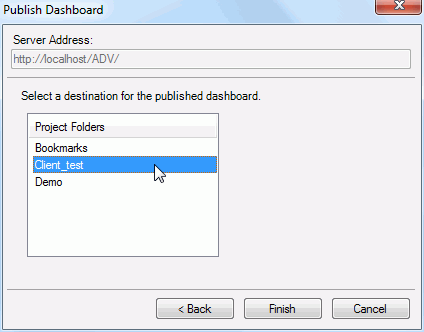
-
Select the subfolder that you created in step 1, as shown
in the following image.
-
Click Finish.
A confirmation dialog is opens, as shown in the following image.
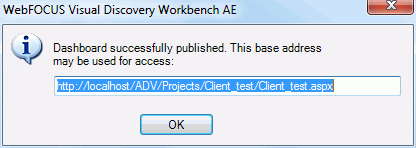
- Copy the dashboard, which you will use later in the procedure, and click OK.
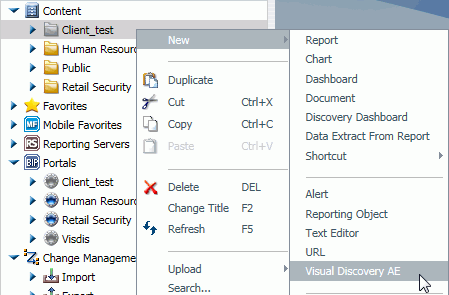
- Open the WebFOCUS BI Portal and create a new folder (for example, Client_test).
-
Right-click the folder, select New,
and then click Visual Discovery AE from the
context menu, as shown in the following image.
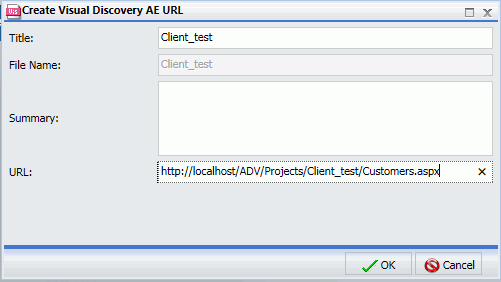
The Create Visual Discovery AE URL dialog box opens, as shown in the following image.
-
Perform the following steps:
- Enter a title for the WebFOCUS Visual Discovery AE dashboard that is being added as a WebFOCUS BI item.
- Enter a summary (optional) that describes the data being presented in the dashboard.
- Enter the URL that points to the published dashboard, which was generated by the WebFOCUS Visual Discovery Workbench AE during the publishing process.
-
Click OK.
The published Visual Discovery AE dashboard is added as a new item to the WebFOCUS BI Portal.
- Right-click the new WebFOCUS BI Portal item and select View from the context menu.
If a pre-built dashboard is displayed, then you have successfully validated the WebFOCUS Visual Discovery Workbench AE installation.
If the validation is not successful, see Maintenance and Troubleshooting.