To install the required IIS features:
-
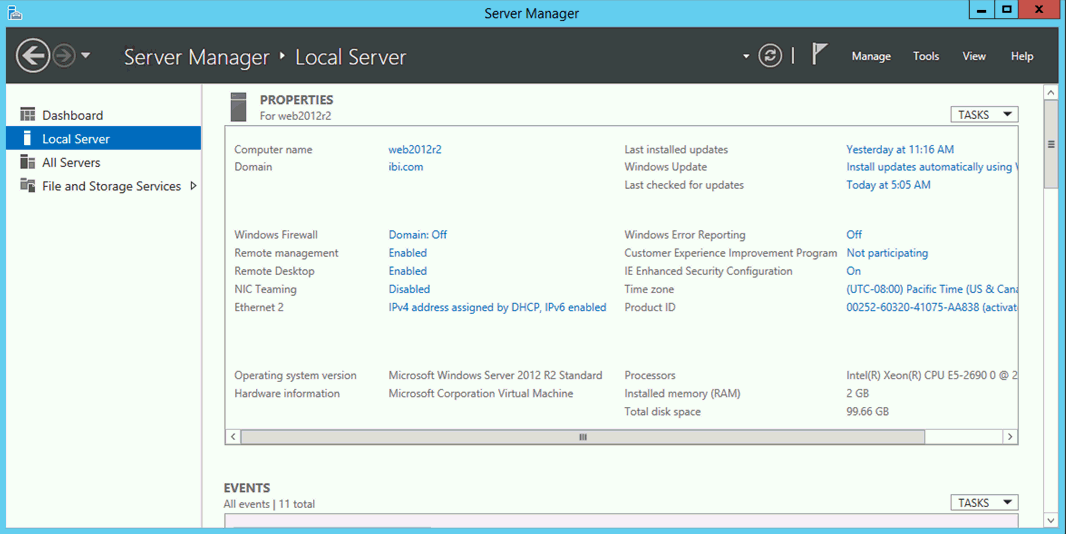
From the Server Manager, click Local Manager in
the left pane, as shown in the following image.
-
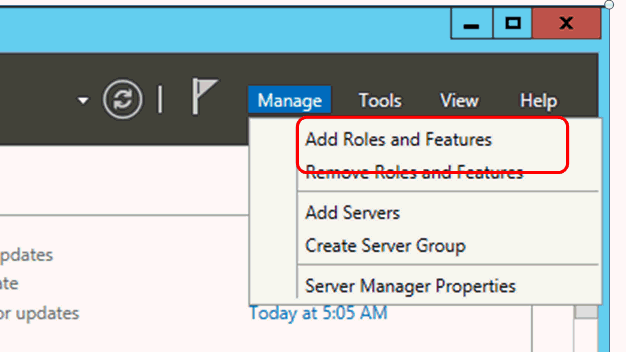
Click the Manage tab, and then select Add
Roles and Features, as shown in the following image.
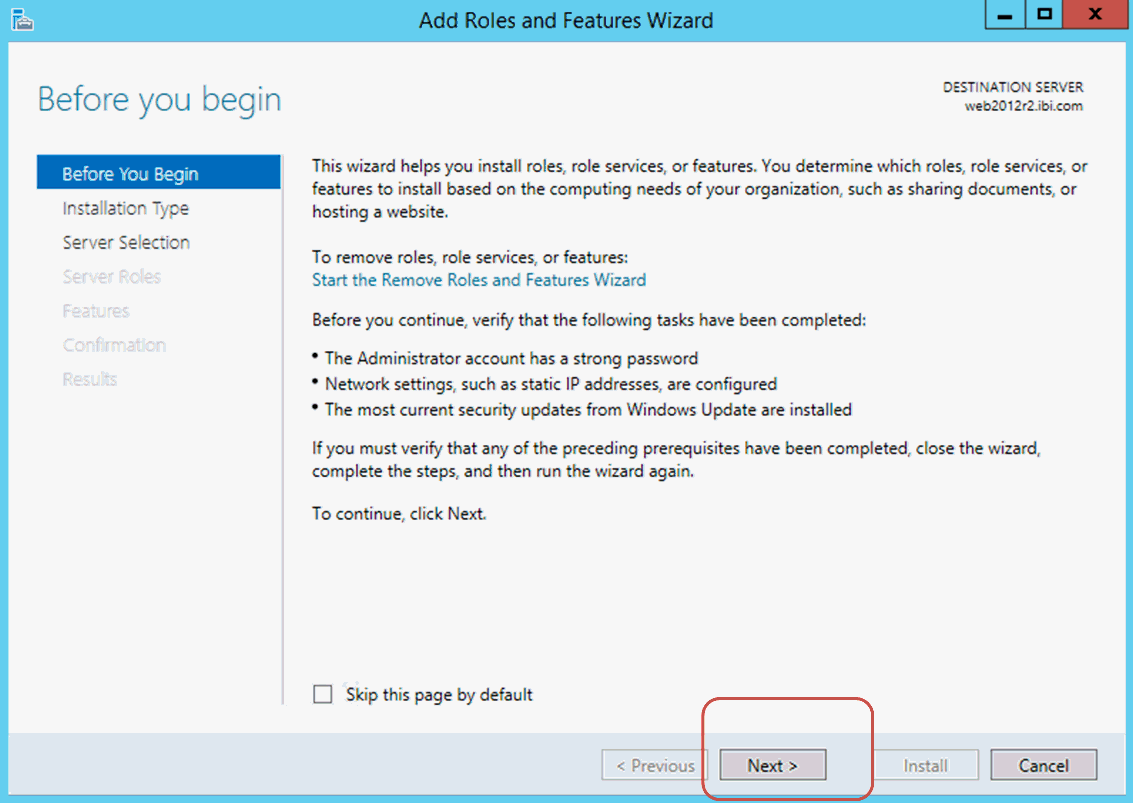
The Add Roles and Features Wizard dialog box appears.
-
Click Next, as shown in the following image.
-
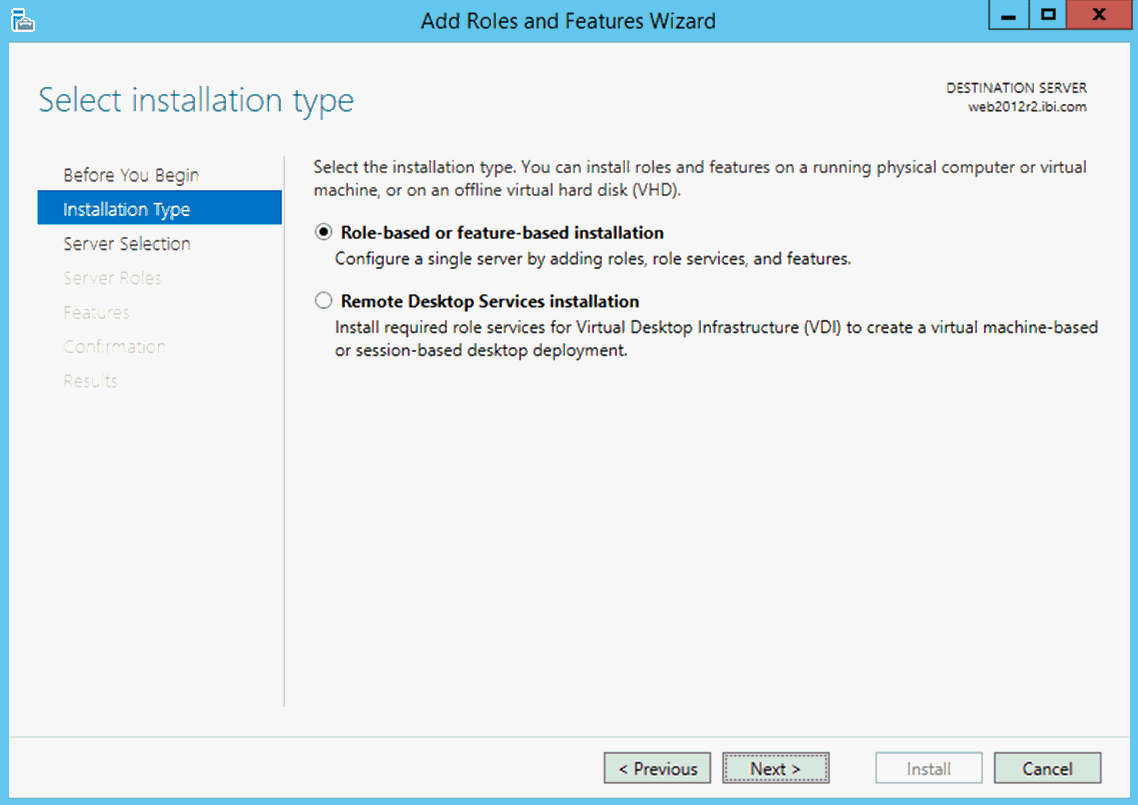
In the Select installation type pane, select Role-based
or feature-based installation, and click Next,
as shown in the following image.
-
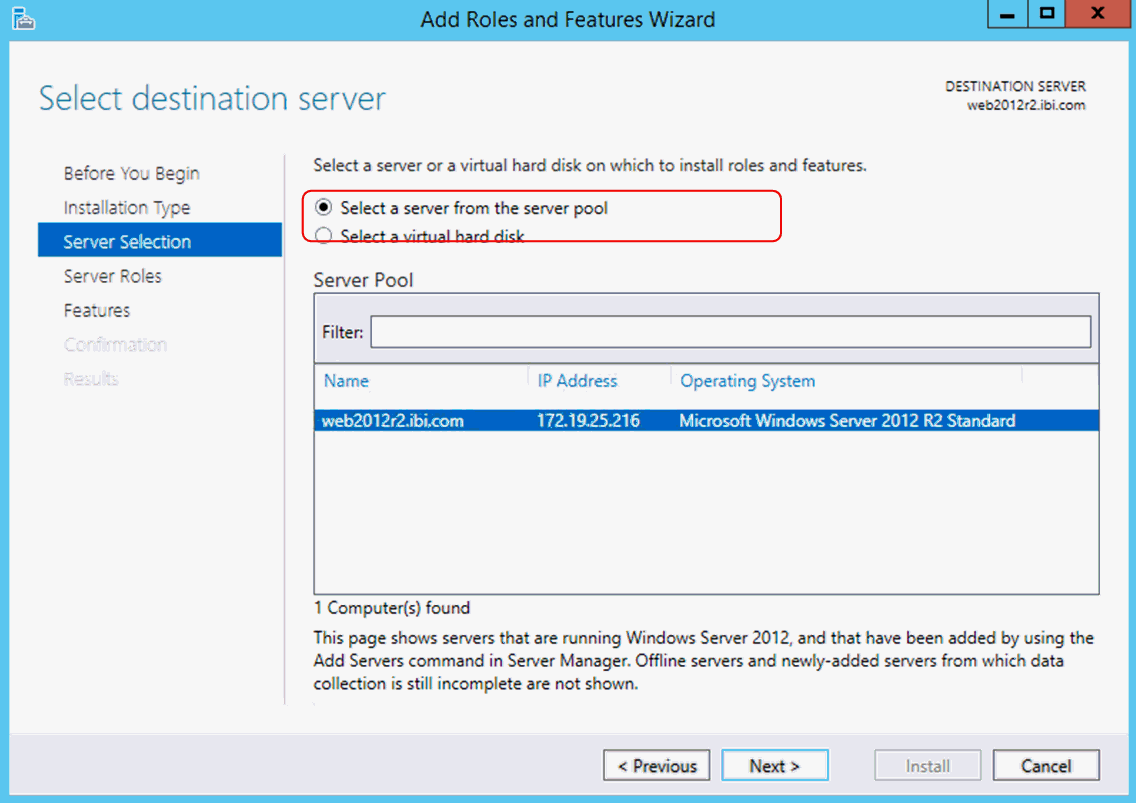
In the Select destination server pane, ensure that Select
a server from the server pool is selected, and then
click Next, as shown in the following image.
-
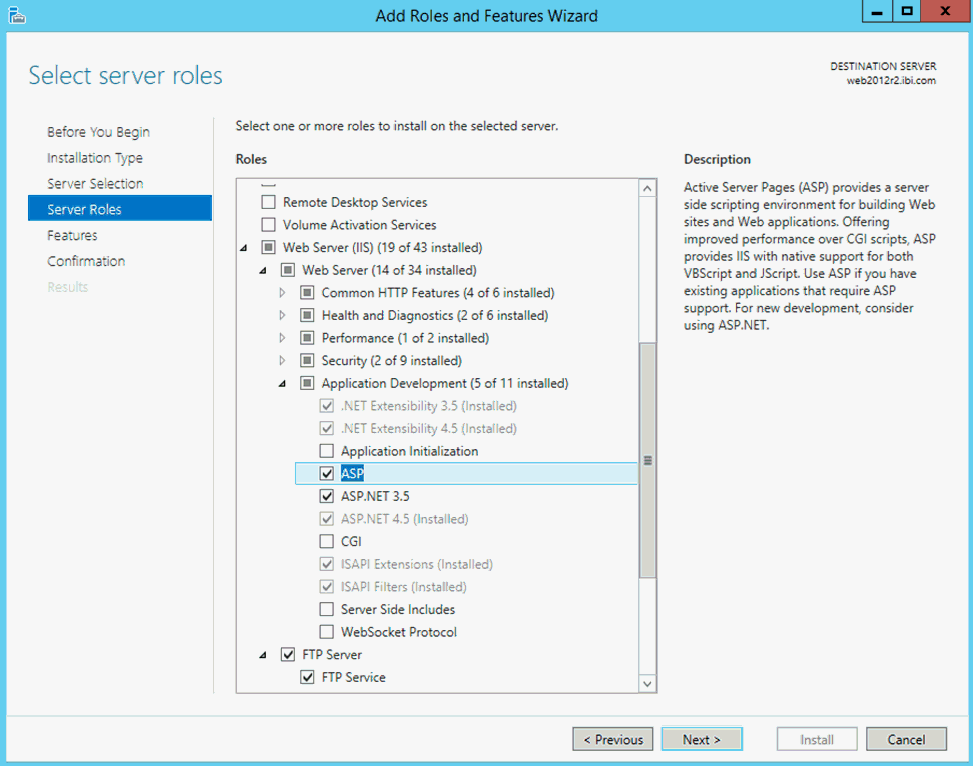
In the Select server roles pane, scroll down the Roles
list and select the ASP check box, as shown
in the following image.
-
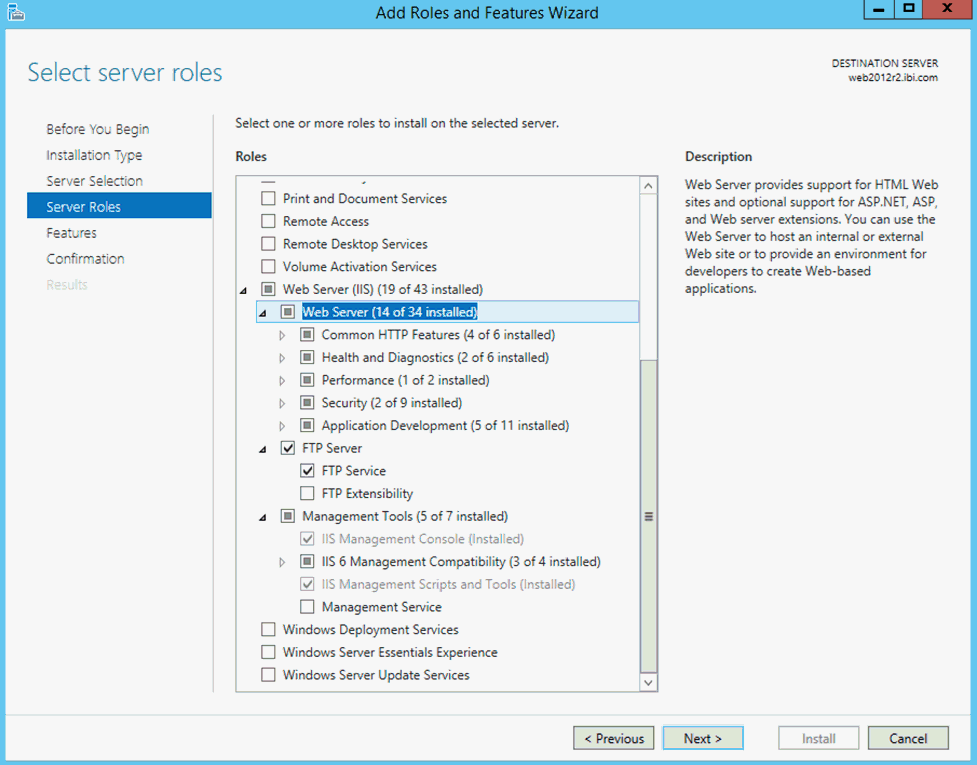
Continue scrolling down the Roles list and ensure that
the Web Server check box is selected, and
then click Next, as shown in the following
image.
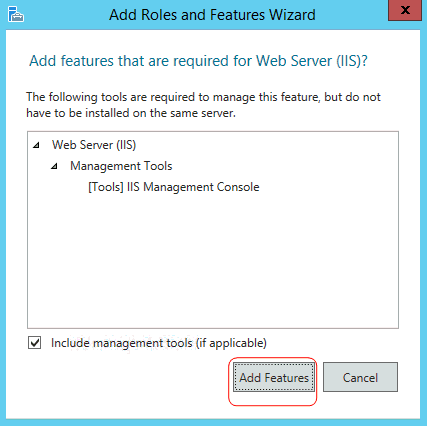
The following pane asks you to add features required for the Web Server.
-
Select the Include management tools (if applicable) check
box, and then click Add Features, as shown
in the following image.
-
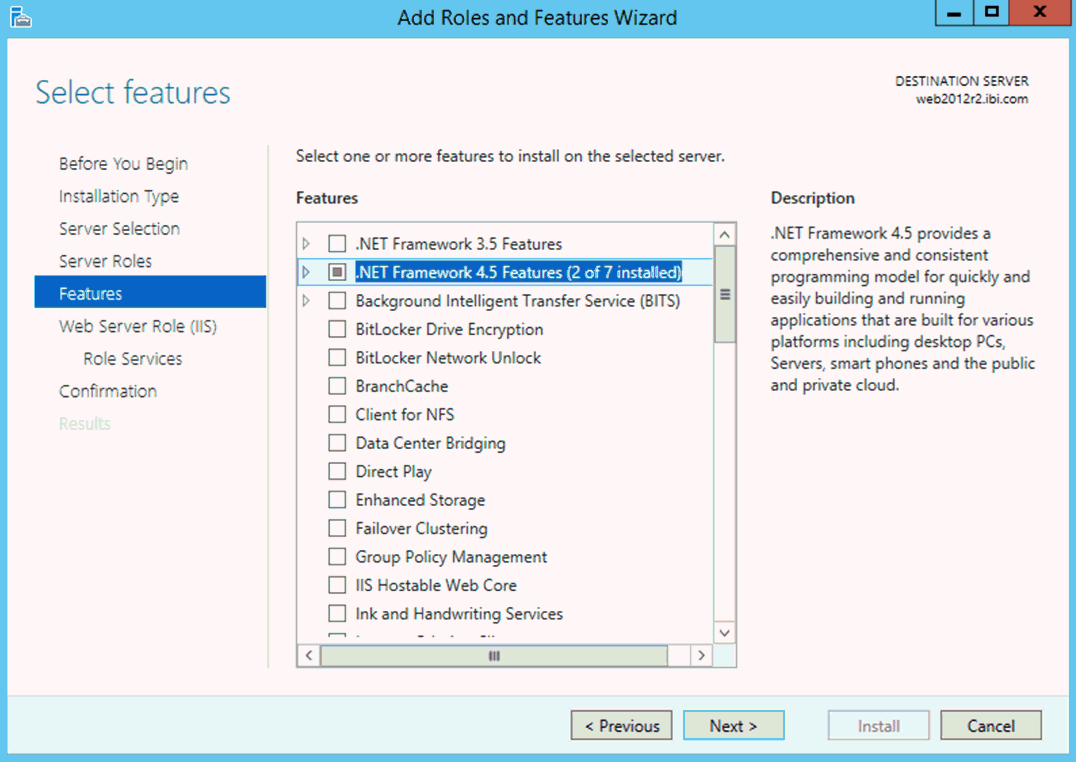
In the Select features pane, select the .NET
Framework 4.5 Features check box, and click Next,
as shown in the following image.
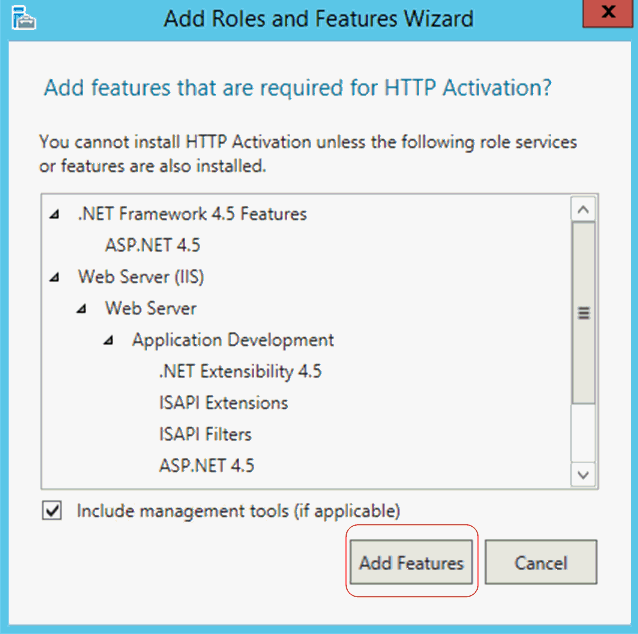
The following pane asks you to add features that are required for HTTP activation.
-
Select the Include management tools (if applicable) check
box, and then click Add Features, as shown
in the following image.
-
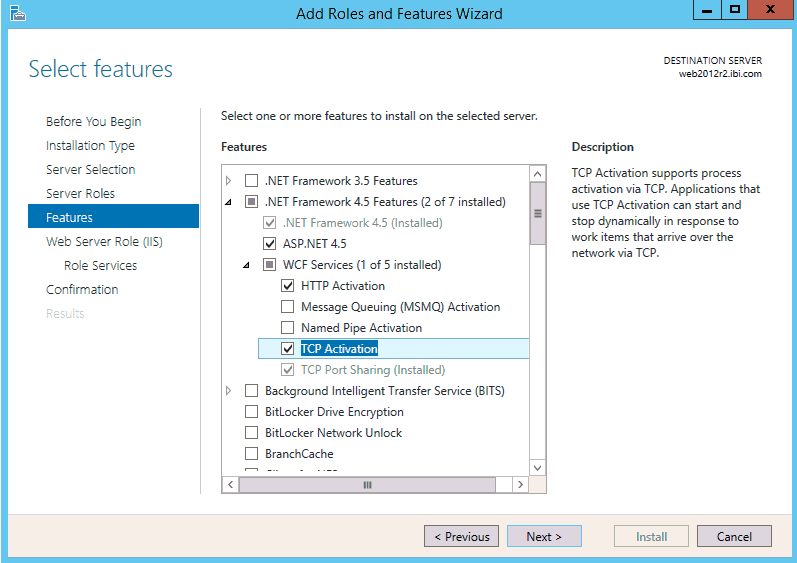
In the Select features pane, select the TCP Activation check
box, and then click Next, as shown in the
following image.
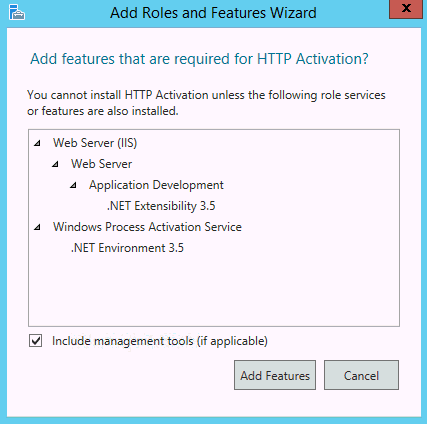
The following pane asks you to add features that are required for HTTP activation.
-
Select the Include management tools (if applicable) check
box, and then click Add Features, as shown
in the following image.
-
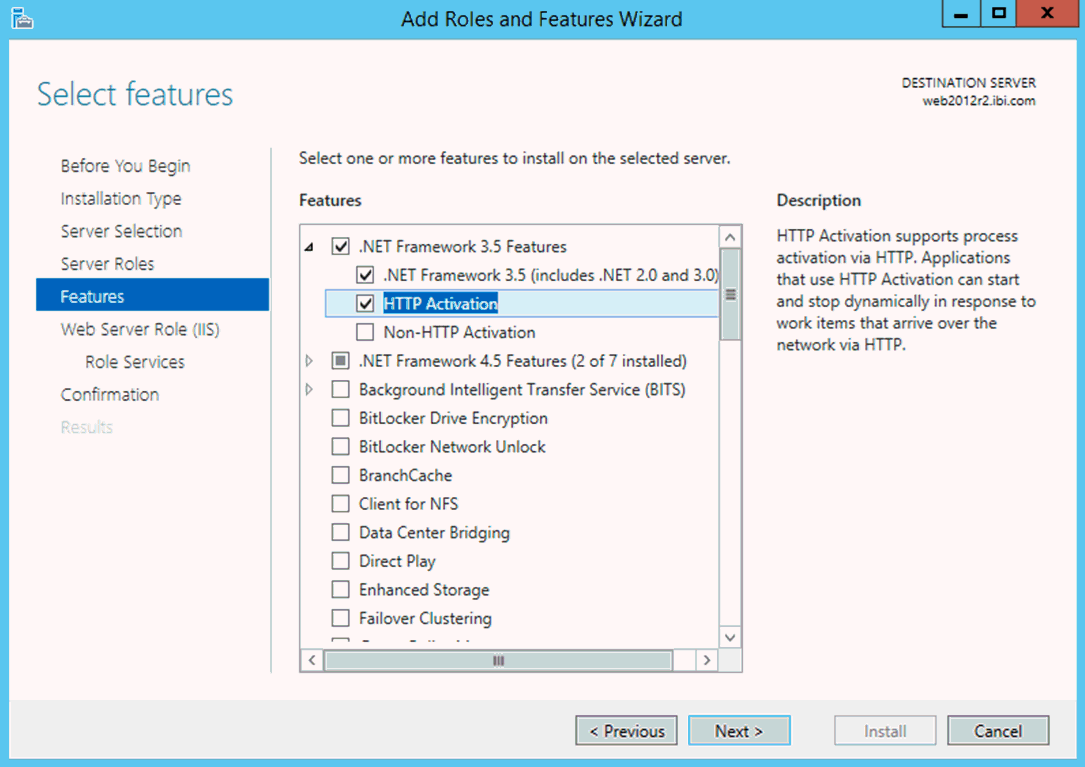
In the Select features pane, select the HTTP Activation check
box, and then click Next, as shown in the
following image.
The Web Server Role (IIS) pane appears, as shown in the following image.
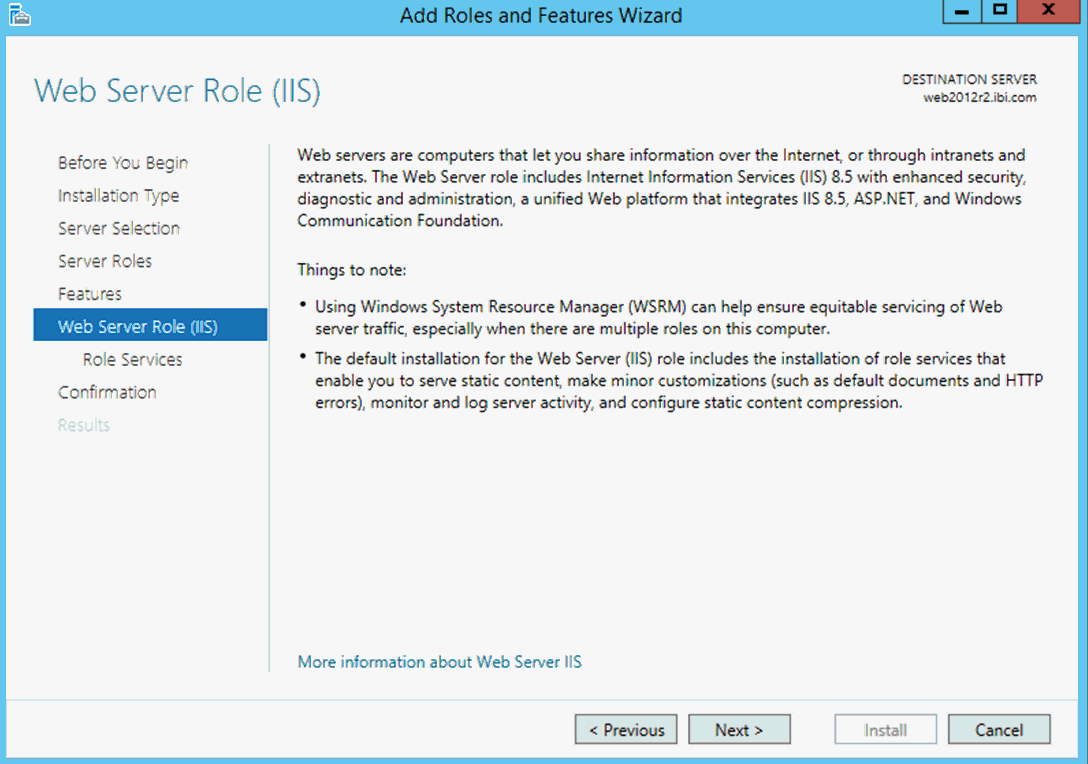
- Click Next.
-
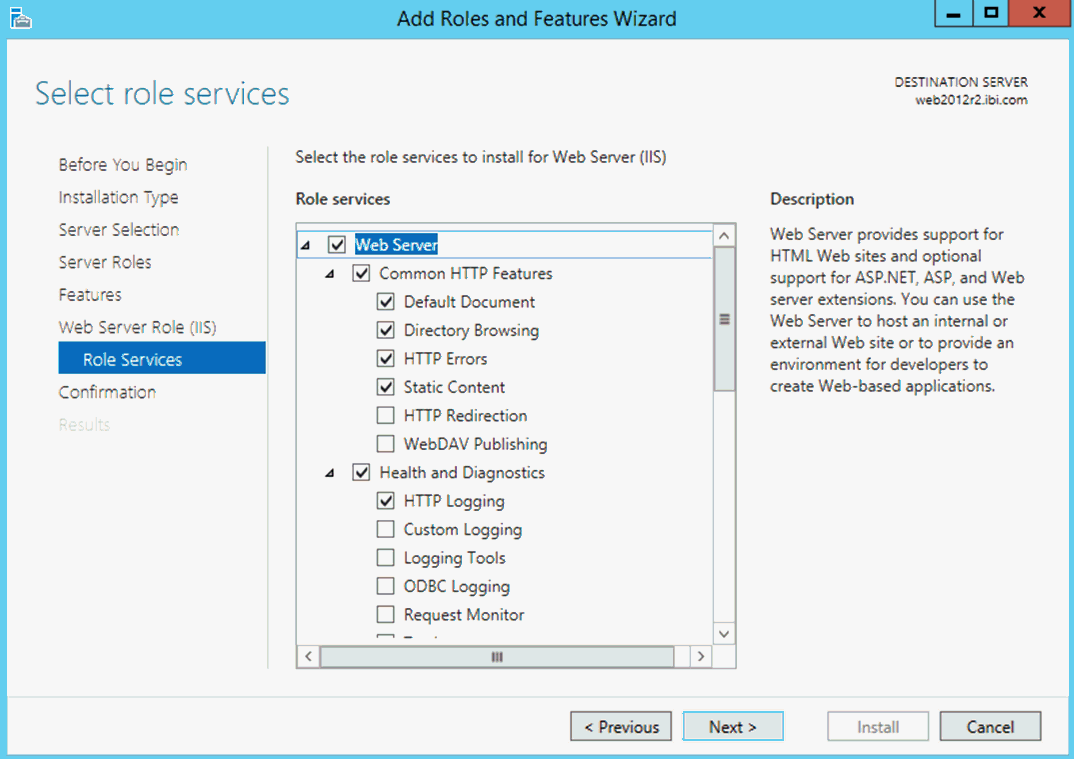
In the Select role services pane, select the Web Server check
box in the Role services list, as shown in the following image.
-
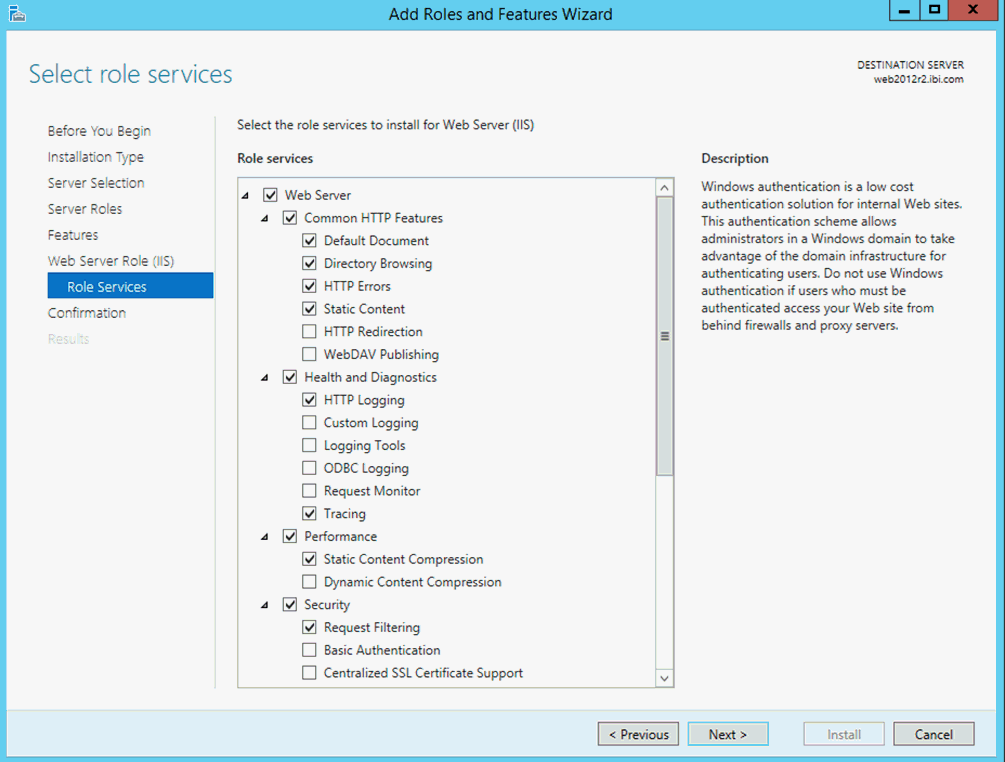
Scroll down the Role services list and select the other
role services you wish to install for the Web Server (IIS), and
then click Next, as shown in the following
image.
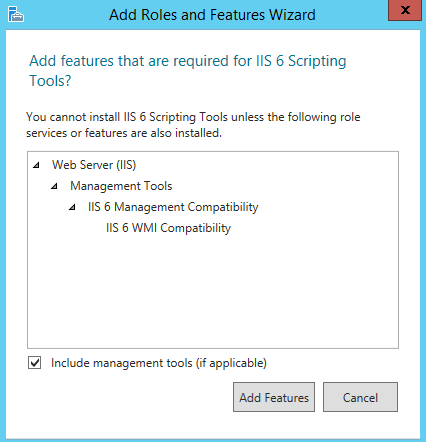
The following pane asks you to add features that are required for IIS 6 Scripting Tools.
-
Select the Include management tools (if applicable) check
box, and then click Add Features, as shown
in the following image.
-
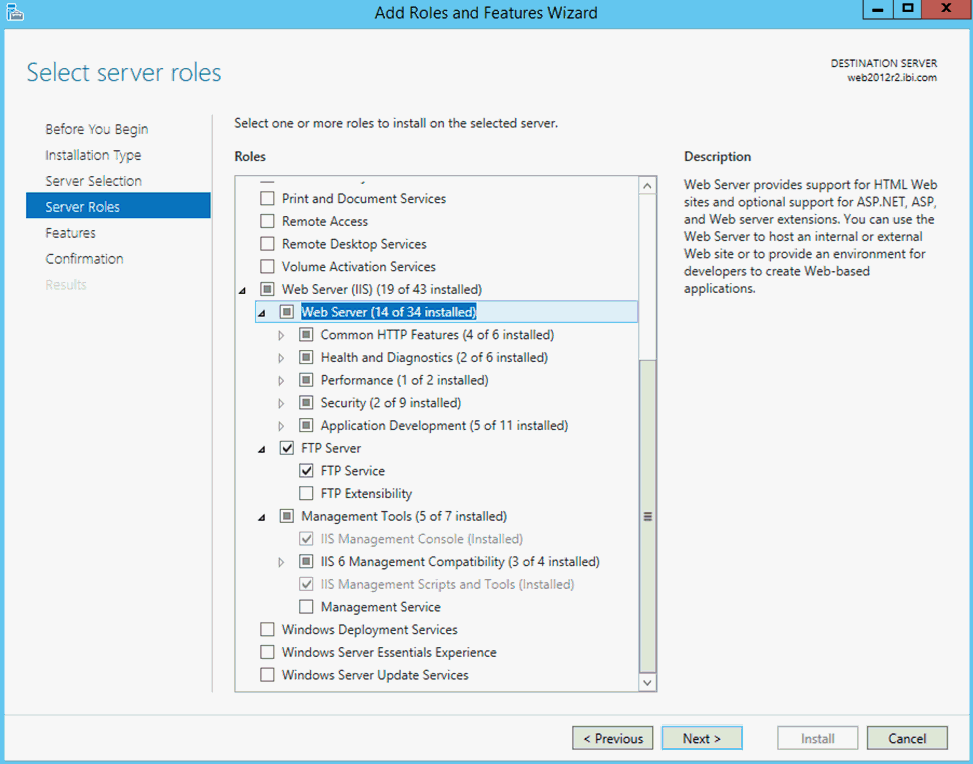
In the Select server roles pane, select the Web Server check
box, under Web Server (IIS), and then click Next,
as shown in the following image.
-
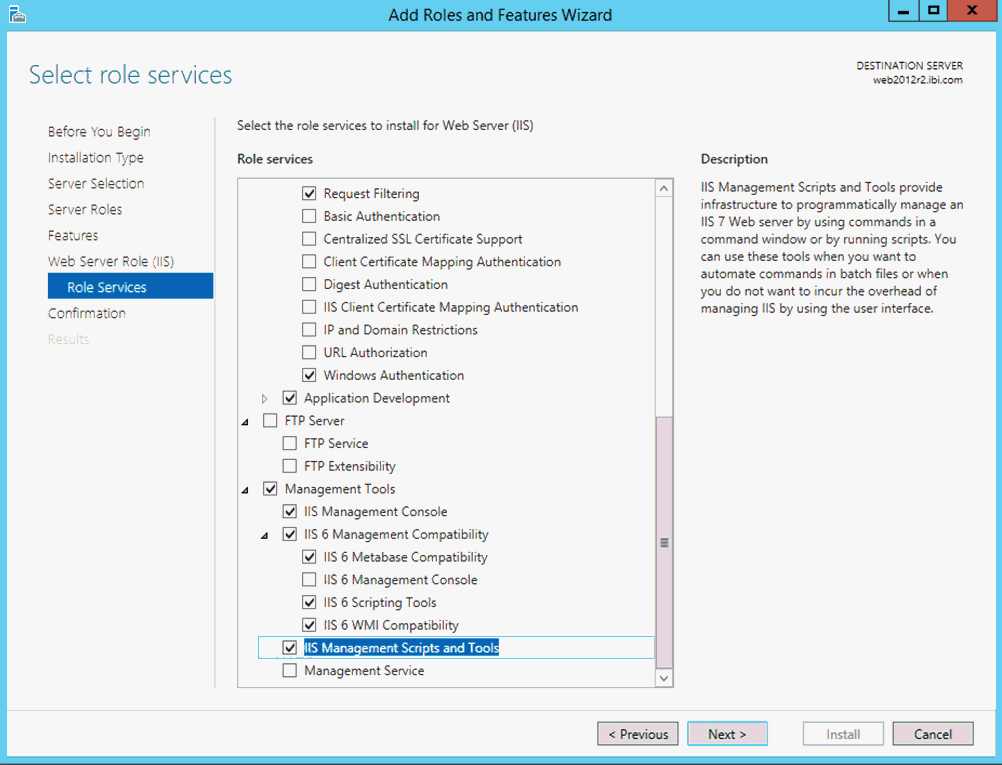
In the Select role services pane, scroll down the Role
services list and select the IIS Management Scripts and
Tools check box, and then click Next,
as shown in the following image.
- Click Install.
-
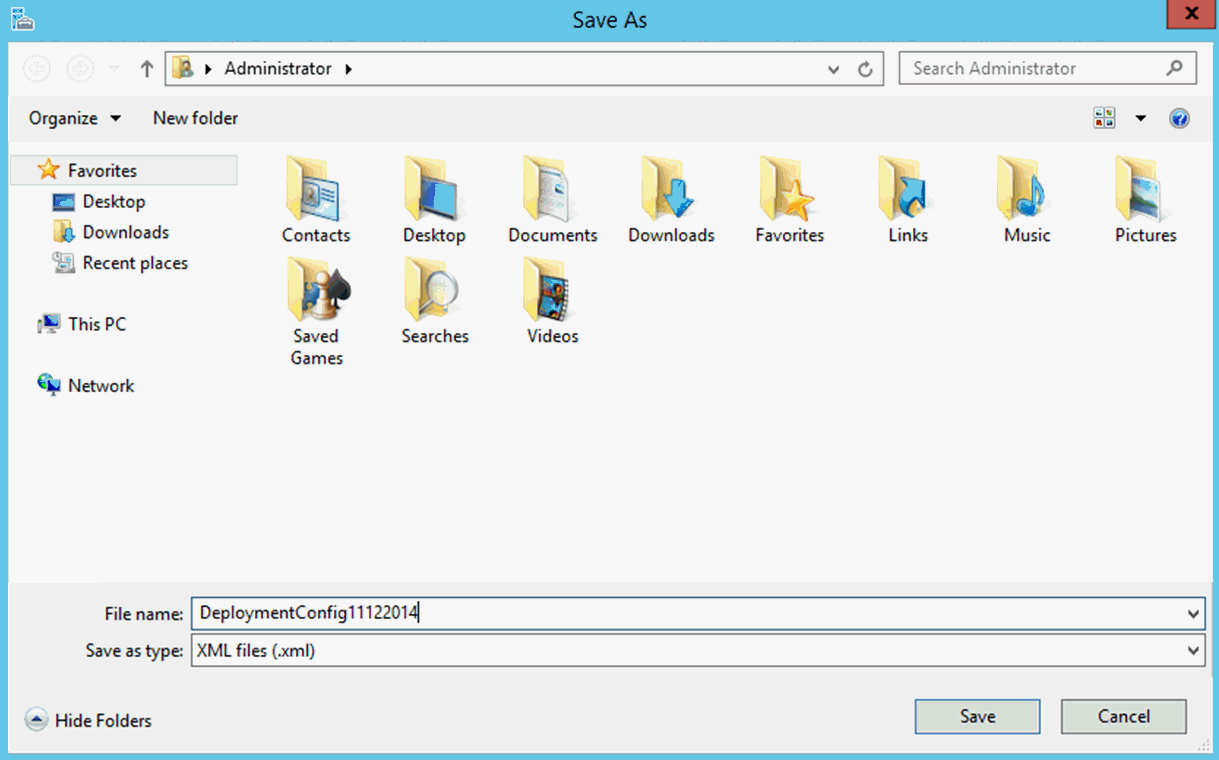
Click Export configuration settings,
and then save your configuration, as shown in the following image.
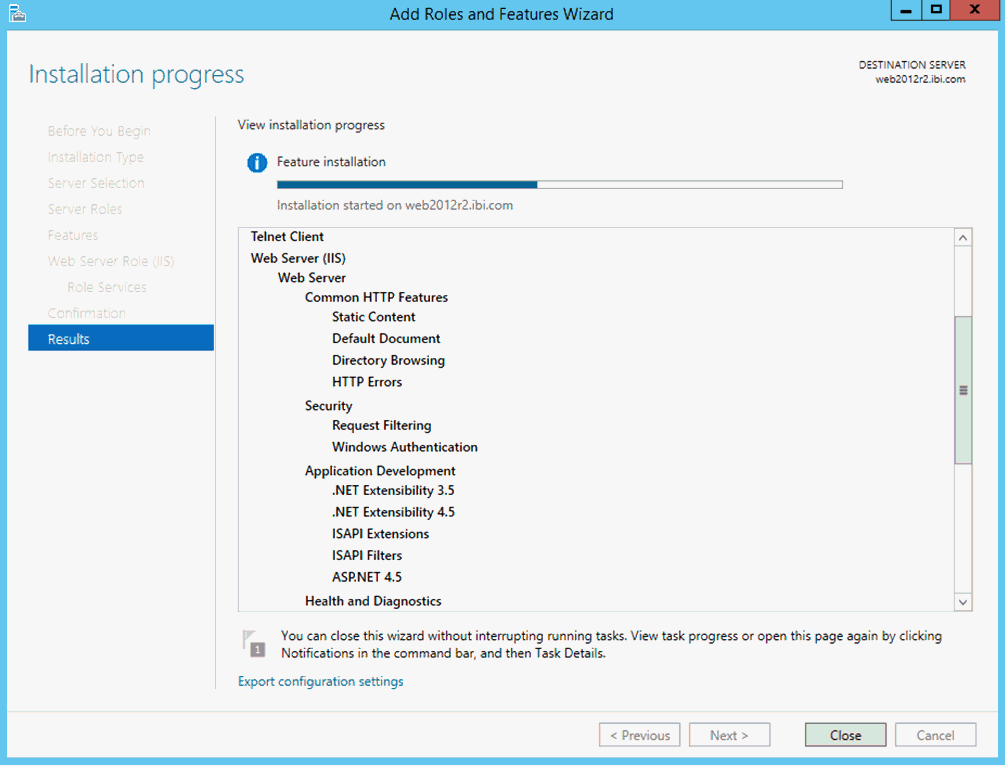
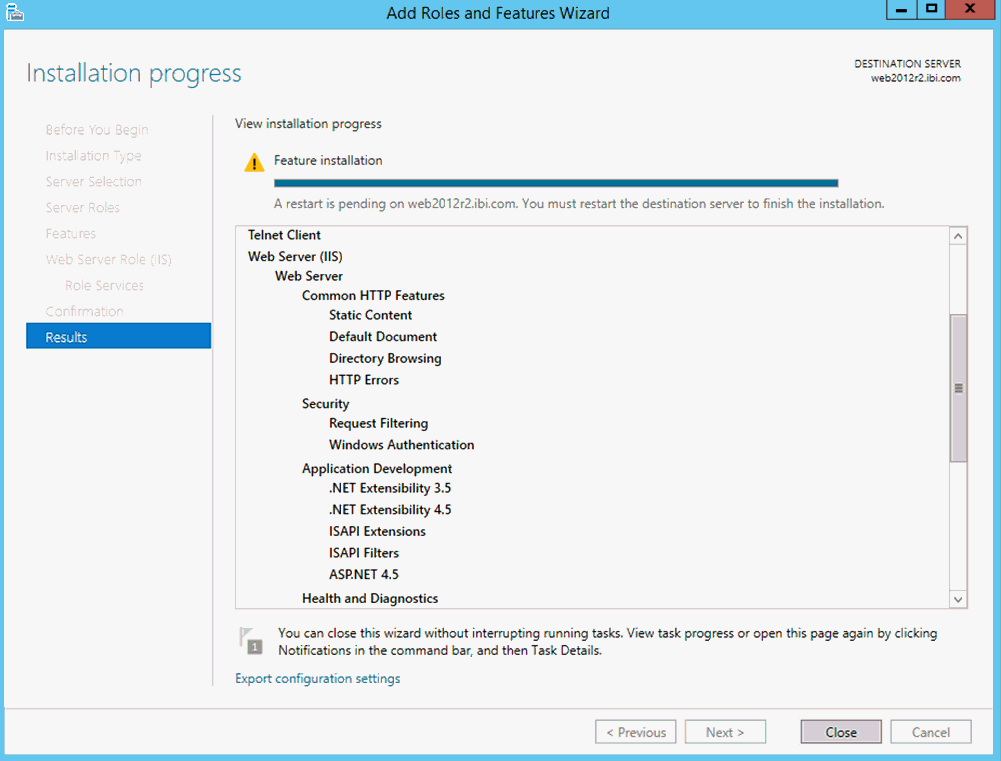
The Installation progress pane appears, as shown in the following image.
-
Once the Feature installation progress bar is complete,
click Close, as shown in the following image.
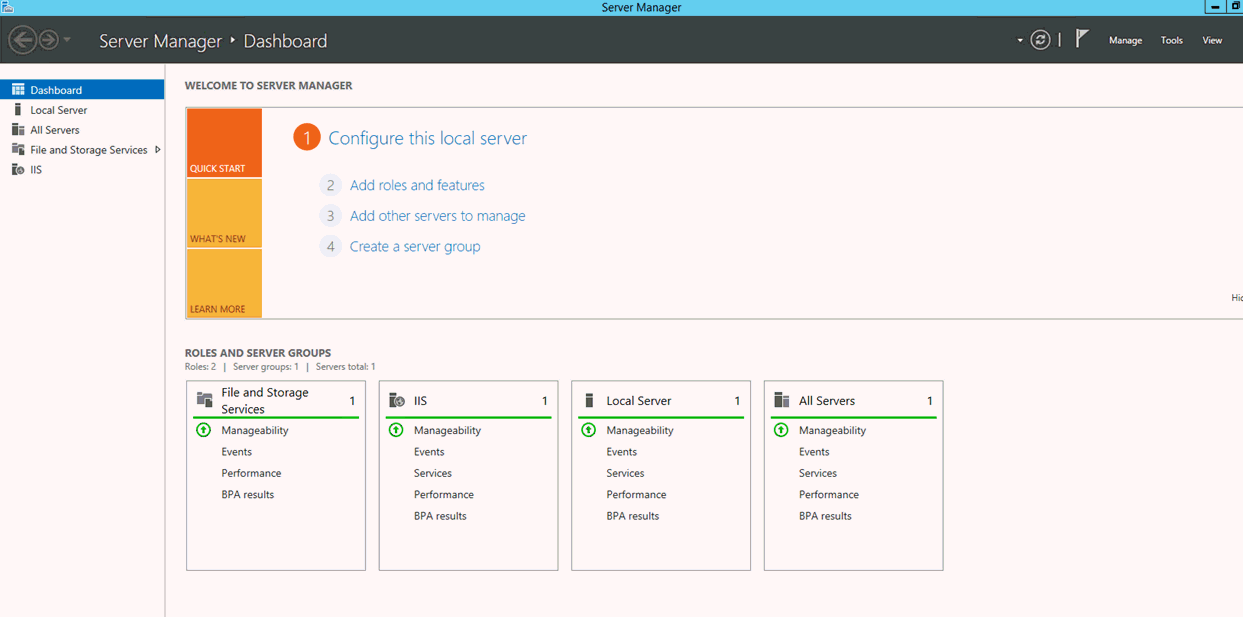
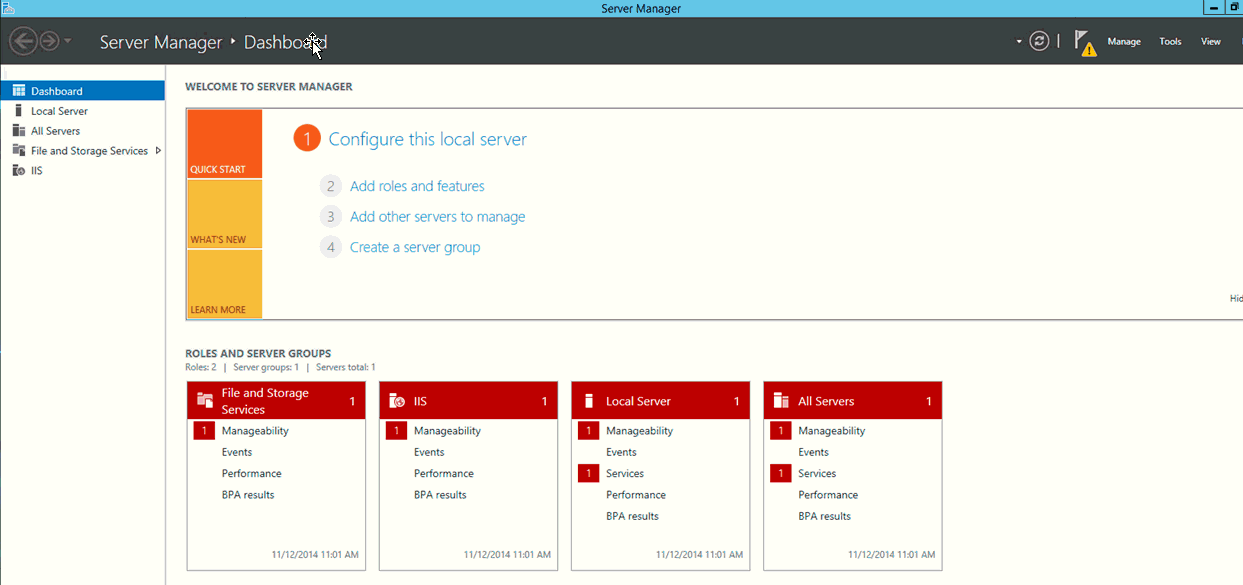
You are returned to the Dashboard screen of the Server Manager, as shown in the following image.
-
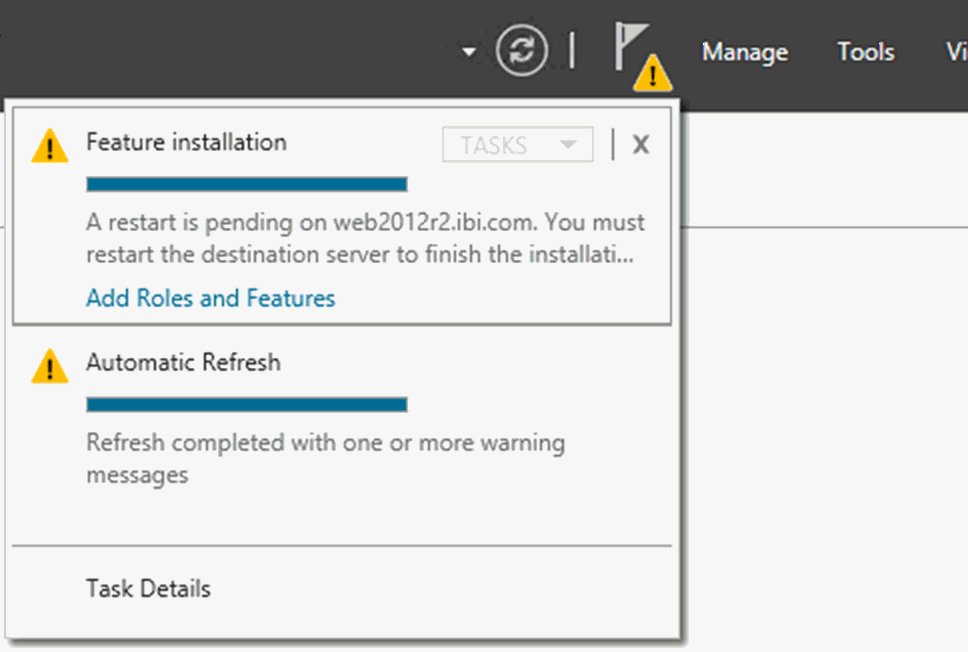
Click the notification symbol next to the Manage tab
to see the pending notification(s), and then select Task
Details, as shown in the following image.
The Task Details and Notifications dialog box appears, as shown in the following image.
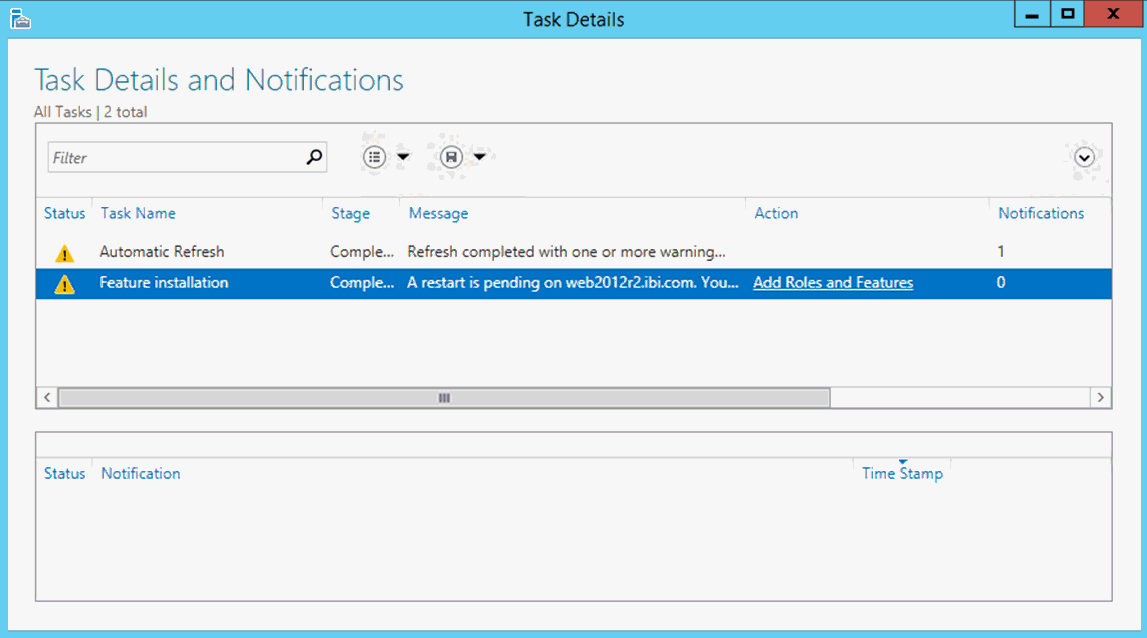
A message from the Feature installation notification informs you that a restart is pending. During the restart process, the following screen appears.

After your computer restarts, you are returned to the Server Manager Dashboard, as shown in the following image.
