-
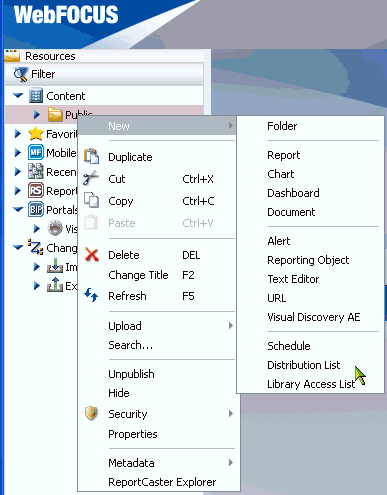
In the WebFOCUS Business Intelligence
(BI) Portal, right-click the Public folder,
select New from the context menu, and then
click Distribution List, as shown in the
following image.
The Distribution List window opens, as shown in the following image.
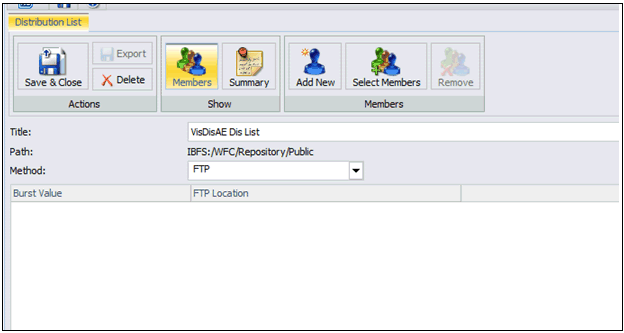
- In the Title field, type a descriptive name for the Distribution List.
-
From the Method drop-down list, select FTP as the
distribution method for the Distribution List.
You are now ready to configure new member properties and burst values.
-
Click Add New from the ribbon,
as shown in the following image.

-
Add member properties for each potential burst value.
- Enter a burst value.
-
Configure the FTP location according to the following guidelines:
- The folder name must contain a leading slash.
- If a folder is not present, then you must create it manually beforehand.
- If a BY value contains spaces, then the folder name may require spaces to be replaced with underscores.
- The text file name must be the same as that generated by the designated WebFOCUS Visual Discovery AE procedure.
For more information on configuring Dynamic Distributions Lists to automate folder creation when a new BY value is present, see the ReportCaster documentation.
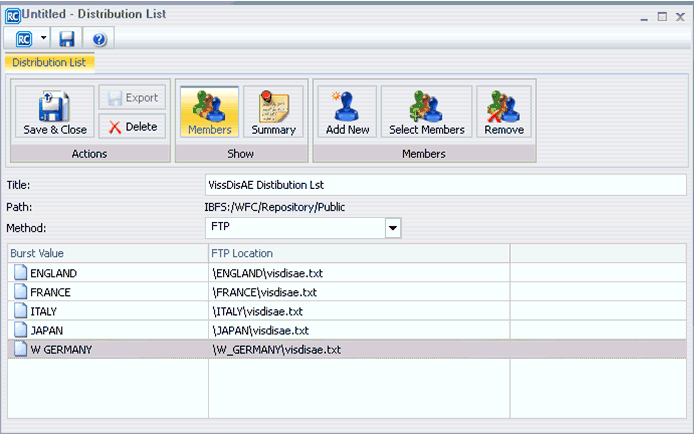
The following image shows an example of burst values that have been added to designated FTP locations.
- Click Save to save the Distribution List.
-
Close the Distribution List window.
You are now ready to schedule a WebFOCUS Visual Discovery AE procedure for FTP distribution.
-
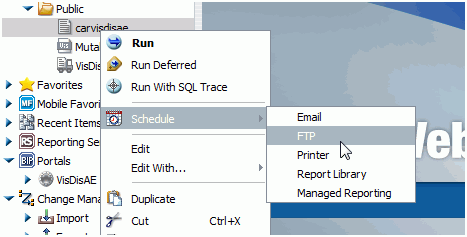
In the left pane of the WebFOCUS BI Portal, expand the Public folder,
right-click a WebFOCUS Visual Discovery AE procedure, select Schedule from
the context menu, and then click FTP, as
shown in the following image.
The Task: WebFOCUS Report dialog opens, as shown in the following image.
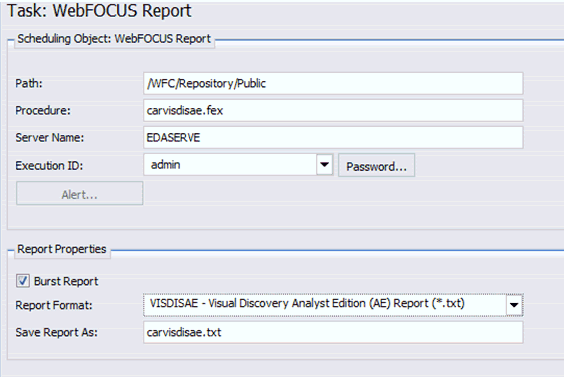
- Configure the scheduling options according to your requirements.
-
Configure the burst properties according to the following guidelines:
- Select the Burst Report check box.
- From the Report Format drop-down list, select VISDISAE - Visual Discovery Analyst Edition (AE) Report (*.txt).
- In the Save Report As field, enter the output name that was specified in the WebFOCUS Visual Discovery AE procedure.
You are now ready to configure the distribution information.
-
Click Distribution in the ribbon,
as shown in the following image.

The Distribution: FTP dialog opens, as shown in the following image.
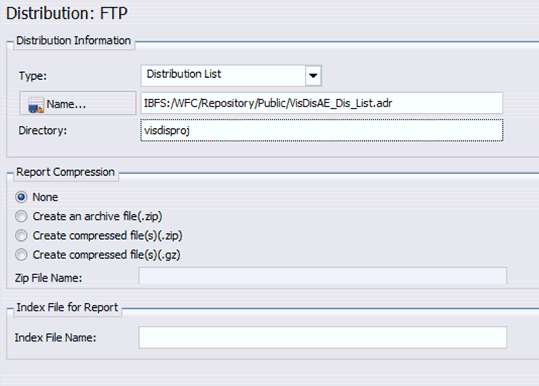
- From the Type drop-down list, select Distribution List.
- Click Name and select the name of the Distribution List that was created earlier.
- Enter the designated directory where the subfolders are located, as specified in step 5b.
You are now ready to configure the FTP server information.
-
Click FTP Server in the ribbon.
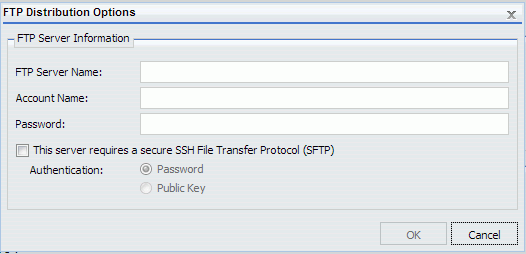
The FTP Distribution Options dialog opens, as shown in the following image.
-
Configure the FTP server information according to your requirements.
For more information, see the ReportCaster documentation
- Click Save and then close the Schedule dialog.