You may format individual text elements or style entire
strings of text in Document Composer. The formatting options are
available from the Formatting toolbar.
You may format individual pieces of text by using the Bold, Italic,
Underline, Superscript, and Font Style options. If the entire text
element is selected, Font Style and Alignment options are available.
Note: These text formatting options are only available
in Document Composer when PDF is set as the Compound document output
format.
x
Procedure: How to Apply Various Formatting in a Text Element
You may apply various formatting
and style options to words and individual text characters within
the text element.
-
From
Document Composer, add a text element to the page.
Select Text from the Insert menu.
or
Select
the text button  from
the Components toolbar.
The cursor changes into a crosshair.
-
Click
and drag the crosshair to create the text element on the page and adjust
it to the size you want. Double-click, or highlight and single-click
the text element, to go into edit mode.
-
Type
text in the text element.
Note: Line breaks can be set by using the Enter
key when typing text in a text element.
-
To format
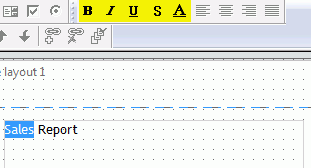
the text, highlight part of the text within the text element.
The Formatting toolbar is activated.
-
Select
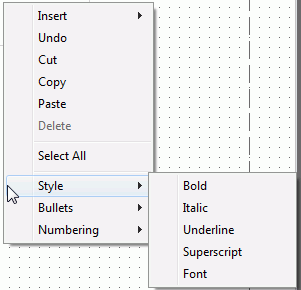
Bold, Italic, Underline, Superscript, or Font Style from the Formatting
toolbar.
Note: You can also access the formatting options
from the context menu, as shown in the following image.
-
The
Font Style option opens the Font dialog box where you can change the
type, style, color, size, and effect of the font.
Tip: You may also access the Font Style dialog box
from the Font ellipsis button of the Styling Font field
in the Properties window.
-
Click OK to
close the Font dialog box.
The font options are applied to the text selected.
x
Procedure: How to Insert a Bulleted List or Numbered List Into a Text Element
To
insert a bulleted list or numbered list into a text element:
-
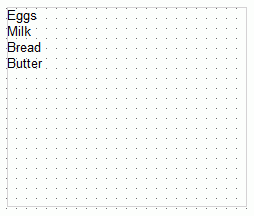
Insert a
text element into the layout and type text on different lines, as
shown in the following image.
-
Highlight
and right-click the text.
The context menu opens.
-
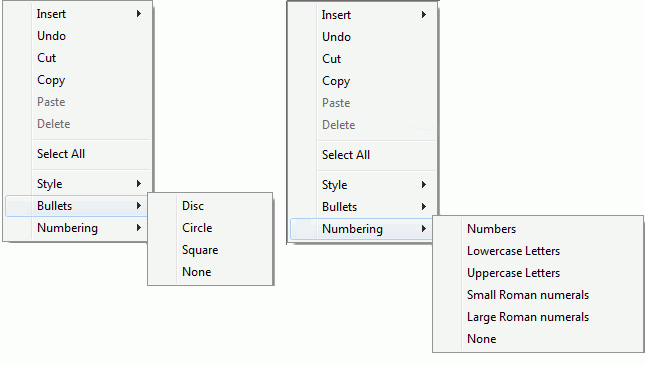
Select Bullets and
then either Disc, Circle,
or Square if you want a bulleted list. Select Numbering and
then either Numbers, Lowercase
Letters, Uppercase Letters, Small
Roman numerals, or Large Roman numerals if
you want a numbered list. Both options are shown in the following
image.
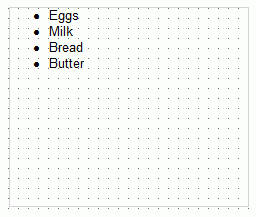
For
example, the following image shows each item of text on a different
line with a bullet next to it.
Note:
- Alternatively, you
can select a bullet type before typing text to begin the list. Press
the Enter key to begin the next item in the list on a separate
line.
- To change the bullet
or number list type of an existing list, place your cursor on the list
level you want to change and reselect a bullet or number list type.
Selecting None will remove the bullets or
numbers for that level and move any nested lists up one level. In
order to switch between bullets and numbers, you must first remove
the current list option by selecting None and then
applying the list option you want.
x
Procedure: How to Insert Nested Lists Into a Text Element
To
insert a nested list into a text element:
-
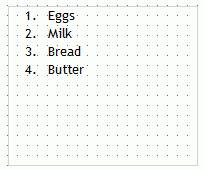
Insert a
text element into the layout and create a list, as shown in the
following image.
-
Place your
cursor after a list item.
-
Right-click
and select Nested List and then select a
bulleted or numbered list option.
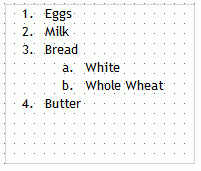
A list is started within the current list, allowing you
to enter text on that list level, as shown in the following image.
Note: Pressing
the Tab key while your cursor is on the same line as a list item
will move that item one level down, resulting in a nested list.
The bullet or number type selected is the next list type in the
context menu. For example, if you have a bulleted list that uses
the disc bullet type, pressing tab to move an item down one level will
cause that nested list to have the circle bullet type.
You
can continue to nest lists within other lists by using the same
steps shown above.
Note: You cannot skip a list level.
For example, in order to insert a nested bulleted list or nested
numbered list on a lower level, there must be a list one level up from
it.
x
Procedure: How to Apply Formatting to an Entire Text Element
You
may apply formatting and style options to the entire text element
in Document Composer.
Note: Any
formatting and styling that you may have applied to individual text strings
within the text element will remain unchanged. Changes made to the
entire text element are only applied to the part of the text string
that has not been formatted.
-
Insert a text element into the layout and type text in the
text element.
-
Single-click
the text box in the layout, as show in the image below.

or
Select
the text element from the Properties window drop-down list, which
appears as text(n).
-
Select the Font ellipsis button from the Styling Font field
in the Properties window.
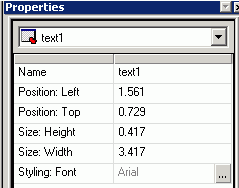
The Font dialog box opens.
-
Select the type, style, color, size,
and effect of the text element.
Note: The default font is
Trebuchet MS 10pt.
-
Click OK to close the Font dialog box.
The font options are applied to the text element.
x
Procedure: How to Align Text Within the Text Element
You
may apply alignment options to the text within the text element.
-
Insert a text element into the layout and type text in the
text element.
-
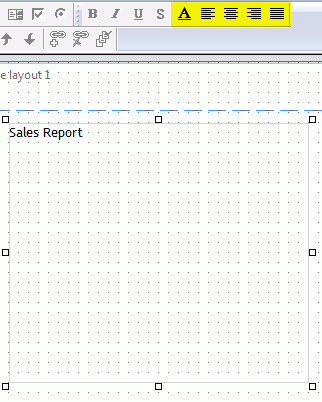
Single-click
the text box in the layout.
or
Select the text element from the Properties window
drop-down list, which appears as text(n).
The Alignment options on the Formatting toolbar are
activated.
-
Select Align Left, Align Center, Align Right, or Full Justification.
Note: The default is set to Align Left.
The
alignment format is applied to the text element.
 from
the Components toolbar.


