Common Tasks in Snapshot Manager
|
How to: |
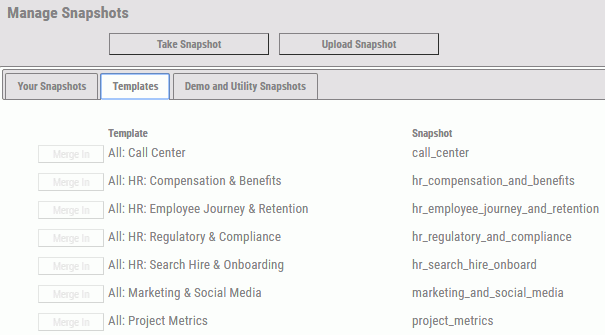
To access the Snapshot Manager, navigate to the Manage page, click the Data Mart subtab, and then click Manage Snapshots.
The Manage Snapshots panel opens, as shown in the following image.

From the Snapshot Manager, you can:
- Take a Snapshot. Copies all content from the PMF Data Mart into a portable file, which can be restored on any PMF environment.
- Restore a Snapshot. Replaces all content in the current PMF Data Mart with the exact state of the Snapshot when it was taken.
- Merge in a Template. Lets you incorporate the exact state of a distributed Solution Template from Information Builders or another vendor into your existing PMF Data Mart.
- Upload a Snapshot. Lets you move a Snapshot in compressed (ZIP) format stored in a file-accessible location to a new PMF environment.
- Download a Snapshot. Lets you obtain a Snapshot file in compressed (ZIP) format from a PMF environment and copy it to a folder on a file-accessible machine, from which it can be uploaded in the future.
- Merge a Snapshot. Lets you incorporate the exact state of a Snapshot into your existing PMF Data Mart, allowing you to add objects from multiple Snapshots together.
Procedure: How to Take a Snapshot
When you Take a Snapshot, all content from the PMF Data Mart is copied into a portable file, which can later be restored to any PMF environment (including the same one).
To take a snapshot:
- From the Manage Snapshot pane, Click Take Snapshot.
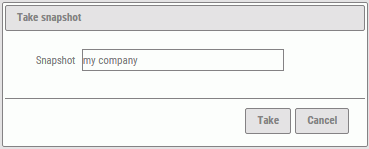
The Take Snapshot dialog box opens.
- Enter a name for the Snapshot, or select the text box
if you want to use and overwrite a previous Snapshot, as shown in
the following image.
 Tips:
Tips:- As you type, if a previous and similar name was used, the dialog box will display a list of matches, and you can click one of these matches if you want to replace it.
- Only alphanumeric characters are accepted, since this will become a folder and file name. Any spaces or special characters will be edited out.
- Click Take. The Snapshot Manager creates the Snapshot. Once it is complete. it will appear in the list on the User Snapshots tab.
Procedure: How to Restore a Snapshot
When you restore a Snapshot, all content in the current PMF Data Mart is replaced with the exact state of the Snapshot you select, at the time it was taken. Restoring Snapshots lets you preserve the exact state of PMF, including all models, data, and content. Snapshots are good for:
- PMF Data Mart backups.
- Situations where you want to experiment or create new models and want to be able to preserve them.
- Moving a PMF Data Mart to a new PMF environment.
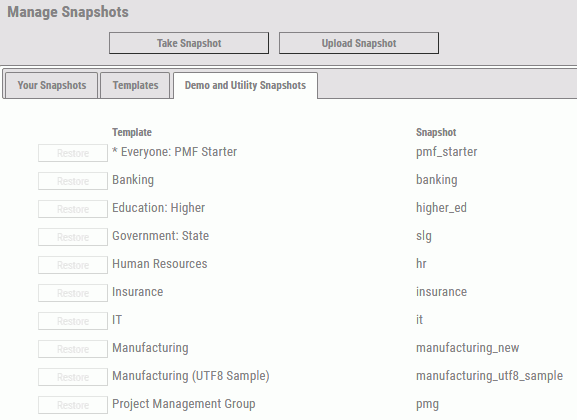
The Restore button is available on the following tabs: Your Snapshots and Demo and Utility Snapshots.
To restore a snapshot:
- From the Manage Snapshot pane, click the Restore button
next to the snapshot you want to restore, as shown in the following
image.

The Restore Snapshot dialog box opens, as shown in the following image.
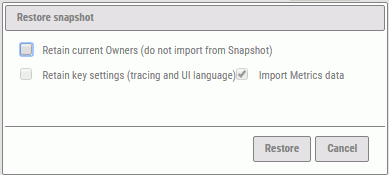
- Click Restore. Snapshot Manager
will restore the Snapshot and notify you when the process is complete.
Note: Depending on the size of the metrics warehouse in the Snapshot, a restore can take some time.
- Refresh the browser once the process is complete.
Procedure: How to Download a Snapshot
You can download a Snapshot to your browser Downloads folder. This lets you upload it to another compatible PMF environment, where it can be restored at will.
To download a Snapshot:
- From the Manage Snapshot pane, click the Download button
next to the Snapshot in the Your Snapshots tab that you want to download, as shown in the following
image.

Snapshot Manager compresses the Snapshot to a single ZIP file, and downloads it to your browser Downloads folder.
You can upload the Snapshot to another PMF environment, either now or at a future time.
Note: If you periodically clean up your browser Downloads folder, and accidentally delete the Snapshot ZIP file, return to the PMF environment with the Snapshot you want, and download it again.
Procedure: How to Upload a Snapshot
You can upload a Snapshot from your browser Downloads folder to any compatible PMF environment. Any uploaded Snapshots are stored in the PMF environment, and can be restored at any future time.
To upload a Snapshot:
- From the Manage Snapshot pane, click the Upload
a Snapshot button.
The Upload Snapshot dialog box opens, as shown in the following image.
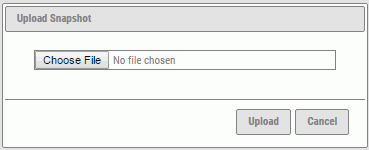
- Click Choose File to select the
file to be uploaded.
Your browser Downloads folder opens.
- Click the compressed (ZIP) PMF Snapshot you want to upload
and click Open.
Note: The dialog box varies depending on your local operating system.
- The file name is shown in the Upload Snapshot dialog
box. Click Upload.
Snapshot Manager uploads the file to the PMF environment. The Snapshot then appears in the Users Snapshots tab, where you can restore it at will. For more information on restoring Snapshots, see How to Restore a Snapshot.
