|
In this section: |
PMF implements WebFOCUS ReportCaster alerts through an easy-to-use action block. You can display fired alerts and scheduled alerts, modify or delete existing alerts, or add new alerts.
When you log on to PMF, you can access all alert functionality from the action block located on the dashboard. Since the action block is a portable component, it can be placed anywhere on the PMF dashboard by an administrator.
From the action block, you can work with alerts in the following ways:
- See a list of the current fired alerts and alerts scheduled to be fired.
- Display alert views from the ReportCaster Library.
- Reassign actions for an alert to another user.
- Document the actions taken to correct the condition that caused the alert to fire.
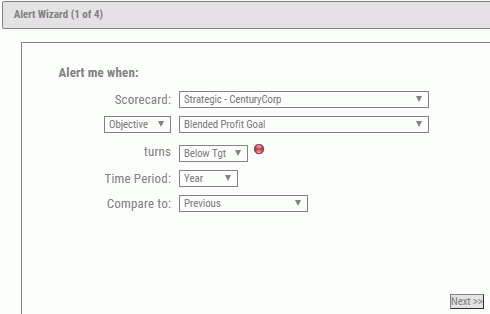
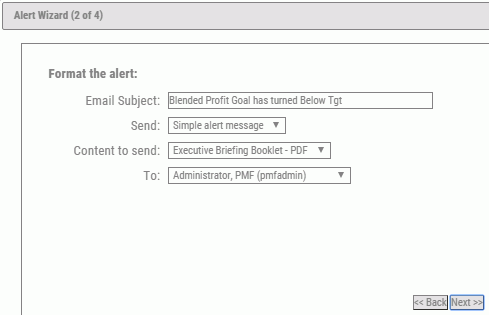
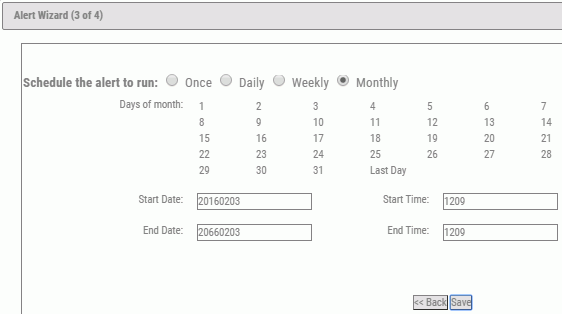
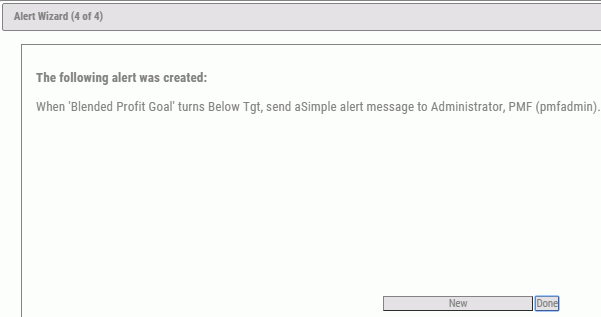
- Access the Alert Wizard, where you can change how the alert fires or create a new alert.
The action block allows you to choose to display Fired Alerts (alerts that have been sent because the alert condition was met), Scheduled Alerts (alerts that are being monitored and will be sent if the alert condition is met), Scheduled Reports, Measure Tasks (for collaborating), or Measures to Input (for user-entered measures).
When you choose Fired Alerts, for example, a list similar to the following displays.
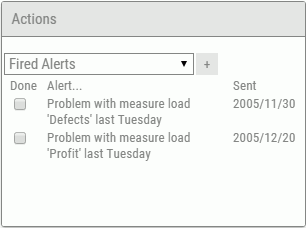
The Fired Alerts list includes the date each alert was sent and
a Done check box next to each alert to close the alert. Selecting
the New Alert icon  opens the Alert Wizard for creation of a new alert.