- Log on to WebFOCUS as an administrator.
-
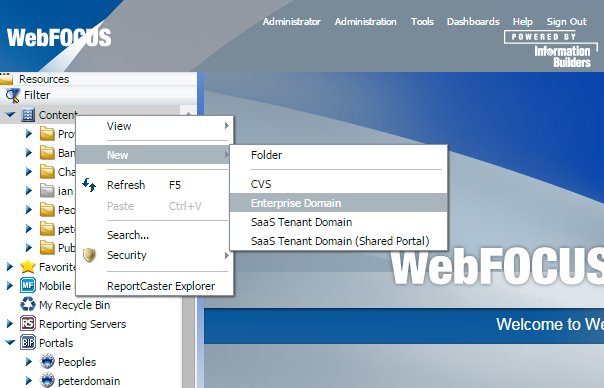
In the Resources tree, right-click the Content node,
select New and then click Enterprise Domain,
as shown in the following image.
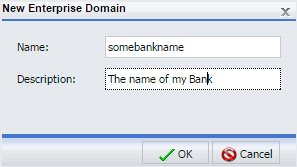
The New Enterprise Domain dialog opens, as shown in the following image.
-
In the Name field, enter the name of the index (collection)
you want to control access using WebFOCUS security.
Note: Since Magnify and the repository are case-sensitive, the name should be entered using lowercase characters.
- In the Description field, enter a brief description that users will see in the Collection drop-down list on the Search page. This value can be string, but do not use special characters (for example, < > " ' = . & ; :).
-
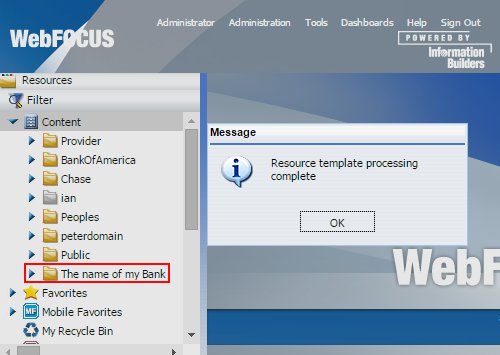
Click OK.
The Resource template processing complete message is displayed, which indicates that the domain has been created, as shown in the following image.
- Click OK.
-
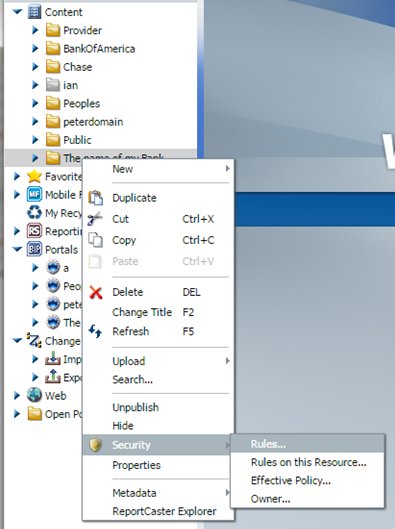
Right-click the new domain (for example, The name
of my Bank), select Security from the
context menu, and then click Rules, as shown
in the following image.
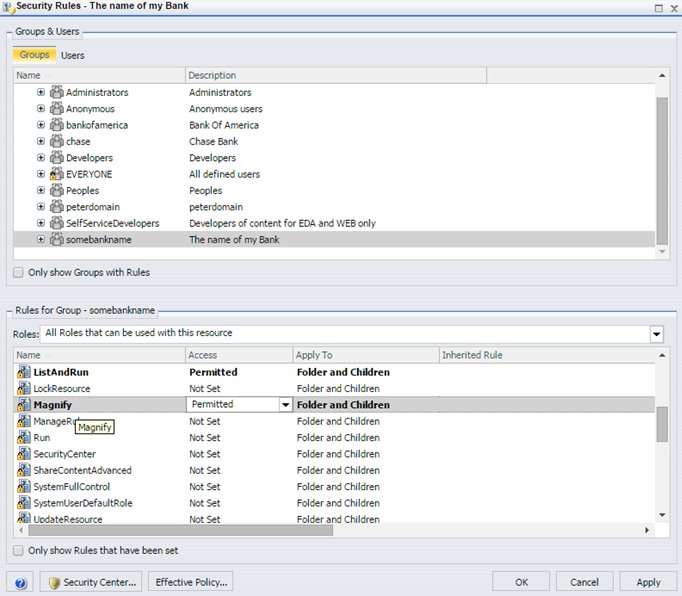
The Security Rules dialog opens for the new domain, as shown in the following image.
-
Perform the following steps:
-
In the Groups tab, select your new domain
(for example, somebankname - The name of my Bank).
Note: You may need to deselect the Only show Groups with Rules check box to see the domain.
- In the Rules for Group section, locate the rule named ListAndRun, and change its access to Permitted.
-
Locate the rule named Magnify, and change its
access to Permitted.
Note: Ensure that a Magnify rule has already been created before performing this step. For more information on configuring rules in WebFOCUS, see the WebFOCUS Security and Administration documentation.
-
In the Groups tab, select your new domain
(for example, somebankname - The name of my Bank).
-
Click Apply and then OK.
You are now ready to add users that have access to this resource.
-
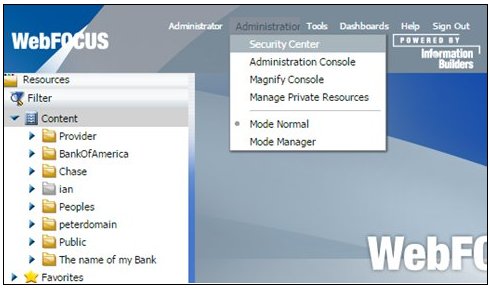
Click Administration and then
select Security Center, as shown in the following
image.
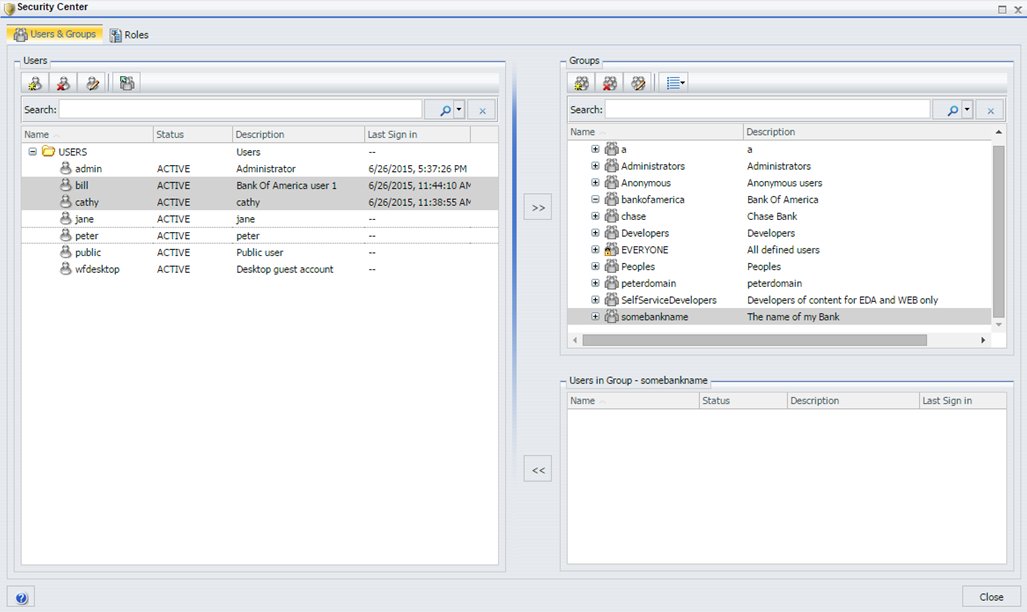
The Security Center opens, as shown in the following image.
-
Perform the following steps:
- In the Groups section, select your new domain (for example, somebankname - The name of my Bank).
- In the Users section, select the users that you want to allow access for this group (for example, bill and cathy).
-
Add the selected users to the selected group by clicking
the double-right arrows (>>).
For more information on configuring users and groups in WebFOCUS, see the WebFOCUS Security and Administration documentation.
- Click Close.
-
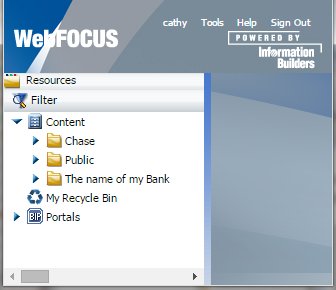
Log out as the administrator and then log in as the user bill.
Notice that the user bill can view three items in the Resources tree, as shown in the following image.
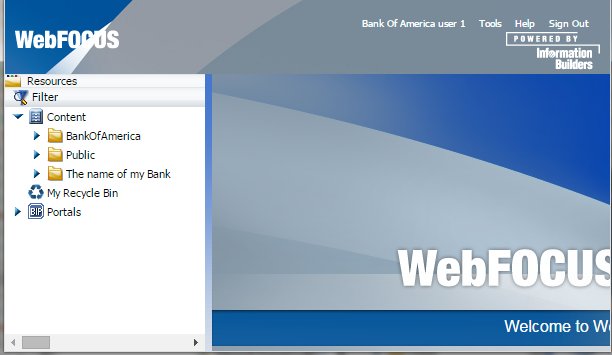
This is the list of items that Magnify will use to access data.
-
Log out as the user bill and then log in as the administrator.
Notice that the folder name is somebankname, as shown in the following image.
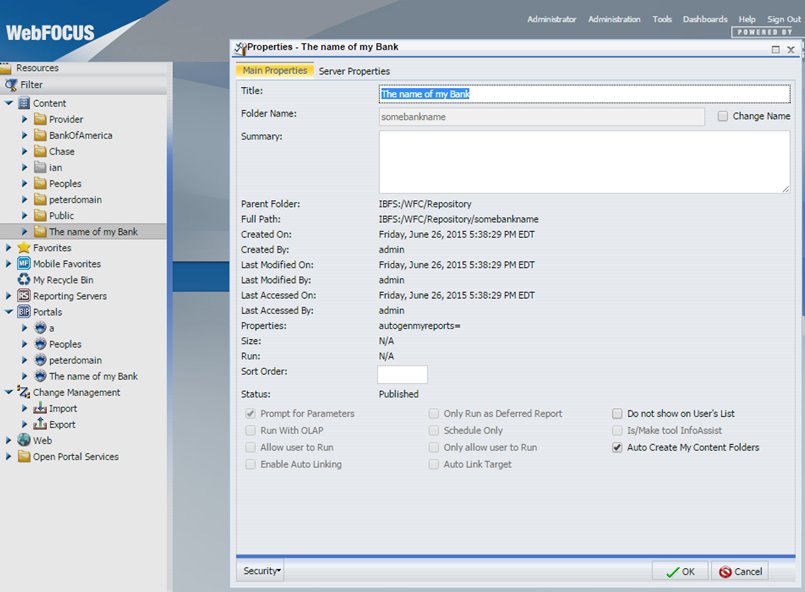
This is the name of the index that you need to create.
-
When you load data into an index, there are two methods
you can use to make the name appear in the Search page.
The first method is to create an index using the same name as the domain you created earlier (for example, somebankname).
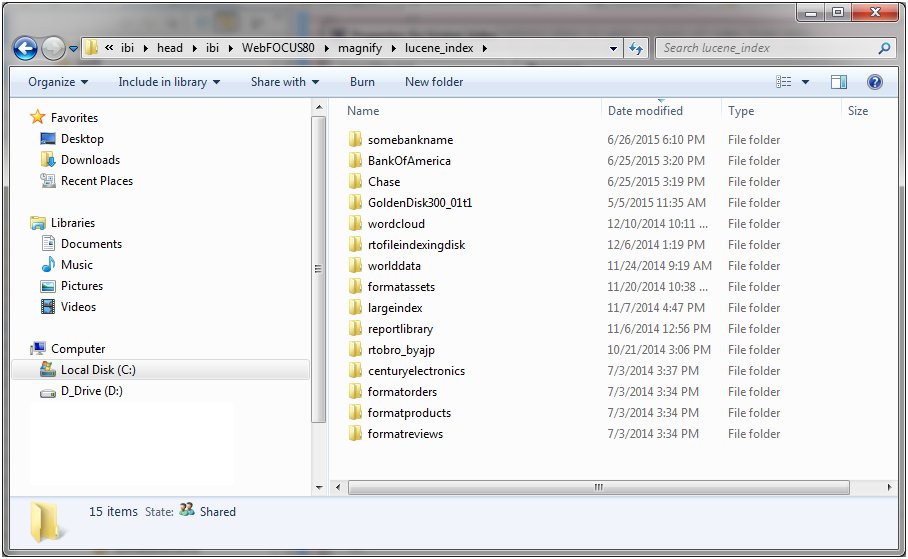
In this example, notice that somebankname is in the directory where the Lucene indexes are located (lucene_index).
The second method is to edit the collections.xml file, which is located in the ibi\config\magnify directory and map a name of a collection to the index(s) with different names.
<collections>
<group name=" somebankname" id="somebankname">
  <search lang="en" analyzer="MagnifyAnalyzer" stylesheet="en/en_stylesheet_peter" id="en_search_cent_sales"/>
     <component id="centurycustomers" member="centurycustomers"/>
      <component id="centuryorders" member="centuryorders"/>
</group>
</collections>
    <indexes>
    <index name="centurycustomers"    directory="centuryelectronics\centurycustomers"></index>
    <index name="centuryorders"       directory="centuryelectronics\centuryorders"></index>
</indexes>
This method allows you to join multiple indexes into a single collection, or move indexes onto other physical disks, because all of the data cannot fit on a single disk.
For performance reasons, if you have many large indexes, then you can use multiple physical drives.
-
Log on as a user to which you have granted access (for
example, the user bill.)
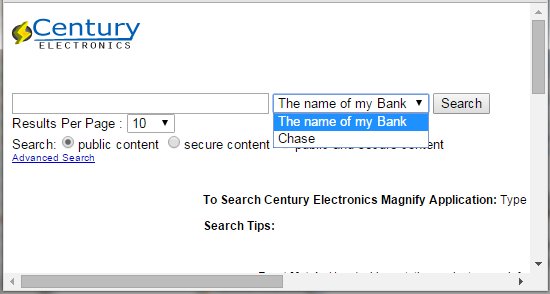
When you run a search, the new collection names will appear in the drop-down list, as shown in the following image.

However, the domain/group/index name does not appear here. The description appears to the user.
-
When you run the query, then the name is passed along
on the Search URL.
http://hostname:port/ibi_apps/search?form=3&viewname=searchresultsview &q=a*&site=somebankname&btnG=Search&oe=utf8&ie=utf8&spelling=true&num= 10&getfields=*¶llelreaders=1&facetcounts=false&access=pThis is the name that is validated at search time, to ensure that the user has access to this resource. If you were to try and hack the system by changing the name, then you would not be given access to an index that you were not allowed to view.
-
Log out as the user bill and then log on as the
user cathy.
Notice that the user cathy can view a different set of items (names) in the Resources tree, as shown in the following image.
The same names are now available in the collection drop-down list. Notice that the name Public is missing from the Search page, as shown in the following image.
This is because there is no index named Public in the directory where the Lucene indexes are located (lucene_index). Indexes that do not exist, do not appear in the collection drop-down list.