In this section: |
Regardless of the data that is assigned to each series/group, the range of data that is imaged on a numeric axis can be limited by the {Axis}ScaleMin and {Axis}ScaleMax properties. For example, given a graph in the following format:
The Y1ScaleMax, Y1ScaleMaxAuto, Y1ScaleMin, and Y1ScaleMinAuto properties can be used to modify the range of values displayed on the Y1 axis as shown in the following example:
setY1ScaleMaxAuto(false);
setY1MajorGridStepAuto(false);
setY1MinorGridStepAuto(false);
setY1ScaleMax(80.0);
setY1ScaleMinAuto(false);
setY1ScaleMin(10.0);
When these properties are set, the graph is imaged in the following format:

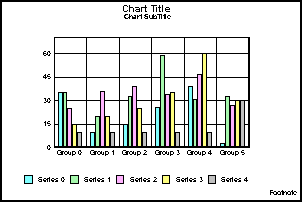
The setDataRange() method can be used to limit the number of series/groups (rows/columns) that are imaged in the graph.
Example:
setDataRange(1,1,3,3);

The following properties can also be used to limit the range of data that is imaged in the graph:
Example:
setDepthAngle(0);
setDepthRadius(0);
setScrollOffsetGroups(1);
setScrollOffsetSeries(1);
setViewableGroups(2);
setViewableSeries(3);

When the number of viewable groups or series is set to a value less than the number of groups/series in the data set that defines the graph, you can use these properties to display data scroll bars in the graph:
Example:
setDataScrollerPresenceGroups(2);
setViewableGroups(4);

The data scroll bar consists of two segments:
In the first segment, the darker, movable thumb can be dragged to change the group offset. In the second segment, the total of the three numbers indicates the total number of groups defined in the data set. For example, the status area of the scroll bar displays 2 3 1. These numbers indicate that ScrollOffsetGroup is 2, ViewableGroups is 3, there is 1 group in the data set that is not displayed, and there are a total of six groups defined in the data set. The user can click on these numbers and edit them with the arrow keys.
Important: The following is applicable only when graphs are rendered in applets using SET GRAPHEDIT=OFF.
The following properties and methods can be used to zoom in, zoom out, and identify data zooming parameters:
In addition to these properties and methods, you can also enable data zooming and scrolling via the user interface with the SelectionEnable property. When setSelectionEnable(5) is used, zooming and scrolling functions are enabled. When this mode is used, it allows the user to drag out a rectangle and zoom in on the data within the rectangle area. A single mouse click will back up one data-zoom level. Double click will restore the original data state. Note that user interface-based zooming and scrolling is mutually exclusive with selecting graph items. When setSelectionEnable(5) is used, graph objects cannot be selected.
When data zooming is enabled with the zoom properties/methods or via the user interface, a zoom index will be kept that keeps track of the number of times a graph has been zoomed in and the state of zooming. As an example, assume ZoomPercentage is set to 10%, and the user clicks once. The graph is now zoomed to 90% of its original values, and the zoom index is now 1. Now the user clicks a second time. The graph is now zoomed to 80% of its original values, and the zoom index now is 2. Or, actually, the zoom index now has two entries: one for the first, 90% state, and a second for the second, 80% state.
You can keep adding to the zoom index as the user continues to click. Continuing with the example and the same values, assume the user has clicked eight consecutive times. The zoom index now contains eight items:
Your application can go back and forth in this list. For example, assume you want to switch from the current level (the last level the user clicked, the eighth zoom level which currently shows 20% of the original state). setZoomIndex(4) can be used to immediately switch to the fourth level which had a zoom factor of 60%. You can use setZoomIndex to switch back and forth between any zoom level set.
| WebFOCUS |