As you use the Alert Wizard to create reports, you may see messages that state Report Saved. Your changes for the report have been saved but not written to the tree until the Alert is saved. To save the Alert, click Finish in the Alert Wizard. If you exit the Alert Wizard before you click Finish, the Alert is not saved.
The following steps provide options for creating an Alert in Developer Studio.
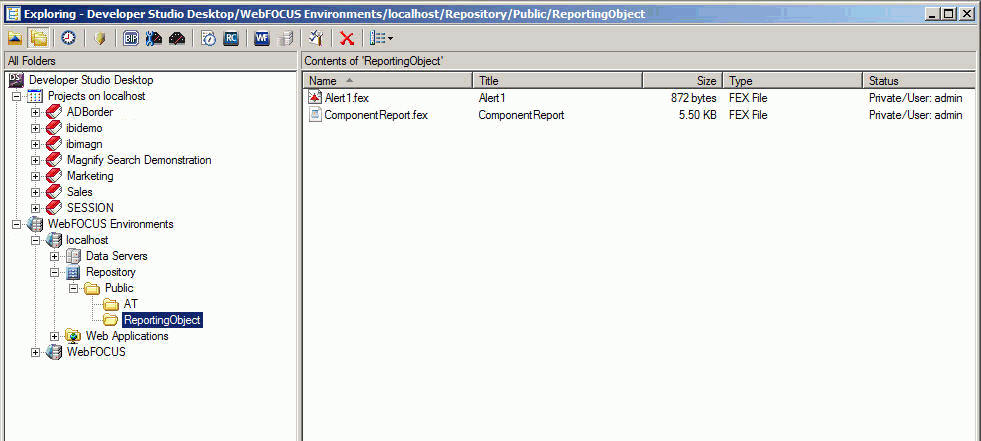
- Open WebFOCUS Developer Studio, and expand the tree to show the folders and subfolders.
-
Right-click
a folder or subfolder. Select New, and then Alert from
the context menus.
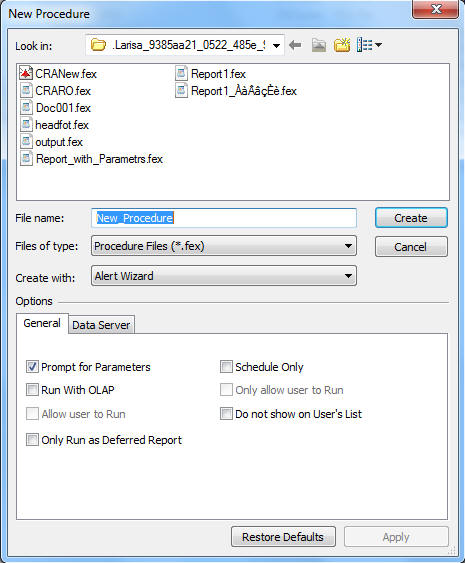
The New Alert Wizard Procedure window opens, as shown in the following image.
-
Enter the name for the Alert, check any necessary options,
and click Create.
The Alert Wizard Welcome window opens.
-
Click Next.
The Alert Wizard, Alert Test window opens, as shown in the following image.
-
Select the Alert test.
- If you select WebFOCUS Test (the default), click Next. Proceed to step 6.
- If you want to check for a file, click the Test for
File Existence option button.
Type the full path to the file on the WebFOCUS Reporting Server that you want to check. Do not use a file name or a file path that includes spaces.
Click Next.
If the file is located, the Alert report is sent. Proceed to step 14 to create the Alert report (event procedure).
Note: Testing a folder for existence is also valid. You can test a folder for existence if it is available on the WebFOCUS Reporting Server.
-
Select
a tool to create an Alert test.
Select either the Procedure Viewer or Editor to create an Alert test.
- If you choose Procedure Viewer (recommended), proceed to step 7.
- If you choose Editor, proceed to step 11.
-
From the WebFOCUS Table List window, select a Master
File and click OK.
The Procedure Viewer opens, where you can create selection criteria for your Alert test. If you do not see the reporting tool, double-click the Report icon in the Procedure Viewer.
-
Select your options. When you have finished, click Exit.
Note: When creating an Alert test, amper variables in a WHERE condition must have a value specified in the schedule. This is because Alerts run unattended and are not able to collect a value from a user. For more information, see the ReportCaster manual.
-
You are prompted to save your changes. Click Yes and
close the Procedure Viewer.
You return to the Alert Wizard, New or Existing Test window.
- Click Next. Proceed to step 14.
-
If you chose Editor in step 6, the Editor window opens.
Type your Alert test in the editor window.
Note:
- You must include an ON TABLE HOLD command in your Alert test.
- You can access graphical tools, such as the Join and Define tools from the Developer Studio text editor.
- When you have completed the procedure, close the Text Editor. The Save Current Changes window opens.
- Click Yes to save your Alert test. You return to the Alert Wizard, New or Existing Test window.
-
Click Next.
The Alert Wizard, Alert Event window opens, as shown in the following image. You can indicate which report to distribute when the Alert test is true. It can be a report you create or one that already exists.
- If you choose New WebFOCUS Report, click Next and proceed to step 15.
- If you choose Select WebFOCUS Report, click Next and proceed to step 17.
For information on which option to select, see the Considerations note in Components of an Alert.
-
From
the Alert Wizard, Create the Report window, create a new report with
the Procedure Viewer or Editor. The Alert Wizard, Create the Report
window is shown in the following image.
Note: From the Procedure Viewer Alert Event window, you can select a Report or a Graph.
- Selecting a Report opens Report Painter to create a more complex request.
- Selecting a Graph opens InfoAssist to create a robust graph.
- When you have completed the report, click Save. Proceed to step 18.
-
Select your report from the tree, and click Save,
as shown in the following image.
The Alert Wizard, Finish window opens.
-
Click Finish.
Note: The new Alert can be found under the folder, or subfolder, in the tree, identified by the Alert icon
 . Your Alert will
automatically be executed if the test report is true. It is not
necessary to schedule the Alert.
. Your Alert will
automatically be executed if the test report is true. It is not
necessary to schedule the Alert. -
From the tree, right-click the newly created Alert, click Schedule,
and then Email.
ReportCaster opens in a new browser window, as shown in the following image.
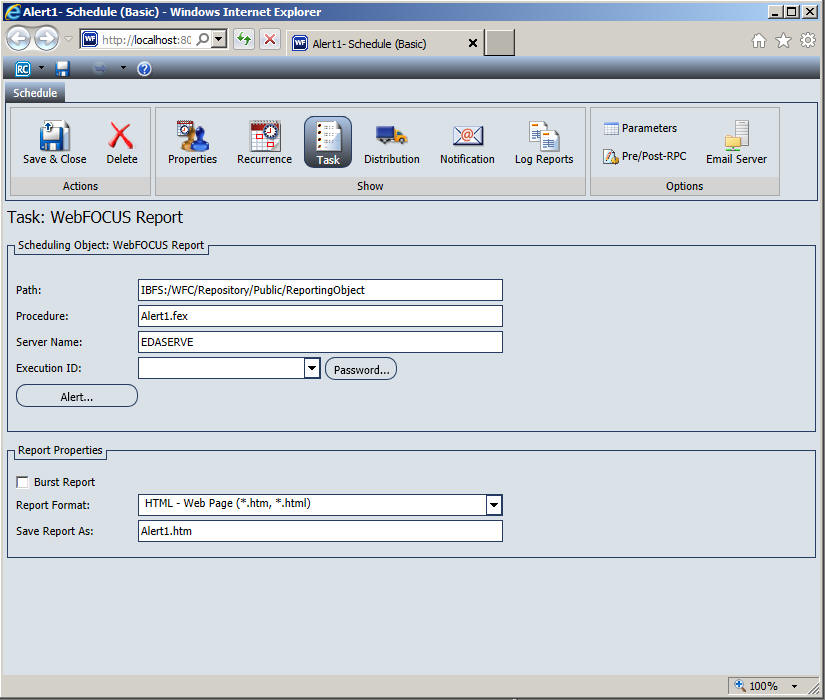
- Update the fields as desired. Ensure that you have the correct Path, Procedure, and Server Name.
-
Click Alert.
The Alert Options dialog box opens, as shown in the following image.
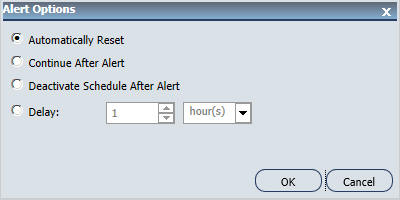
-
Select one of the following options:
- Automatically Reset. This option continues to run the schedule at the specified time and checks to confirm that the Alert test is no longer true before the Alert test is evaluated again. It is best to use this option when you do not want to receive the Alert result again until after the exception condition has been addressed and occurs again. For example, when the quantity in inventory is greater than 20,000, the Alert is triggered. You do not want to receive the report again until after the inventory is less than or equal to 20,000 for all products and then goes back over 20,000 again.
- Continue after Alert. This option continues to run the schedule at the specified time and distribute the report for each time the Alert test is true. It is best to use this option when you want to be notified on the interval specified in the schedule that the Alert test is true.
- Deactivate Schedule After Alert. This option deactivates the schedule after the Alert is triggered. The schedule has to be activated again for the Alert test to run after the Alert is triggered. It is best to use this option for one-time Alert tests. This is the default value.
- Delay. This option is best used when you want to allow a specific period of time to address the Alert test but want to be notified again if the Alert test has not been met. You can specify to restart the Alert after a maximum of 99 hours, days, weeks, months, or years.
As you complete the creation of the schedule, remember to consider the burst option to distribute specific report values, instead of the entire report. When a report is burst, the distribution information must be provided in a distribution list, distribution file, or dynamic list for email distribution and an access list for library distribution. The email and library distribution options are the most effective for Alert reports because of the push versus pull notification through email. For more information on using the burst option in ReportCaster, see the ReportCaster manual.
- Click Distribution and type the email addresses you want the report sent to.
- Click Properties in the Show group and type a title and summary for your scheduled report.
- Click Recurrence and specify when and how often to run the schedule.
-
Click Save & Close.
The scheduled report now appears in the tree, as shown in the following image.