-
Right-click the procedure in the Procedures folder and choose Edit
in Developer Studio Tool from the shortcut menu.
The Procedure (FOCEXEC) window opens.
-
Click a component connector (yellow diamond), and select Allocation
 from
the Component Connector toolbar.
from
the Component Connector toolbar.
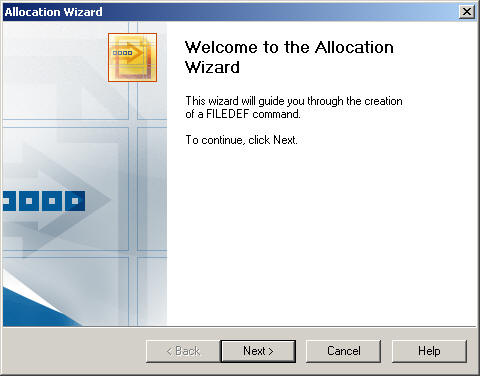
The Allocation Wizard opens, as shown in the following image.
-
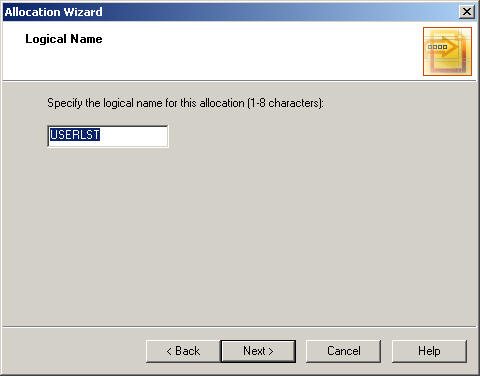
Click Next and specify the logical name
for the allocation.
The following image shows that a name can be from one to eight characters. If you are identifying a data source, the name must be the same as the name of the Master File.
-
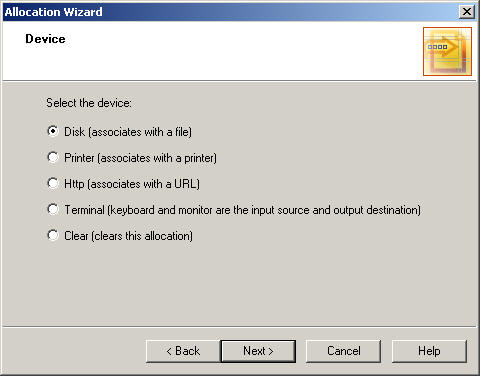
Click Next and select the device for
the logical name.
- Disk associates the logical name with a file. This is the default option.
- Printer associates the logical name with a printer.
- Http associates the logical name with a URL, by allocating the Master File to the result of running the URL.
- Terminal indicates that the keyboard and monitor are the input source and output destination for the file.
- Clear clears the allocation assigned to a file name. The device options are shown in the following image.
-
Click Next to select additional options.
Note: The options vary depending on which device is selected. The steps below detail how the Allocation Wizard continues with the selected device.
Tip: At any time, you may click Back to go back and change the device, or any of the device settings.
-
When selecting Disk as the device:
-
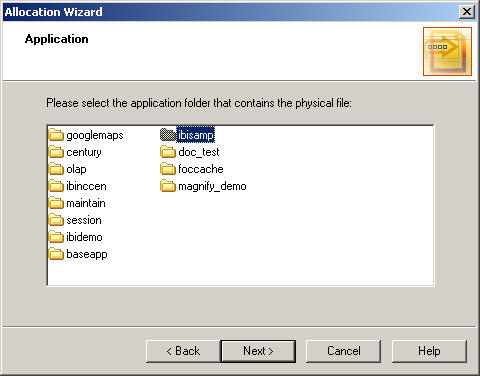
Select the application folder that contains the physical file.
Note: The application folders from the Reporting Server are shown by default and depend on the area from which the Allocation Wizard is invoked. For example, Local Projects, Data Servers, or Managed Reporting. You may specify a file in a directory that is not in the Reporting Server Application Path by using the Advanced option from the completed Allocation. For more information, see Advanced Allocation Dialog Box. The Application folders are shown in the following image.
-
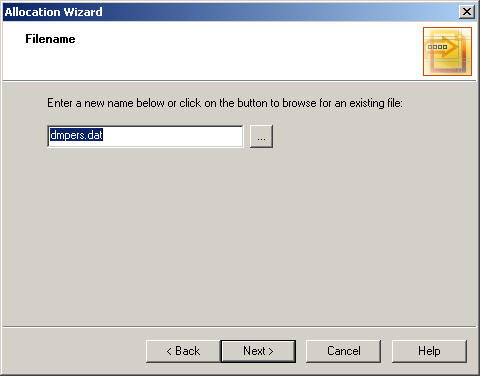
Click Next and enter the new file name, as
shown in the following image.
or
Click the Browse button to display the Open dialog box and select from the list of existing files, as shown in the following image.
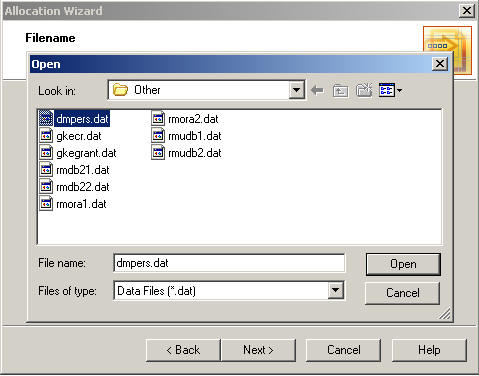
Note: Data files (*.dat) is the default value for the files of type drop-down list. You may also select Temporary Files (*.ftm), and All Files (*.*), as the type of file.
-
Click Next to
specify additional options for the Disk device, as shown in the
following image.
- Appends records to the end of the file (without this option, the file is overwritten).
- Fixed length records indicates that you are assigning a logical name to a file with a fixed record length.
- Record Size specifies the record length of the file, when using the Fixed length records option.

-
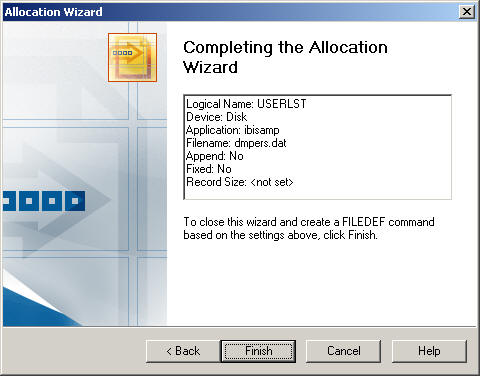
Click Next to view the summary of the allocation
settings you selected for the Disk device, as shown in the following image.
-
Select the application folder that contains the physical file.
-
When selecting Printer as the device:
-
Select the application folder that contains the physical file.
Note: The application folders from the Reporting Server are shown by default and depend on the area from which the Allocation Wizard is invoked. For example, Local Projects, Data Servers, or Managed Reporting. You may specify a file in a directory that is not in the Reporting Server Application Path by using the Advanced option from the completed Allocation. For more information, see Advanced Allocation Dialog Box, The application folders are shown in the following image.
-
Click Next and enter the new file name, as
shown in the following image.
or
Click the Browse button to display the Open dialog box and select from the list of existing files, as shown in the following image.
Note: Data Files (*.dat) is the default value for the Files of type drop-down list. You may also select Temporary Files (*.ftm), and All Files (*.*), as the type of file.
-
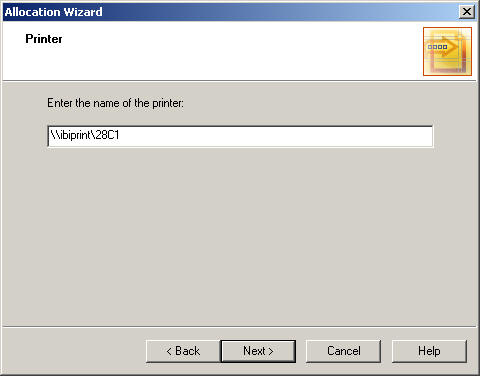
Click Next to enter the name of the printer,
as shown in the following image.
-
Click Next to view the summary of the allocation
settings you selected for the Printer device, as shown in the following image.
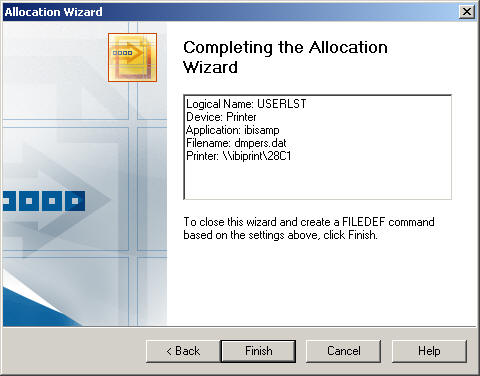
Note: The following syntax is applied to the FILEDEF statement when using a Printer device:
FILEDEF OFFLINE PRINTER BASEAPP/TEMPOFFLINE.FTM (PRINTER \\ibiprint\28C1
-
Select the application folder that contains the physical file.
-
When selecting Http as the device:
-
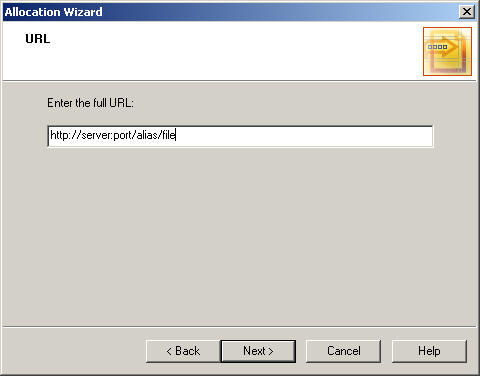
Enter the full URL path, as shown in the following image.
-
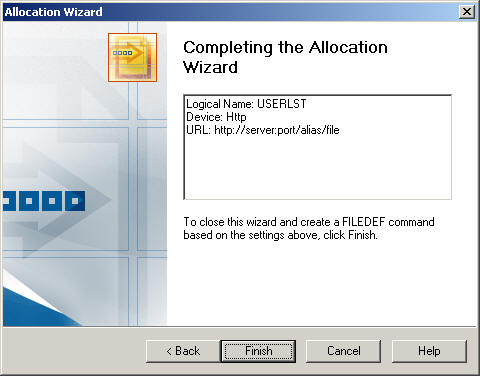
Click Next to view the summary of the allocation
settings you selected for the Http device, as shown in the following image.
-
Enter the full URL path, as shown in the following image.
-
When selecting Terminal as the device:
-
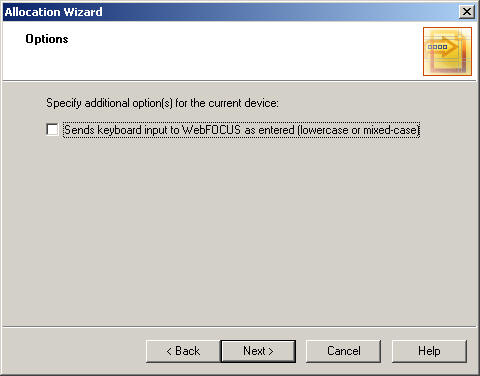
Click Next to specify additional options
for the Terminal device.
- You may choose
to send the keyboard input to WebFOCUS as entered (lowercase or
mixed-case). The default is mixed-case. Select this option to specify
lowercase, as shown in the following image.
- You may choose
to send the keyboard input to WebFOCUS as entered (lowercase or
mixed-case). The default is mixed-case. Select this option to specify
lowercase, as shown in the following image.
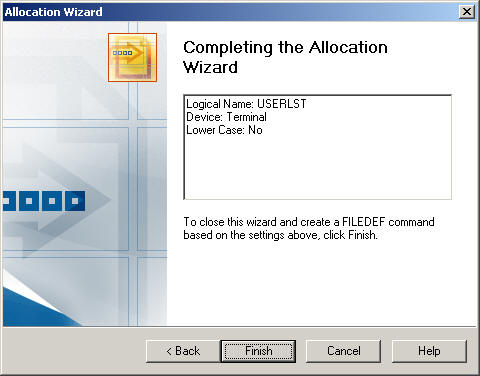
-
Click Next to view the summary of the allocation
settings you selected for the Terminal device, as shown in the following image.
-
Click Next to specify additional options
for the Terminal device.
-
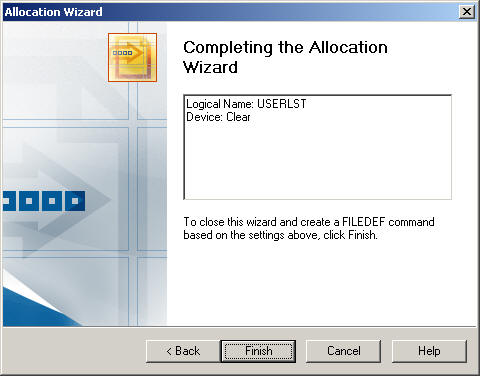
When selecting Clear as the device:
-
Click Next to view the summary of the
allocation settings that you cleared, as shown in the following image.
-
Click Next to view the summary of the
allocation settings that you cleared, as shown in the following image.
-
Click Finish to close the Allocation
Wizard and create the FILEDEF command.
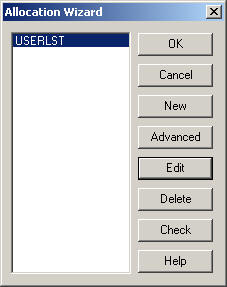
The completed file name appears for the Allocation, as shown in the image below.
-
Optionally, click Check to validate
the FILEDEF command.
A dialog box opens, displaying the component code and confirmation that no error exists.
- To edit the selected allocation, double-click, or click Edit, to open the Allocation Wizard again.
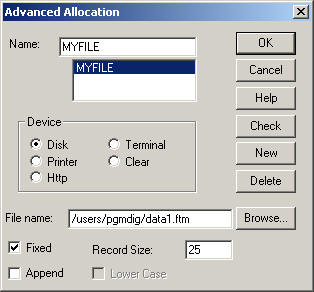
-
Click Advanced to open the Advanced Allocation
dialog box.
The Advanced Allocation dialog box enables you to enter the FILEDEF command without using the Allocation Wizard. For details, see Advanced Allocation Dialog Box.
-
Click OK to close the completed Allocation Wizard.
The Allocation component is added to the procedure. You may double-click the component to view the completed Allocation Wizard options again.