Adding a Page Heading or Footing
You can add a page heading and/or a page footing to a report.
A page heading is text that appears at the top of every page of
a report. A page footing is text that appears at the bottom of every
page.
You can specify whether the page heading and/or page footing
is left justified, right justified, or centered. Individual lines
in the page heading or footing can be assigned a different justification.
For example, you can have a two-line page heading in which the first line
is right justified and the second line is centered.
The heading or footing can display the current page count and
total page count.
Note: The Page Heading and Page Footing are turned
on by default. If you previously specified a subheading, subfooting,
or subtotal, those fields also appear in Report Painter.
If you are sorting the data in a report, you can add subheading
and subfootings at sort breaks. For details, see How to Add a Subheading or Subfooting at a Sort Break.
x
Procedure: How to Add a Page Heading or Footing
To add a heading or a footing to a report:
-
Select Page
Heading or Page Footing from
the Insert menu.
The Page Heading and Page Footing objects
appear.
Note: If you
previously specified a subheading, subfooting, or subtotal, those
fields also appear in Report Painter.
If your Page Heading or Footing is
not shown in Report Painter, ensure that Boundaries is selected
on the Report Options View tab.
-
To position
the cursor in the page heading or footing, click in the heading
or footing area.
-
Type
the heading or footing text.
-
To embed
field values in a page heading or footing:
-
Place the cursor in the page heading/footing where you want
to embed the value.
-
Double-click a field from the Fields tab in the Object Inspector.
-
To justify
a line in the page heading/footing:
-
Highlight the line you want to justify.
-
Right-click the highlighted line and select Justify from
the context menu. Select the justification option from the cascading
menu.
-
To place
the footing at the bottom of the page, right-click and click Footing
Bottom from the context menu.
You can also perform a calculation or other operation on a
field value in a page heading or footing.
Note: Report Painter shows one page vertically. If
you have a large Page Heading, you may increase the virtual screen
size of Report Painter to see the full report. For more information,
see How to Customize the Virtual Screen Size for the Report.
Example: Embedding a Field Value in a Page Heading or Page Footing
Suppose that you want to see total sales at different
levels within your enterprise. The following example shows how to
create a report of total sales for Gotham Grinds within each region
and city, and embeds the total sales quota in the page heading.
- Open the GGSALES
data source in Report Painter.
- Identify and
format your report columns.
- Identify your
sort columns. Click By on the Report Painter
toolbar and double-click or drag REGION and CITY from
the Fields tab of the Object Inspector.
- Identify your
summary column. Click Sum on the Report Painter
toolbar and double-click or drag DOLLARS from
the Fields tab of the Object Inspector.
- Format the
Dollar Sales column. Right-click Dollar Sales in
the Report Painter window and click Format.
Click Decimal in the Format Types box. Click Floating
dollar -- M from the Edit Options list. Click OK.
- Add a page
heading:
- Position the
cursor in the page heading by clicking your left mouse button in
the heading area. Type the following in the heading area, adding
two spaces after the equal sign:
Total
Budget Dollars =
Embed the total sales quota in the heading.
- Place the cursor
after the two spaces then double-click or drag BUDDOLLARS from
the Fields tab in the Object Inspector.
- Highlight <BUDDOLLARS.
Right-click and choose Prefix Operators then TOT from the
context menu. The field appears as <TOT.BUDDOLLARS, indicating
that it will be totaled when the report is run.
- Press the Enter
key twice to leave two lines between the heading and your report
content.
Note: If
your Page Heading is not shown in Report Painter, ensure that Boundaries
is selected on the Report Options View tab.
- Run the report
by clicking the Run button on the toolbar. The
report appears in the browser, as shown in the following image.
x
Procedure: How to Repeat Headings and Footings Per Panel in PDF Report Output
When the columns presented on PDF reports cannot
be displayed on a single page, the pages automatically panel. Paneling
places subsequent columns for the same page on additional pages
until the entire width of the report is presented, after which a
new page number is generated with a new set of panels.
In order to make panels following the initial
panel more readable, you can repeat headings and footings on each
panel page and turn on page numbering. The panel designation is
shown in Report Painter and in the report output.
Note: Headings and Footings can be a Page Heading,
Page Footing, Subheading, or Subfooting.
-
In Report
Painter, create a report using the PDF output format.
-
Click Format from
the Report menu.
The Report Options dialog box opens at the
Format tab.
-
Click Repeat
headings/footings per panel, located under the View/Print
options.
-
Click the Output tab
and click ON from the Page numbering drop-down
list.
Note: This step is
recommended, as it is easier to identify paneled pages with page
numbering on.
-
Click Apply and
then OK to close the Report Options dialog
box.
-
Run the
report.
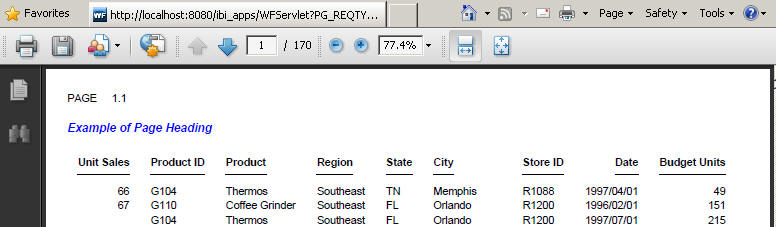
The following example shows a PDF report when all of the
columns cannot be displayed on a single page. Note the page numbers.
Page 1.1 displays the By field, Unit Sales, and the page
heading, as shown in the following image.
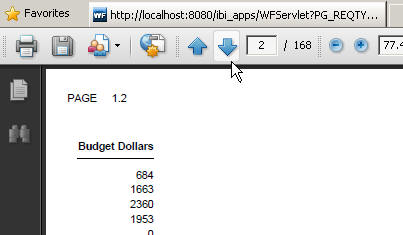
Page 1.2 displays the last column of the
report, Budget Dollars, on a paneled page so that the entire width
of the report is shown, as shown in the following image.
The following image shows the same report
with Repeat headings/footings per panel enabled. Page 1.1 is the
same. Note that Page 1.2 displays the paneled page showing the last
column of the report (Budget Dollars), and the repeated page heading,
as shown in the following image.

x
Procedure: How to Use the Align Column Titles (Section 508) Option for PDF
To use the
Align column titles (Section 508) option for PDF, you must:
-
Create a
new procedure using Report Painter.
-
Change the
report type to PDF.
-
Add the
fields you want displayed to the report.
-
Click the Page
Heading button.
A page heading is inserted into your report, as shown in
the following image.
-
Select the
page heading.
-
Right-click
and click Alignment Grid, as shown in the
following image.
The
Insert Alignment Grid dialog box opens.
-
Select the Align
with Data check box, as shown in the following image.
-
Click OK.
-
Right-click
the page heading and click Grid Options,
as shown in the following image.
The Properties for Page Header dialog box opens to the
Style tab.
-
In the Layout
section, select the Align column titles (Section 508) check
box, as shown in the following image.
xAdding a Report Heading or Footing
You can add a report heading and/or report footing to
a report. A report heading is text that appears above the page heading
at the top of the first page of the report. A report footing is
text that appears below the page footing at the bottom of the last page.
The report heading and footing options are especially useful
if you only want certain text to appear at the top of the first
page or at the bottom of the last page. For instance, if you are
creating a sales report, you can type Sales report for
[your company] in the report heading and Report
created by [your name] in the report footing.
You can specify whether the report heading and/or report footing
is left-justified, right-justified, or centered. Individual lines
in the report heading and/or footing can be assigned a different
justification. For example, you can have two lines in a report heading
where the first line is right-justified and the second line is center-justified.
x
Procedure: How to Add a Report Heading or Footing
-
Click Report
Heading or Report Footing from
the Insert menu.
The Report Heading and Report Footing objects
appear.
-
In the
Report Heading object box, type the desired heading or footing, or
double-click a field from the Fields tab in the Object Inspector
to add it to the heading or footing.
-
To justify
a line in the report heading/footing:
-
Highlight the line you want to justify.
-
Click the appropriate justification button on the Font toolbar.
x
Procedure: How to Insert the Current Date
-
Place
the cursor in the object area (that is, subheading, subfooting,
or page-break) in the Report Painter window.
-
Right-click
and click Insert Date from the context menu.
or
Click Insert
Date from the Properties menu.
-
Select
the date format from the cascading menu.
You can change the display of the date format. For more
information, see Assigning Date/Time Formats.
xAdding the Current Page Number and Total Page Count
You can insert the current page number and the total
page count in the page heading or footing of a report.
x
Procedure: How to Add the Current Page Number
-
Right-click
in the page heading or page footing.
-
Click Insert
Page Markers, and click Current Page Number from
the cascading menu.
A field marker indicates placement of the current page number.
x
Procedure: How to Add the Total Page Count
-
Right-click in the page heading or
page footing.
-
Click Insert
Page Markers, and click Page
Count from the cascading menu.
A field marker indicates placement
of the current page count.
xEmbedding an Adobe Flash File in a Page Heading for a PDF Report
When creating a report with the Portable Document Format
(PDF) output format, you can embed a .SWF file that is Adobe Flash
Player compatible in the page heading.
.SWF files that are Adobe Flash Player compatible combine vector
graphics with animation effects that are scalable and provide a
perfectly smooth transition of lines and images, creating the highest
quality outward-facing PDF documents with engaging functionality
and better visualization of data. Adobe Flash Player must be installed
to view .SWF files that are Adobe Flash Player compatible.
You may embed the Adobe Flash File (.SWF files that are Adobe
Flash Player compatible) as a File, URL, or Hold File, and set the
page heading properties for the source .SWF files. These options
are available from the embedded Flash file tab of the Properties for
Page Header dialog box in Report Painter.
Note: The embedded Flash file tab appears only
if the report output is set to PDF.
x
Reference: Properties for Page Header Dialog Box: Embedded Flash File Tab
The following image shows the options that
are available on the embedded Flash file tab for a page header when
using the PDF output format.
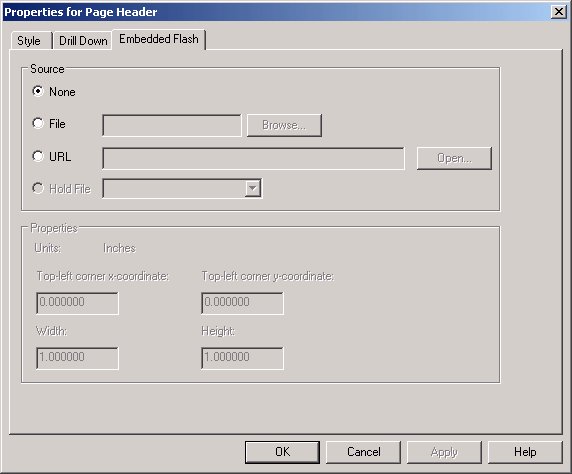
Right-click inside the Page Heading
object in the Report Painter window and choose Options from
the context menu. The Properties for Page Header dialog box opens
at the Style tab. Click the embedded Flash file tab to
view the embedded Flash file options.
The embedded
Flash file tab appears only if the report output is set to PDF.
-
None
-
Indicates that no embedded Flash file is
selected for the page heading. This is the default option.
-
File
-
Indicates the .SWF file that is Adobe Flash
Player compatible is embedded in the page heading. Click Browse to
select from a list of Shockwave® Flash Objects (.SWF files that
are Adobe Flash Player compatible) in your project directory.
-
URL
-
Indicates the URL source that is embedded
in the page heading. Type the location of the .SWF file that is
Adobe Flash Player compatible in the URL and click Open to
verify the URL source in your web browser.
Note: The Open button is not activated
until the location of a .SWF file that is Adobe Flash Player compatible
is included in the URL source.
-
Hold File
-
Indicates the .SWF file that is Adobe Flash
Player compatible hold file that is embedded in the page heading.
Use the drop-down list to select from the list of temporary hold
files.
-
Properties
-
Enables you to set the properties for the
source of the .SWF file that is Adobe Flash Player compatible in
the page heading, if you are using a File, URL, or Hold File.
-
Top-left corner x-coordinate
-
The top-left corner x-coordinate position
of the embedded Flash file in inches.
-
Top-left corner y-coordinate
-
The top-left corner y-coordinate position
of the embedded Flash file in inches.
-
Width
-
The width, in inches, for the embedded
Flash file in the page heading. The default width is 1 inch.
-
Height
-
The height, in inches, for the embedded
Flash file in the page heading. The default height is 1 inch.
x
Procedure: How to Embed an Adobe Flash File in a Page Heading for a PDF Report
This process describes how to embed an Adobe Flash file
in a page heading.
-
In Report
Painter, open or create a report using Portable Document Format
(PDF) as the output format.
-
Position
the cursor in the page heading by clicking your left mouse button
in the Page Heading object.
-
Type the
heading and apply any styling.
-
To embed
an Adobe Flash File in the page heading, right-click anywhere inside
the Page Heading object and click Options,
as shown in the following image.

The Properties for Page Header dialog
box opens at the Style tab.
-
Click the embedded
Flash file tab.
Note: The embedded
Flash file tab appears only if the report output is set to PDF.
-
You may
embed a file, URL, or hold file as the Adobe Flash File (.SWF files
that are Adobe Flash Player compatible) source.
To embed a file:
- Click File as
the source.
The Properties section of the embedded Flash file
tab is activated. You may position the properties for the source
of the .SWF file that is Adobe Flash Player compatible in the page
heading, or use the default settings.
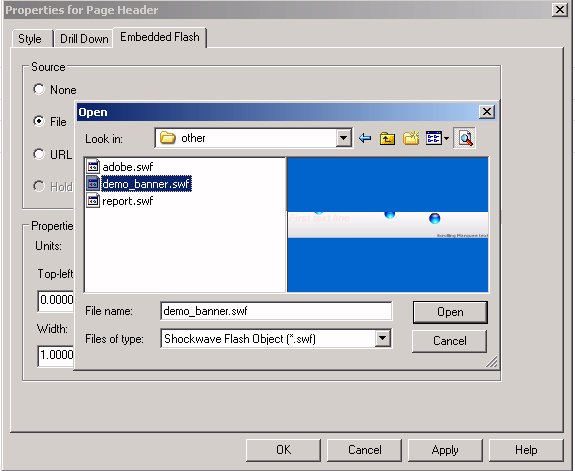
- Click Browse to
select from a list of Shockwave Flash Objects (.SWF files that are
Adobe Flash Player compatible) in your project directory.
Tip: A preview of the Adobe Flash File
animation appears in the Open dialog box, as shown in the following
image. If you are having trouble viewing the .SWF file that is Adobe
Flash Player compatible, ensure that Adobe Flash Player is installed.
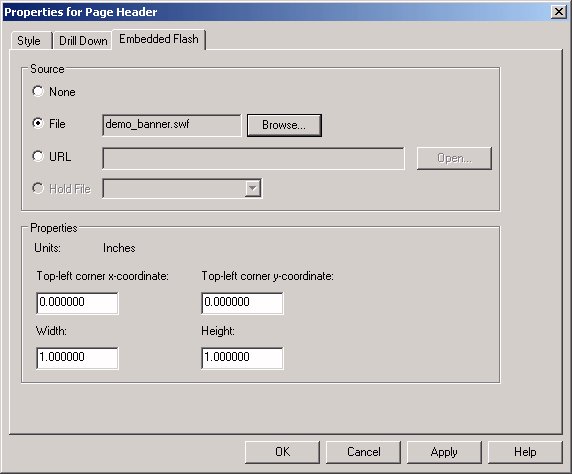
- Click Open to
close the Open dialog box.
The selected Adobe Flash File (.SWF
files that are Adobe Flash Player compatible) appears as the File
source, as shown in the following image.
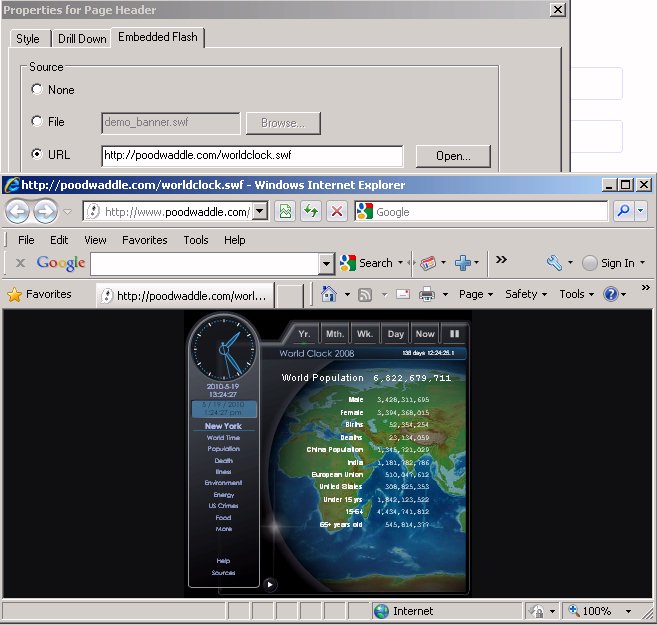
To embed a URL:
- Click URL as
the source.
The Properties section of the embedded Flash file
tab is activated. You may position the properties for the source
of the .SWF file that is Adobe Flash Player compatible in the page
heading, or use the default settings.
- Type the Adobe Flash
File (.SWF files that are Adobe Flash Player compatible) location
in the URL and click Open to verify the URL
source in your web browser.
Note: The
Open button is not activated until the location of a .SWF file that
is Adobe Flash Player compatible is included in the URL source,
as shown in the following example.
To embed a hold file:
-
Click Apply and OK to close
the Properties for Page Header dialog box.
The Adobe logo appears where the embedded
Flash file source is positioned in the page heading.
-
Save and
run the report.
The PDF shows the Adobe Flash File
in the output with its animation effects.
