In this section: |
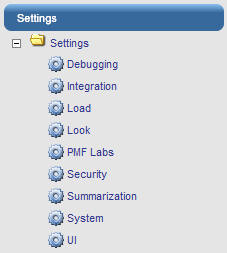
You can view and edit all default settings in PMF by clicking Settings in the Manage tab to open the Settings menu, as shown in the following image.
The Debugging panel is shown in the following image. After you make changes on the panel, click Save to save your changes.

The following table lists and describes the default PMF settings you can view and change on the Debugging panel.
|
Setting |
What To Set It To |
|---|---|
|
AJAX debugging |
Indicates whether the system should display the AJAX execution code before submitting the request. The default is OFF.
|
|
Application RDBMS SQL Tracing |
Select OFF or ON to indicate whether WebFOCUS SQL Tracing should be active. The default is OFF. |
|
Application Tracing |
Select ON or ALL to debug PMF by turning WebFOCUS ECHOing on. ON displays FOCUS code for the last processing step. ALL displays FOCUS code for all processing and is not recommended. The default is OFF. |
|
Minify for Speed |
Enable this feature to run compacted components for faster network performance. |
The Integration panel is shown in the following image. After you make changes on the panel, click Save to save your changes.
The following table lists and describes the default PMF setting you can view and change on the Integration panel.
|
Setting |
What To Set It To |
|---|---|
|
ReportCaster schedule ID |
Provide the WebFOCUS server user ID that is passed to ReportCaster for scheduled runs. |
|
iWay Service Manager |
Provide the URL for the iWay Service Manager Console. |
The Load panel is shown in the following image. After you make changes on the panel, click Save to save your changes.
The following table lists and describes the default PMF settings you can view and change on the Load panel.
|
Setting |
What To Set It To |
|---|---|
|
If Source Data is Keyed Higher |
Controls how PMF handles lower dimension level source data on load. Select E to display an error and stop the source load or W to complete the load and ignore the lower level data. The default value is E. |
|
If Source Data is Keyed Lower |
Controls how PMF handles higher dimension level source data on load. Select E to display an error and stop the source load or W to complete the load and ignore the higher level data. The default value is E. |
|
Preview display size |
The maximum number of lines to show in the Preview tab for Sources, Datapoints, Dimensions, and Measures. |
|
Recalculate on manual load? |
Controls if PMF should, by default, set all datapoints and measures to be recalculated when you click Load (or Generate) on a source, datapoint, dimension or measure during a session. This sets up the default when you create new objects. This setting can be overridden on many objects. |
|
Recalculate on user entry? |
Controls if PMF should, by default, set all datapoints and measures to be recalculated when a user enters data into a user-entered source. This sets up the default when you create new objects. This setting can be overridden on individual user-entered sources. |
|
Use Database Load Utility? |
Enables bulk loading. |
|
Zero on missing components |
Select Y to set values to zero for measure components missing at an intersection. This setting is the default. Select N to reject rows with missing components and allow them to be null. For example, if the actual of a measure is connected to a datapoint for which there is data, but its target data is missing, 0 will be inserted instead of not loading that intersection for the measure. If this is set to N, any missing components at an intersection cause all components to not be loaded. |
The Look panel is shown in the following image. After you make changes on the panel, click Save to save your changes.
The Colors and Styles tab allows you to generate a color swatch for PMF, WebFOCUS content, and the WebFOCUS BI Portal, that give a consistent style to match the official style of your organization, or your group preferences.
The following table lists and describes the default PMF swatch settings you can view and change in the Colors and Styles tab on the Look panel.
|
Setting |
What To Set It To |
|---|---|
|
Choose a swatch |
Select one of the following default swatches for all PMF views.
|
|
Background colors |
Refers to the HTML backgrounds in PMF, such as those for panels, grids, and dashboards. |
|
Foreground colors |
Refers to the colors of text and borders in PMF. |
The following table lists and describes the default PMF settings you can view and change in the Advanced tab on the Look panel.
|
Setting |
What To Set It To |
|---|---|
|
Chart Palette |
Select one of the following default color palettes for charts.
|
|
Data Font |
Type the name of the default font style you want used in all views and grids. The default is ARIAL. If you specify a font and want to ensure the font is used for WebFOCUS PDF output, the font must be defined on the WebFOCUS Server in the PDF.FMP file. |
|
Heading Font |
Type the name of the default font style for headings in all reports. The default is ARIAL. |
|
Line Chart Rounding effect |
Select Y to make lines on line charts rounded, |
|
Line Chart Thickness |
Select the thickness of on line charts. The available options are 1 (thin), 2 (medium), and 3 (thick). |
|
Organization Name |
Provide the name of your company, organization, or enterprise (for display on some reports). |
|
Style Sheet |
Select the WebFOCUS stylesheet that will be used for all standard system reports. |
|
Use Chart Gradients |
Select Y to use gradient colors on chart objects. Select N to flatten chart objects and not use gradients. |
|
Indicator Set |
Select one of the following indicator sets to display in views and grids in PMF.
|
Using the same number elements will give you all of the essential designs, but you can also mix and match them to get a number of combinations.
The PMF Labs panel is shown in the following image. After you make changes on the panel, click Save to save your changes.
Note: This option is only seen if you enable the PMF Labs feature in System settings.
The following table lists and describes the default PMF settings you can view and change on the PMF Labs panel.
|
Setting |
What To Set It To |
|---|---|
|
Analyze Source data on Load? |
Specify if an analysis of the source data will be run during source load. |
|
High performance begins |
Set the time for scheduled or batch jobs to stop running when online entry and reporting starts. |
|
Overnight maintenance begins |
The time for when scheduled loads can begin. |
|
Weekend maintenance |
Set if weekend maintenance should occur. Options are:
|
The Project panel is shown in the following image. After you make changes on the panel, click Save to save your changes.
The following table lists and describes the default PMF setting you can view and change on the Project panel.
|
Setting |
What To Set It To |
|---|---|
|
Project Dimensional linkages |
Select whether to enable the ability to link Projects to up to two dimensions. Choose one of the following:
If you select Y, the following options are available:
|
The Security panel is shown in the following image. After you make changes on the panel, click Save to save your changes.
The following table lists and describes the default PMF settings you can view and change on the Security panel.
|
Setting |
What To Set It To |
|---|---|
|
Access Security |
Select the level of security. Choose one of the following:
|
The Summarization panel is shown in the following image. After you make changes on the panel, click Save to save your changes.
The following table lists and describes the default PMF settings you can view and change on the Summarization panel.
|
Setting |
What To Set It To |
|---|---|
|
External Aggregation |
Select whether to allow aggregate measure values using external tables with pre-populated rollup values. Choose one of the following:
|
|
External Aggregation MFD |
Type the name of the Master File to use for external aggregation. |
|
Measure Detail Sorting |
Select whether to sort measure detail from the report context or the measure dimension order. Choose one of the following:
|
|
Multi-Level Dimension Display |
Select whether to display data at lower levels of non-Time Dimensions than what is measured. Choose one of the following:
|
|
Multi-Level Time Display |
Select whether to display data at lower levels of Time than what is measured. Choose one of the following:
|
|
Previous Period Forward |
Select whether previous measure data should be carried over into the current period until actual data becomes available. PMF marks carried over data to distinguish from actual data. Choose one of the following:
|
|
Rebalance weights for no data? |
Select Y to rebalance weights to compensate for measure series with no data. The default is Y. |
|
Default Dimension |
Select the default dimension to be displayed in views. Choose a Dimension to use. |
|
Default Dimension Level |
Select the default dimension level for standard system reports. The available options are 1-Region, 2-Plant, and 3-Store. |
|
Default Time Level |
Select one of the following default time levels for displaying data when the time level is not specified.
|
The System panel is shown in the following image. After you make changes on the panel, click Save to save your changes.
The following table lists and describes the default PMF settings you can view and change on the System panel.
|
Setting |
What To Set It To |
|---|---|
|
Ajax Timeout (seconds) |
The amount of time (in seconds) PMF should wait for http server requests. |
|
Days to Allow Revisions |
The amount of days PMF will allow newer Feedback and Project information to be updated. The default value is 20 days. |
|
Hide Old-Style Measures |
Hides legacy measures from appearing in the Measure trees on the Author and Manage tabs. |
|
PMF APP PATH |
Enter the WebFOCUS Application Path used by PMF. |
|
Turn On PMF Labs Features |
Displays new and unsupported features from the PMF laboratory. Note: Enabling this feature is not recommended for production environments. |
|
Default Target Field |
Select the default target field to be displayed in views. Choose one of the following:
Note: You might see additional target fields, or different ones, depending on how your administrator has configured PMF at your site. |
|
Today Date |
Select the now date shown for all PMF views. Choose one of the following options from the drop-down menu:
|
The UI panel is shown in the following image. After you make changes on the panel, click Save.
The following table lists and describes the default PMF settings you can view and change on the UI panel.
|
Setting |
What To Set It To |
|---|---|
|
Automatic cancel |
Specify how many seconds PMF should wait before auto-cancelling actions, such as a click on the dashboard, and drills. The default value is 5 seconds. |
|
Display Budgets for Projects |
Select Y to track project expenditures. |
|
Display Language |
Select the default language for panels and reports. Choose one of the following:
|
|
Object Display Type |
Select to display all objects or only the objects owned by the user who is viewing the Author tab. Choose one of the following:
|
|
Pop Up Window Handling |
Select NEW or SAME to determine whether views open in a new window or the same window. The default is NEW. |
|
Weighting Decimals |
Select the number of significant decimal places to use for weighting. Choose 0, 1, or 2 decimal places. The default is 1. |
How to: |
PMF has the ability to support English, Brazilian Portuguese, Catalan, Chinese, Dutch, French, German, Hebrew, Italian, Japanese, and Spanish for its user interface. You can switch PMF to display the user interface (panels, trees) and all report column titles and headings in any of these languages. There can be only one primary language configured for PMF at this time.
If you change the user interface to display a language other than English, PMF runs a process to automatically change some internal data depending on the selected language. This data includes shipped versions of units of measure, content, dashboards, gadgets, time ranges, system settings, and functional roles.
The internal information that is not automatically translated when the primary language is changed includes scorecard data, dimension data, user-entered data, and static components, such as Business Intelligence Dashboard (BID) tab titles and shipped documentation. You should select your desired language at installation time, otherwise you have to manually change BID tab titles when you change the PMF language. For documentation, you have to download and install non-English documentation for PMF.
The primary language is stored as a setting in the PMF primary data mart. It is possible to connect the application to a data mart and have PMF automatically adopt the language configured there after an automatic metadata resync is performed (as long as the language configured is one PMF supports).
If you want user interfaces and data display to be appropriate for the language you select, you should change the primary language of your WebFOCUS environment. The WebFOCUS primary language controls BID menus, WebFOCUS tools available from BID menus, and right-click menus in the PMF trees. For more information about changing the primary language for WebFOCUS, see the WebFOCUS Security and Administration manual, and the WebFOCUS and ReportCaster Installation and Configuration manual for your platform.
Before changing the Display Language setting on the UI Settings panel, do the following:
To change the PMF language display, perform the following steps:
The Settings menu displays.
PMF automatically changes the internal language code and display items. You must log off PMF and then log on again to see the changes.
| WebFOCUS |