
In this section: |
When using the Lucene search engine, Magnify provides a Java-based Security API that enables record-level security whereby users are granted access to data on an individual basis. The rules for data access are defined in the Magnify Security plug-in, which is called once a secure record in the Lucene index is triggered. A Lucene index can contain both public and secure records. Secure records are tagged with security parameters that specify the name of the Magnify Security plug-in and other parameters that are used to define the security rules for accessing an individual record.
Using the Security API, Magnify can integrate with an existing security framework and be extended to provide important security features, such as:
The main components you must incorporate or configure to implement security for Magnify with Lucene are:
Important: When implementing security for Magnify with Lucene, we recommend that you use Hypertext Transfer Protocol Secure (HTTPS) to transfer data between systems. This protects the data during transport on the network. However, if the data exists on the same machine as Magnify, then this is not necessary because the data will never enter the network.
Magnify can verify whether a user has already provided credentials by checking the existence of a cookie. For example, if the user has logged into Managed Reporting, then Magnify can check that the WFC_COOKIE exists and pass this information to the Security plug-in for processing. You can specify the cookie name that Magnify must verify using the magnify_required_cookie parameter in the WebFOCUS Administration Console.

If the cookie does not exist, Magnify redirects the user to a webpage specified by the magnify_required_cookie_redirect parameter in the WebFOCUS Administration Console. By default, Magnify displays the WebFOCUS Home page.
In this section: |
The Magnify Security API is flexible and can integrate with most security models. It provides the framework to authenticate and authorize user access and allows access to HTTP requests, issues alarms of suspicious activity, and sends alerts of erroneous behavior. The Security API Java documentation includes all available functionality and can be accessed using the following URL address:
http://host:[port]/webserver_alias/javadoc/magnify/index.html
where:
Specifies the host and port where WebFOCUS is installed.
Specifies the web server alias specified during the WebFOCUS installation. The default is ibi_html.
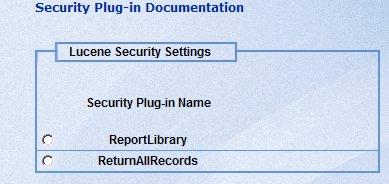
Alternatively, you can access the Magnify Security API Java documentation by clicking Lucene Security under the Magnify menu and then clicking Security Plug-in Documentation on the right pane, as shown in the following image.
Magnify secures each search result independently based on user authentication and various authorization levels. By allowing the ability to exit Magnify and execute external programs, security rules can be highly customized, scalable, and applied at the most granular control.
Security plug-ins allow for the execution of one program, which can perform stand-alone processing or initiate the execution of another program. The results can then either be passed along and/or evaluated by the Security plug-in and returned to Magnify. This allows Magnify to integrate into your established set of security rules.
Each Security Plug-in must be configured using the WebFOCUS Administration Console.
The Security plug-in will:
When implementing a Security plug-in for Magnify, the following classes and methods are used:
If you are using any of the e-mail alert features, the following methods may be implemented:
Magnify provides the following Security plug-in samples that illustrate how to implement some of the functionality available in the Magnify Security API:
The ibi.search.securityplugin.SimpleSecurity class enables Magnify to display secure search results based on a user role. The user credentials and role are stored in the following file.
\ibi\WebFOCUSxx\config\magnify\magnify_security.xmlNote: The SimpleSecurity java class is not for production use.
The Security plug-in samples are located in the \ibi\WebFOCUSxx\webapps\webfocus\WEB-INF\classes\ibi\search\securityplugins folder of the WebFOCUS Web application. To compile the samples, Information Builders recommends using JDK 1.6 or higher.
Note: Information Builders offers sample Security plug-ins as a learning tool. Most are not intended for production use. Licensed users are welcome to alter or extend these samples and deploy them in other environments as they see fit. Information Builders will support the documented functionality of its API classes and methods. However, Information Builders is not responsible for functionality or behavior of products built with its API unless the documented or expected behavior of its discrete classes and methods is different than the actual results.
In the Magnify section of the WebFOCUS Administration Console, select Lucene Security. The following image shows the Lucene Security Settings page displaying existing Security plug-ins.
Select New or Modify to open the Lucene Security Plug-in creation and modification page.
The Lucene security options and parameters are:
Type a name for the Security plug-in. A Security Plug-in Name binds individual search results to security and provides an alternative name for the Java class name. This field is required and must match the value provided for the SECURITY_PLUGIN field in the index.
Type a name for the Java class. The Java Class Name is the file name of the Java class assigned to the Security Plug-in. The Java class contains functions for authentication, authorization, and alarms. This field is required.
Provide instructions to be displayed in the browser for a search when prompting for a user ID and password. All characters except quotation marks and colons are allowed. This field is required and should provide some detail about the type of data for which the user is accessing. In this way, the user knows which credentials are required. It can also contain a warning message.
Type the time limit in milliseconds to wait for a response. The time limit determines how long Magnify waits for a response before timing out for each Security plug-in. The actual wait time is twice the specified time limit because it is applied independently to both authentication and authorization. This field is required and it must be populated with a positive numeric value. Note that one thousand (1000) milliseconds is equal to one second.
Provide a list of optional parameters that can be passed to the Security plug-in. The Optional parameters are command line statements. This field is optional.
Type a valid user ID. If this field is populated, the user ID is passed to the Security plug-in. This field is optional.
Type a valid password. If this field is populated, the password is passed to the Security plug-in. This field is optional.
Provide one or more email addresses to be used for sending notifications based on the results of the security plug-in alarm. Multiple addresses must be separated by a comma or semi-colon. This field is optional.
Provide the email address that notification email recipients can reply to after receiving an email alarm for a Security plug-in. This field is optional.
Type the number of failure attempts that must occur before Magnify Search:
This field is optional and it must be populated with a positive numeric value when provided.
Type the number of milliseconds that Magnify Search must wait before retrying the Security plug-in after it has failed the number of times set in the Allowed Failures field. The Security plug-in must be successful on the first retry attempt or the specified wait time goes into effect again. This field is optional and it must be populated with a positive numeric value when provided.
The message should provide the user with information about the system for which they are providing credentials, since each search record can require authentication to a different system. For example, Enter a valid userid and password to access the Century Electronics employee information.
-passwordfile c:\ibi\WebFOCUS\config\magnify\magnify_security.xml

Magnify calls the SimpleSecurity plug-in when a user submits a query to the Magnify search application and secure records are retrieved from the Lucene index. Users are prompted as follows:

The following syntax in the SimpleSecurity plug-in uses the Magnify Security API promptForPassword() method to display the authentication dialog box.
private final void promptForPassword(){
  final boolean noAccountCheckbox=this.securitycallback.
        getNoAccountCheckbox(this.realmName);
  if (!noAccountCheckbox)
  {
    this.securitycallback.promptForPasswords(this.realmName);
    this.securitycallback.
         setRealmRequestJSP("search/jsp/passwordPrompt.jsp",
    this.realmName);
  }
}
The following syntax in the SimpleSecurity plug-in uses the Magnify Security API getUserid() method to retrieve authentication information from the browser session:
public String getUserid(){
  return this.userid;
}
public void setUserid(String userid)
{
this.userid = userid;
}The user credentials are then verified against the information stored in the magnify_security.xml file as follows:
private final boolean isAuthenticated(final String username,
  final String password, final String SecurityPluginName_param)
{
  final Map <String,NamedNodeMap>
        usernameMap =  getUserNameMap(SecurityPluginName_param);
  if (usernameMap != null && username != null)
  {
    if (usernameMap.containsKey(username))
    {
       final NamedNodeMap attMap=usernameMap.get(username);
       final Node passwordNode=attMap.getNamedItem("password");
       if (passwordNode.getNodeValue().equalsIgnoreCase(password))
       {
         this.rolesSet=new TreeSet<String>();
         final Node rolesNode=attMap.getNamedItem("roles");
         final String rolesString=rolesNode.getNodeValue();
         if (rolesString != null)
         {
           final String [] rolesList=rolesString.split(",");
           final int nRoles=rolesList.length;
             for (int roleIndex=0;roleIndex<nRoles;roleIndex++)
             {
               this.rolesSet.add(rolesList[roleIndex]);
             }
          }
          return true;
       }
     }
  }
  return false;
}
| WebFOCUS |