- Clear the cookies from the web browser that will be used to start the WebFOCUS Reporting Server Web Console.
-
Access the WebFOCUS Reporting Server Web Console with
a URL containing the domain where the WebFOCUS Reporting Server
is installed. For more information, see Creating a Facebook Application.
This domain should match the one configured with the Facebook application. For example:
http://IBI-Computer.ibi.com:8121
-
From the WebFOCUS Reporting Server Web Console menu bar,
click Adapters.
The Adapters pane opens.
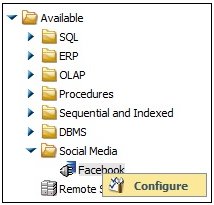
- Expand the Available folder, if it is not already expanded.
- Expand the Social Media folder.
-
Right-click the Facebook node
and select Configure, as shown in the following
image.
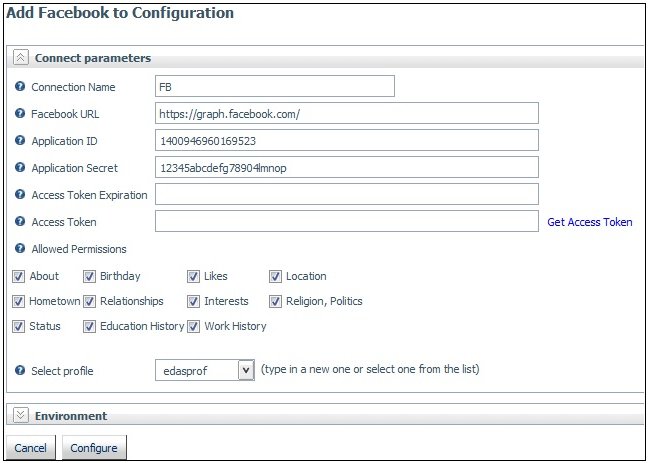
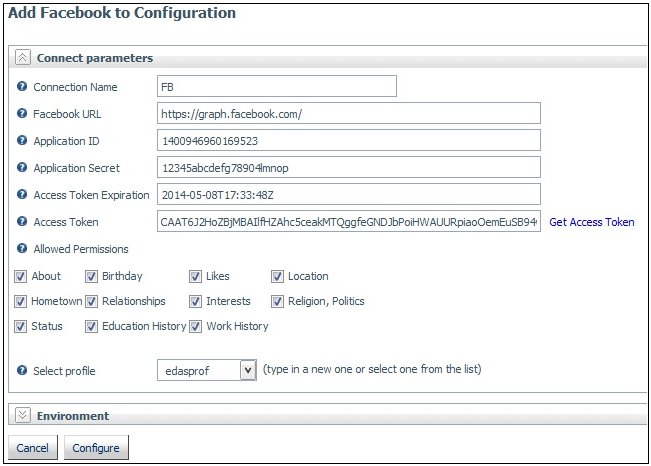
The Add Facebook to Configuration pane opens, as shown in the following image.
-
Enter the values for the Application ID and Application
Secret as defined in the Facebook application you created.
For more information, see Creating a Facebook Application.
-
Choose the options in the Allowed Permissions area that
are to be granted to the Facebook application and then click the Get
Access Token link.
For more information on the Allowed Permissions, see Connection Attributes for Facebook.
A Facebook login dialog opens, as shown in the following image.

If the Facebook login dialog does not open, ensure that the Pop-up Blocker within the web browser is either disabled or configured to allow pop-up windows from the host where the WebFOCUS Reporting Server is installed.
-
Enter the Facebook login credentials and then click Log In.
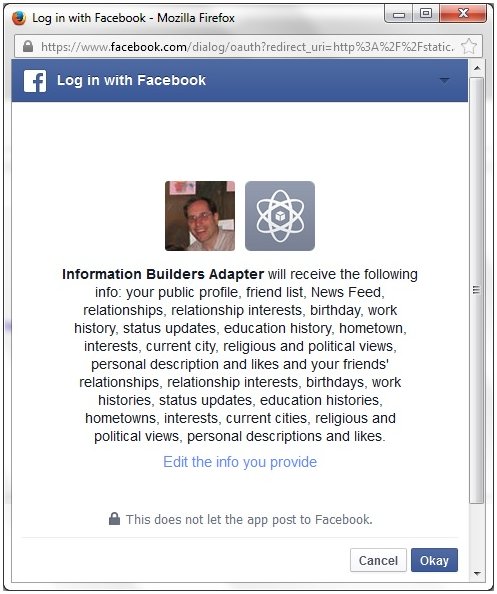
A pop-up window is displayed asking you to confirm the permissions that are to be granted to the Facebook application, as shown in the following image.
-
Click Okay.
You are returned to the Add Facebook to Configuration pane where the Access Token Expiration and the Access Token fields are now populated, as shown in the following image.
-
Click Configure.
The configured Facebook Adapter is added to the Facebook node in the left pane.
Note: The Access Token expires after 60 days. To refresh the Access Token, click the Get Access Token link and then click Configure.