In addition to providing a graphical interface for designing
flows, the DMC can also be used to perform the major setup and administrative
tasks.
Note: When you install a Windows server on a computer
where you are building flows, the DMC is installed automatically.
For other server types or for access to remote Windows servers,
the DMC must be installed separately.
x
Reference: WebFOCUS Environments
The
DMC allows you to configure the mid-tier environment for a WebFOCUS
server.
x
Reference: Requirements for Installing the Data Management Console
To
install the DMC, you need the following:
- Pentium 550
mHz processor or higher.
- 400 MB of hard
disk space.
- 512 MB of RAM.
- SVGA or higher
resolution graphics card set to at least 800 X 600 pixels and high color
(16 bit). (The preferred setting is 1024x768, with a color depth
of 16 bits.)
- A mouse or
compatible pointing device supported by Windows.
- A network (TCP/IP)
connecting to the DataMigrator Server.
- Windows Vista,
7, 8, or Server 2008 or 2012.
x
Procedure: How to Install the Data Management Console
-
Close
any open programs.
-
Unzip
the iserver.zip file to a directory on your hard drive. In Windows Explorer,
navigate to the directory and run SETUP.EXE.
The setup program begins and the InstallShield Wizard opens.
-
In the
Choose Setup Language window, select a language and click Next.
The License Agreement opens.
-
Click Yes to
accept the terms of the license agreement.
If you do not accept the terms of this agreement, click No to
exit the InstallShield Wizard.
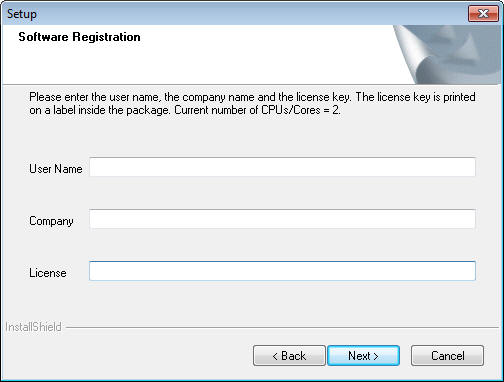
If you click Yes,
the Software Registration window opens, as shown in the following
image.
-
Enter
your user name, company name, and license key in the corresponding
fields. Your license key is found on the packing slip you received
with your iWay 77 Data Management Tools CD. Click Next.
The Install Shield Wizard displays the License Agreement.
Click Yes.
-
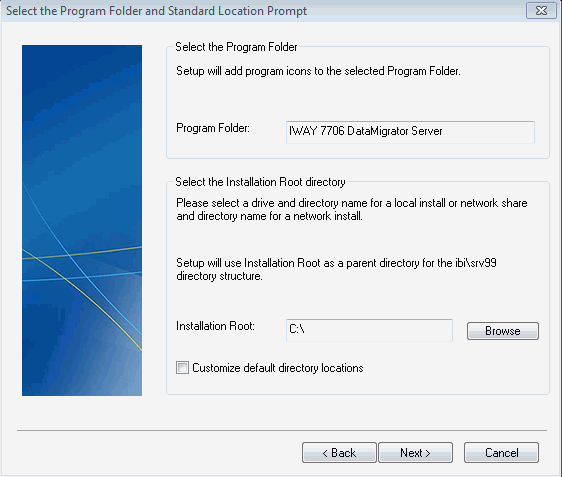
The InstallShield
Wizard displays the Select the Program Folder and Standard Location
Prompt window, as shown in the following image.
-
The
default Program Folder name, as it will appear in the Windows Start menu,
is IWAY 77 Client. If you wish to use a different folder name, enter
it here. (You can also choose a folder from the Existing Folders
list.) Click Next.
-
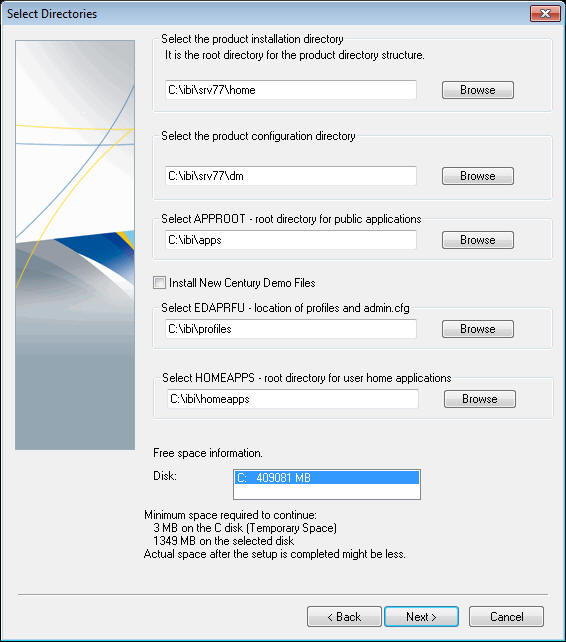
Select
a radio button for a local or network drive installation and click Next.
The Select Directories window opens, as shown in the following
image.
-
Accept
the default root and product configuration directories, or browse to
directories in which you prefer to install your software. Accept
the default disk designation or, if applicable, choose another disk
from the list.
-
Click Next.
-
The
Configure Remote Server window opens. When you install the software,
you can set up communication to a server. When you start the software,
the server you identify here appears in the Server list in the navigation
pane. If necessary, you will be able to enter additional server
nodes as needed, after the installation is completed. The following
image shows the Configure Remote Server window.

- In the Node
box, enter the name of the DataMigrator Server.
- In the Host
box, enter the computer name or IP address where the DataMigrator
Server is running.
- In the Port
Number, enter the Port number of the DataMigrator Server. If you used
the defaults when you installed your DataMigrator Server, the HTTP
Listener port number is 8117 and the TCP Listener port number is
8116.
- Optional. If
you enter a User ID and password in the Security input boxes, the iWay
client saves the entries, setting security to Explicit by default.
You will not be prompted for them again from the DMC.
-
Click Next.
Files are copied to the designated locations. Percent of
progress is noted during this process.
Informational messages
indicate that setup is configuring the product based on your specifications
and that the program folder and icons are being created.
-
Optionally,
you can start the DataMigrator Server and Web Console, or start
the Data Management Console as soon as the installation is complete.
-
Click Finish.
x
Procedure: How to Launch the Data Management Console and Connect to a Server
Note: For
non-Windows server installations, the DMC can be found in iWay Software\iWay
77 DM Client\Data Management Console. For Windows server installations, the
DMC can be found in iWay Software\iWay 77 DataMigrator Server\Data
Management Console.
-
From
the Windows Program menu, go to iWay Software\iWay 77 DM Client\Data
Management Console or iWay Software\iWay 77 DataMigrator Server\Data
Management Console.
The DMC opens with the available servers listed in the
navigation pane on the left.
-
Right-click
on the server you wish to use and click Connect.
If you have not entered connection information, the DMC
login dialog box opens, as shown in the following image.

-
If your
server has security enabled, enter your user ID and password in the
User Name and Password fields. If you are connecting with a domain
user ID, select the domain from the drop-down menu.
Windows requires that your user name be no longer than
32 characters.
Note: If you select Save
credentials, you do not need to enter these credentials
each time you connect, and the dialog box does not appear. However,
you must reenter this information when you change your password
for the server. To do so, right-click the server name in the navigation
tree and select Properties to reopen the
Remote Server Configuration dialog box.
-
Click Connect.
For data retrieval and processing to occur, you must perform
this connection step each time you start the DMC.
x
Procedure: How to Add a Node to Identify the Server to the Data Management Console
You
can set up the DMC to connect to any number of servers in your enterprise.
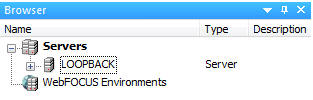
When
the DMC opens for Windows servers, the default LOOPBACK node is
listed under Servers in the navigation pane. It does not appear
if you open the DMC from a non-Windows installation.
Warning: Do
not delete the LOOPBACK node, since it is required for internal processing.
To
add another server node in this location:
-
Right-click Servers and
click Add Server Node.
The Server Node Configuration dialog box opens, as shown
in the following image.
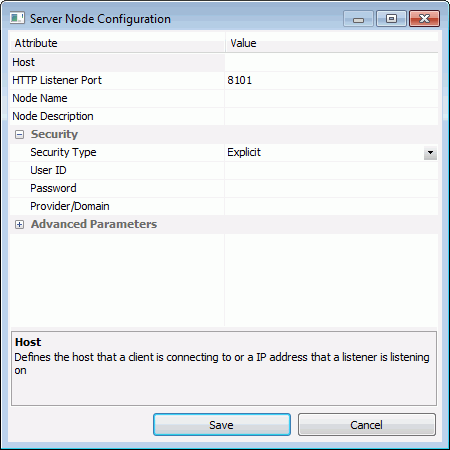
Note: The
DMC connects to server nodes using an HTTP listener port and the
properties specified in the Basic tab. Applications that connect
using the EDA API, like Resource Analyzer/Governor, use a TCP listener
port and the properties specified in the Advanced tab.
-
In the Node
Name field, enter a name for the Server node you wish
to add.
-
In the Host field,
enter the computer name or IP address where the DataMigrator Server
is running. For a server running on the same PC as the client, you
can enter localhost.
-
In the HTTP
Listener Port field, enter the port number of the DataMigrator
Server, which is 8117 if you used the installation defaults. This
port listens to all incoming requests from the DMC.
-
Optionally,
use a Secured Sockets Layer (SSL) by selecting that check box in
the Advanced Parameters section.
-
Optionally,
enter a description of the node in the Node Description field.
-
Security
is set to Explicit by default. When this setting
is in effect, the User ID and password you used to log on to Windows
are not passed to the server. If security is required, you must
enter it either at connection time or in the Security credentials
fields to the right.
Alternatively, for servers running on Windows, you can
choose IWA (Integrated Windows Authentication),
which passes the Windows User ID and password to the server when
a connection is made.
For information
about configuration parameters, see Viewing Properties.
-
Click OK.
The node is added to the Servers tree, as shown in the
following image:
You
can test the connection between the DMC and the DataMigrator Server
you have added.
x
Procedure: How to Test the Server
Before you proceed,
it is recommended to test the connection between the DMC and the
DataMigrator Server.
To ensure that the server is running
and that you are able to retrieve sample data:
-
In the
DMC, right-click the server name and click Test Server.
If you can connect to the server, the Input Query dialog
box opens, as shown in the following image. The default query is
select CAR from car.
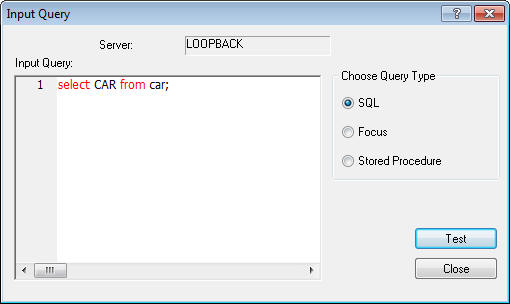
You
can change the test query, but the default, based on sample data
delivered with your software, is sufficient to verify that you can
retrieve data.
-
Click Test.
The answer set shown in the following image appears in
the right pane of the DMC, behind the Input Query dialog box.
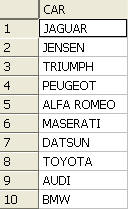
-
Click Close to
close the Input Query dialog box and examine the test output.