- In Report Painter, confirm that Excel 2000 (EXL2K) or Excel 2000 Formula (EXL2K FORMULA) is selected as the output format on the Report Options dialog box.
-
Click
the worksheet option, Define a range name for the data,
on the Format tab of the Report Options dialog box, and type in
a name.
Note: The name should not contain any spaces and there is a 256 character limit for named ranges.
- Click the Display repeated sort values option on the Output tab of the Report Options dialog box to prevent discontinuous data in a report. This is recommended for use with Named Ranges.
- Click OK and run the report.
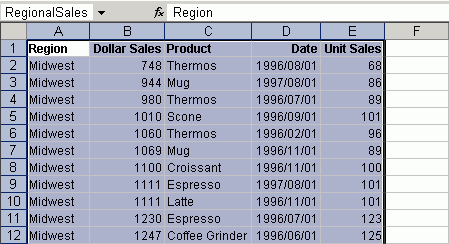
Note that you will have to select the named range from the Name Box drop-down list.
The following example creates one report, in one worksheet of an Excel workbook. The tabular output is assigned an Excel Named Range, defined as RegionalSales that begins at cell A1 and continues to cell E4318.

These steps create the output in this example:
- Open the GGSALES data source in Report Painter.
- Identify and
format your report columns.
- Identify your sort columns. Click By on the Report Painter toolbar and double-click or drag REGION and DOLLARS from the Fields tab of the Object Inspector.
- Identify your detail columns. Move the insertion point after the Dollar Sales column. Click Detail on the Report Painter toolbar and double-click or drag PRODUCT, DATE, and UNITS from the Fields tab of the Object Inspector.
- Confirm and
set up the Excel report output format.
- Click Output from the Report menu and ensure that Excel 2000 (EXL2K) is selected as the report output.
- Click the Display repeated sort values option to prevent discontinuous data in a report.
- Define an Excel Named Range.
- Click the worksheet option Define a range name for the data, on the Format tab of the Report Options dialog box.
- Type RegionalSales in the Define a range name input field.
- Click OK to close the Report Options dialog box.
- Run the report
and view select the named range from the Name Box drop-down list.