In this section: How to: Reference: |
You can customize an existing Join by changing the files
or fields involved. If no default Join was created, you can use
the same technique to specify a connection explicitly.
You can also change the Join name, make the Join a single instance,
use a virtual field as the Join field, and add tag names to the
Join files.
For related information, see Working With Joins.
x
Procedure: How to Remove a File From the Join
-
Click
the table of the file you want to remove.
-
Click
the Delete button on the toolbar or press the Delete key.
A confirmation dialog box appears.
If you
delete the host file, all cross-referenced files are automatically deleted.
x
Procedure: How to Delete a Join
-
Right-click
the Join connector line.
-
Select Delete from
the context menu.
You
can also select the Join connector line and click the Delete button
on the toolbar, or press the Delete key.
The
files remain in the window with no connector line between them.
x
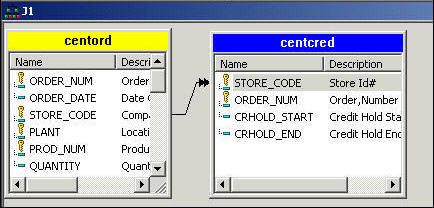
Procedure: How to Specify Join Fields
To
create your own Join (after deleting the existing Join, if necessary):
-
Select
a field in the host file panel.
-
Click
and hold the selected field.
-
Drag
the selected field from the host file panel onto the matching field located
in the cross-referenced file panel. The cursor changes and displays
the appropriate icon when a join is possible.
-
Release
the mouse button.
A Join
connector line appears.
x
Reference: Usage Notes for Specifying Join Fields
- You can multi-select
fields in the host file to join to a single field in the cross-referenced
file when both are FOCUS files. For other file types (for example,
EDA, Oracle, DB2, and so on) you must join a host field to a cross-referenced
field, one pair at a time.
- For non-FOCUS
joins, you can join a maximum of 16 fields from each file.
x
Procedure: How to Create Additional Joins
You
can leave the Join window open and create another Join by:
- Clicking the New
Join button from the Join toolbar.
- Selecting New
Join from the Developer Studio File menu.
- Selecting New
Join from the right-click context menu in the Join window.
You
can define up to 63 concurrent Joins that will have a maximum of
64 segments in the new join structure.
x
Procedure: How to Make a Join a Single Instance
By
default, each Join is a multiple instance.
To make the Join a single instance:
-
Right-click
the Join connector line.
-
Select Single
Instance from the context menu.
x
A default name is automatically assigned to each Join.
You can use the Join name to later clear the Join and to prevent
another Join from overwriting it. If you remove the Join name completely,
any subsequent unnamed Join will overwrite this Join.
x
Procedure: How to Change or Remove the Default Join Name
-
Right-click
the Join connector line and select Join Name from
the context menu. The Join Name dialog box displays the default
Join name.
-
Edit
or delete the name in the Join Name box and click OK.
You can also provide a description. This is not used in
the Join command. It is used for reference purposes. A comment (-*)
is added to the procedure. For example, -*JOINDESC J0.
Note: The
following words cannot be used as a Join name: ALL, AND, AS, IN,
JOIN, TAG, TO, WITH.
x
Procedure: How to Display Current Join Structures
To
display a list of joined data sources, issue the command from the
Command Console:
? JOIN
This
displays every Join currently in effect.
xUsing a Virtual Field as the Join Field
A virtual field is a temporary field that you describe
in a Master File or procedure. The value of the virtual field is
calculated and treated as part of the data source.
Consider the following factors before making a virtual field
the host field in a Join:
- If you create
the virtual field in a procedure rather than in the Master File,
you must make sure the virtual field runs after the Join runs because
a Join clears all existing virtual fields.
- If there is
a Join connector line, you must delete the line before creating
the Join on the virtual field. You cannot join multiple fields with
this option. The virtual field must be the only Join field.
x
Procedure: How to Use a Virtual Field as the Join Field
-
Click
on the caption in the Fields window of the host file to make it
active.
-
Click
the Define Field button on the toolbar.
The Join Define in File dialog box opens.

-
You
must associate the virtual field with a segment of the data source:
-
Enter the name of the virtual field in the Define Field box.
-
In the With Field drop-down box, choose the name of any real
field from the segment in which you want to put the virtual field,
and click OK.
The virtual field appears in the Fields window of the host
file.

-
To complete
the Join, drag the mouse pointer from the virtual field to a matching
field in the cross-referenced file.
You
cannot join multiple fields with this option. The virtual field
must be the only Join field.
x
Reference: Join Define in File Dialog Box
The Join
Define in File dialog box has the following fields and options:
-
Define Field
-
Identifies the virtual field that is the host field in the Join.
-
With Field
-
Associates the virtual field with a segment in the data source.
Select any field from the segment in which you want to place the
virtual field.
x
Tag
names provide a way of making identical field names a single instance.
They function as aliases for the file names in the Join. Tag names
are useful when you join a file to itself because in such a Join
all field names, segment names, and file names are the same in the host
and cross-referenced files. For more information, see Joining a Data Source to Itself: The Recursive Join. Tag names are also useful if a file is
used as a target more than once in the join structure.
A procedure can use the tag name of a file as a qualifier for
field names and aliases in the file.
If you create a report using a recursive Join without tag
names, the field names in the cross-referenced file are prefixes
with the first four characters of the Join name.
x
Procedure: How to Add a Tag Name
To
add a tag name to a file in the Join:
-
Double-click
the link between the tables. The Join Properties dialog box appears.
The Join Properties dialog box also appears if you right-click a selected
link or select Properties from the View menu.
A thick line appears when a join is selected.
-
Enter
names in the Host Tag and Cross Tag name fields and click OK.
Note:
- The following
words cannot be used as a tag name: ALL, AND, AS, IN, JOIN, TAG,
TO, WITH.
- Tag names can
be up to eight characters in length.
Example: Impact of Tag Names on Join
Syntax
The following example illustrates the effect of
tag names on the Join syntax:
JOIN
JOBFILE.JOBSEG.JOBCODE IN jobfile TAG tag name Job TO ALL
JOBFILE.JOBSEG.JOBCODE
IN jobfile TAG tag name Jobc AS J4
END
If
you add the tag name FILE1 to the host file, and the tag name FILE2
to the cross-referenced file, the following Join is created:

A
report can refer to the field names in the host file with the qualifier
FILE1 and in the cross-referenced file with the qualifier FILE2,
for example, FILE1.JOBSTART and FILE2.JOBSTART. For additional information,
see How to View Join Syntax.
Tag
names are not supported in Report Painter. You can use qualified
field names in Report Painter to differentiate fields and identify
the table from which you want to retrieve data.