How to: |
The server supports various levels of profiles to provide flexibility for designing and running production applications. The order in which the following profiles are listed correlates with the search order in which they are processed by the server when multiple profiles exist.
-
Global profile. The
first level of profile, the global profile, is a startup file that
is automatically created during installation and configuration of
the server. It contains default environment settings required for
the correct operation of the server.
The global profile remains in effect throughout a user session. You can modify the global profile default settings. You can also add any commands or code that all connected users require before application processing begins.
Characteristic
Description
Name
edasprof.prf
Location
UNIX: $EDACONF/etc directoryWindows: $EDACONF\etc directoryIBM i: IFS $EDACONF/etc directoryOpenVMS: EDACONF [.ETC] directoryOverride
Set the environment variable EDASPROF to point to an alternate location of edasprof.prf (you cannot rename edasprof.prf).
Sequence in search order
First
Scope
Applies to all connected users.
-
Service profile. A
service profile specifies settings for the server environment, but
the settings in this level of profile apply only to users associated
with a specific service. When a user connects to the server, the
service profile settings are applied and remain in effect throughout
the user session.
A service profile may contain settings that are the same as those in a global profile. You can specify a service profile in the Web Console by selecting Workspace from the menu bar. In the navigation pane, right-click the Workspace folder, and select Settings, and then Profile Settings.
You can create a service profile from the Workspace folder. Expand the Configuration Files folder in the navigation pane. Right-click Server Profiles and select Edit. You can also use any standard system editor. If you use an editor, create the service profile in the correct location.
Characteristic
Description
Name
name.fex
Location
Follows the normal search path for procedures (focexecs).
Override
None
Sequence in search order
Second
Scope
Applies to all users of the same service.
- Role profile. A role profile specifies settings for the server environment, but the settings in this level of profile apply only to users assigned to a specific role. When a user connects to the server, the role profile settings are applied and remain in effect throughout the user session.
-
Group profile. A
group profile specifies settings for the server environment, but
the settings in this level of profile apply only to users associated
with a specific security group. When a user connects to the server,
the group profile settings are applied and remain in effect throughout
the user session.
A group profile may contain settings that are the same as those in a global profile.
Server Administrators need to register group profiles and users to give them privileges that are different from those they inherit from their default role. Group profiles are used to set DBMS connections, variables, and other settings that should be executed for group users when they connect.
If you use an editor, create the group profile in the correct location.
Characteristic
Description
Name
group_name.prf
Location
UNIX: base_directory_name/ibi/profilesWindows: base_directory_name\ibi\profilesIBM i: IFS base_directory_name/ibi/profiles directoryOpenVMS: base_directory_name [.IBI.PROFILES] directoryOverride
Set the edaserve.cfg keyword edaprfu to point to an alternate location of group_name.prf.
Sequence in search order
Third
Scope
Applies to all users of the same security group.
-
User profile. A
user profile specifies settings for the server environment, but
the settings in this level of profile apply only to a specific user
ID. When a user connects to the server, the user profile settings
are applied and remain in effect throughout the user session.
A user profile may contain settings that are the same as those in a global profile.
You can create a user profile at any time as by:
- From the menu bar, select Workspace.
- Expand the Configuration Files folder in the navigation pane.
-
Right-click
the User/Group Profiles folder, and select New
Profile.
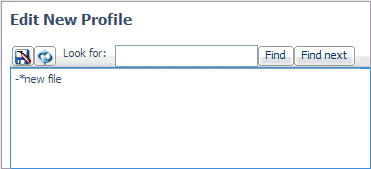
The Edit New Profile page opens.
-
Enter the
profile parameters and click the Save As button.

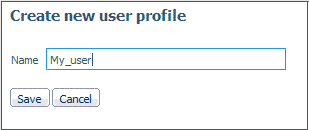
The Create new user profile page opens.

-
Enter a
profile name and click Save.
You can also use any standard system editor. If you use an editor, create the user profile in the correct location.
Characteristic
Description
Name
user_id.prf
Location
UNIX: base_directory_name/ibi/profilesWindows: base_directory_name\ibi\profilesIBM i: IFS base_directory_name/ibi/profiles directoryOpenVMS: base_directory_name [.IBI.PROFILES] directoryOverride
Set the edaserve.cfg keyword edaprfu to point to an alternate location of user_id.prf.
Sequence in search order
Fourth
Scope
Applies to a specific user.