Synonyms define unique names, or aliases, for each Hive
table that is accessible from a server. Synonyms are useful because
they hide the location and identity of the underlying data source
from client applications. They also provide support for extended
metadata features of the server, such as virtual fields and additional
security mechanisms.
Using synonyms allows an object to be moved or renamed while
enabling client applications to continue functioning without modification.
The only modification required is a redefinition of the synonym
on the server. The result of creating a synonym is a Master File
and Access File based on a given Hive table.
x
Procedure: How to Create a Synonym
To
create a synonym, you must have previously configured the adapter
and a connection.
-
From Web
Console menu bar, select Applications.
or
From the Data Management Console, expand the Applications folder.
-
Right-click
an application directory, select New and
click Synonym.
The Select Adapter dialog box opens.
-
Under the
Hive/Hadoop folder, select a connection and click OK.
The Select Synonym Candidate dialog box opens.
-
Select the Restrict
object type to” is set to “Table, views and other objects check
box.
-
Deselect Tables and Views in
the Further restrict search to section.
-
Click Next.
The Create Synonym for MongoDB dialog box opens.
-
Optionally,
expand the Customize data type mappings section
and enter a value for Maximum String Length or numeric precision.
-
Select the
check box for the objects that you want to create synonyms for.
If you want to change the name of the synonym from the default name,
click the name and edit it as needed.
-
Click Create Synonym.
The
Status pane indicates that the synonym was created successfully.
The synonym is created and added under the specified application
directory.
x
SQL Data Type mapping options are available in a report
available from the Web Console.
x
Procedure: How to Access the Data Type Report
To
access the Data Type Report:
-
Select Adapters from the
main menu.
-
From the Troubleshooting section of the Ribbon, click
the Data Types button.
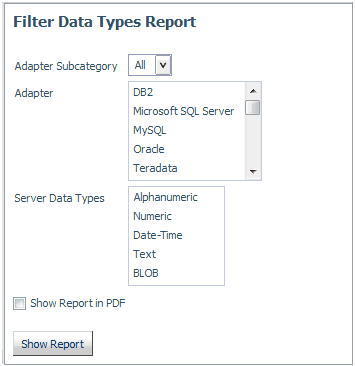
The Filter Data Types Report page opens, as shown in the
following image.

-
Select an Adapter Subcategory from
the corresponding list box.
-
Select an Adapter from the corresponding
list box.
-
Select a Server Data Type from
the corresponding list box.
-
Click Show Report.
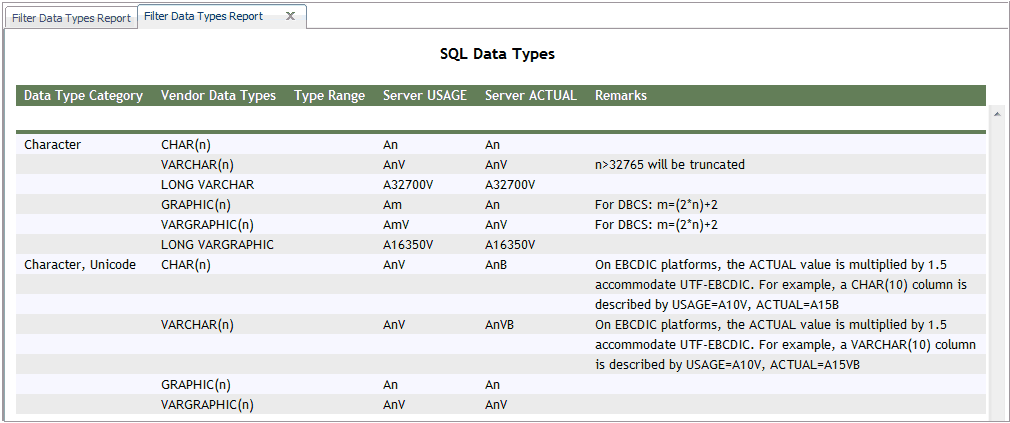
The
Filter Data Types Report is displayed, as shown in the following
image.

Note: You can
also display the report as a PDF by selecting the Show
Report in PDF check box.

