Creating Hold Files

In this section:

How to:

This section contains examples of how you would use a HOLD file.

Note: Across fields are not allowed in HOLD files.


Top of page

x
Procedure: How to Create Multiple Components in a Document From a HOLD File

This procedure describes how to extract fields into a HOLD file and then create multiple components in a document from the HOLD file.

  1. Select a data source.
  2. Add fields that need to be extracted for use in subsequent requests.
  3. On the Home tab, in the Format group, click File.
  4. In the Temporary dialog box, name the file, choose the format of the Hold file from the format drop-down list, and click Save.

    Note: The default is to create a temporary Hold file, which is deleted after the report or chart is run. Alternatively, you can create a permanent Hold file by selecting an application path folder location. This file will remain in this location after the procedure is run for future use.

  5. Select Create Document.
  6. On the Insert tab, in the Reports group, click Chart.
  7. Add fields to the chart.
  8. Insert another chart.
  9. Add fields to that chart.
  10. On the Format tab, in the Chart Types group, click Pie.
  11. On the Insert tab, in the Reports group, click Report.
  12. Add fields to the report.
  13. Add as many reports and charts as you want to complete your document.

Top of page

x
Procedure: How to Create a Tabular Report From a HOLD File

To create a tabular report from a HOLD file, begin by creating a report.

  1. In the Open dialog box, select the WF_RETAIL Master File.
  2. Add the following measure fields to the report:
    • Cost of Goods
    • Discount
    • Gross Profit
    • Quantity,Sold
    • Revenue
  3. Add the following dimension fields to the report:
    • Product Category
    • Product,SubCategory
    • Sale,Year
  4. On the Home tab, in the Format group, click File.

    The Temporary dialog box opens.

  5. In the Temporary dialog box, name the HOLD file, keep the default file type, Binary (*.ftm), and click Save.
  6. At the bottom of the canvas, click Create Report.

    The custom database structure displays in the Resources panel. The canvas is returned to a default blank state, enabling the development of a new report using the HOLD file.

  7. From the HOLD file, drag Quantity,Sold to the canvas.
  8. On the canvas, select the Quantity,Sold column heading.
  9. On the Field tab, in the Display group, click Aggregation and then click First Value.

    Note: The heading changes to FST Quantity Sold.

  10. Select the FST Quantity Sold heading.
  11. On the Field tab, in the Display group, click Hide Field to hide Quantity,Sold, as it will be used in a subsequent calculation.
  12. On the Data tab, in the Calculation group, click Summary (Compute).
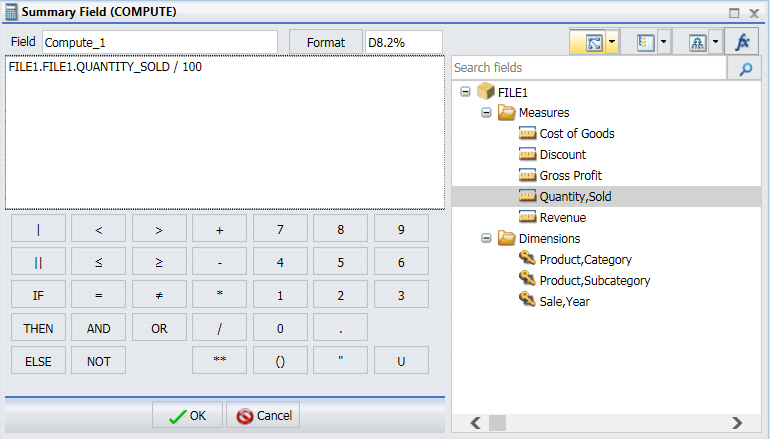
  13. In the Summary Field (COMPUTE) dialog box, do the following:
    • In the Format field, type D8.2%.
    • Double-click the Quantity,Sold field to add it to the formula box.
    • Add / 100 after the Quantity Sold field to calculate the percentage.

    The following image is an example of the Summary Field (COMPUTE) dialog.

  14. Click OK to close the dialog box.
  15. Drag Product,Category to the By Query field container.
  16. In the Query pane, select the Product,Category field.
  17. On the Field tab, in the Break group, select Subtotal to create Subtotals on Product,Category.
  18. Drag Product, Subcategory to the By Query field container.
  19. Drag Sale,Year to Across.
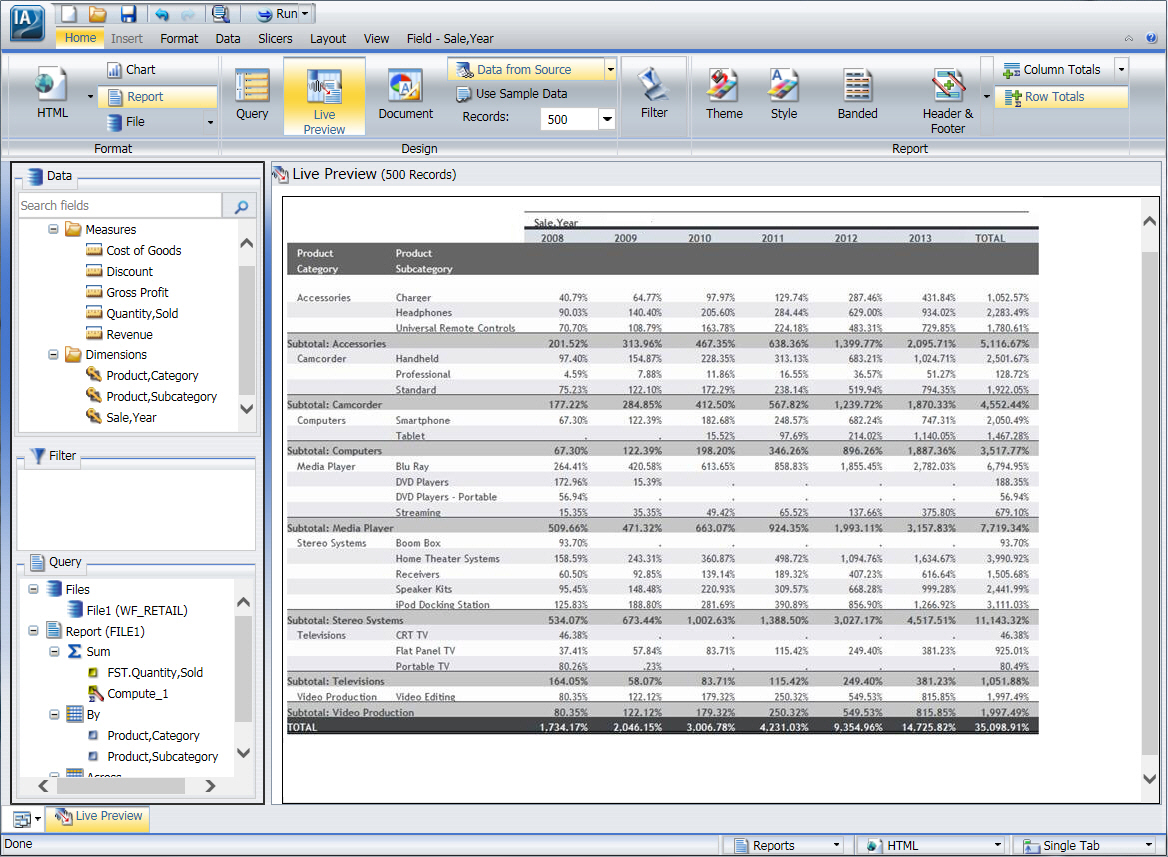
  20. On the Home tab, in the Report group, click Row Totals.

    The final report displays, as shown in the following image.


Top of page

x
Procedure: How to Create a HOLD File for a Subquery

The following procedure describes how to create a HOLD file for use in a subquery.

  1. Create a new report with at least one filter condition set.

    For example, the report shown in the following image lists Customer IDs with Gender equal to Female.

    Report of Customer IDs with Gender Equal to Female

  2. Click File.

    The File button is found on the Home tab, in the Format group, and on the Format tab, in the Destination group.

    The File button is a split button. Click the left side of the button to launch the Temporary dialog box. The down arrow on the right side also opens the Save dialog box so you can change settings or set them for the first time.

    An example of the File button and the associated ToolTip are shown in the following image.

    File button and ToolTip

    The Select a location and format dialog box opens, as shown in the following image.

    Select a location and format dialog box

    Note: The label Temporary appears at the top of the dialog box. When you select a folder, the label changes to Select a location and format, as shown in the following image.

  3. In the Select a location and format dialog box, provide the following:
    1. In the File name text box, type a file name.

      The default file name is File1.

    2. From the list menu, select SQL Script (*.sql) as the file format.
    3. Select a location for the HOLD file.

      The location is either Temporary, which is the default, or a writable server application folder.

      Note: If the HOLD file name already exists in the specified location, it will be overwritten without warning, when you click Save.

  4. Click Save.

    The Create Report button appears on the bottom of the InfoAssist Live Preview application window, as shown in the following image.

    Create Report button in Live Preview

  5. Repeat steps 2 - 4 to create as many HOLD files as you need.
  6. To use the HOLD file right away, select the corresponding option, as shown in the following image.

    Create Menu

    The following image is an example of the Live Preview application window when Create Report is selected.

    Note: When you are working with a report created from a HOLD file, if you try to switch data sources, or add data sources to the report, you are presented with warning messages.


Top of page

x
FOCUS Format Index Fields

FOCUS is the only format that supports an index field. The maximum number of fields to index is four. If the file format is FOCUS, then Index appears on the Query pane, as shown in the following image.

Focus Index on Query Pane


WebFOCUS