How to: Reference: |
From the Logo & Links window, you can insert an image, such as a company logo in the banner. The selected image file is copied to the WebFOCUS directory for access while running the view. If the image file is modified in its original location, you have to reinsert the image from View Builder because it is not automatically updated.
The logo image must be a GIF, JPG, or BMP file. The logo size is determined by the size of the available space on the banner, and is different for each of the available templates. For details, see Logo Size.
For information on links, see Customizing the Banner.
Note: If you select a banner template that does not require a logo, your window displays the title Links, rather than Logo & Links.
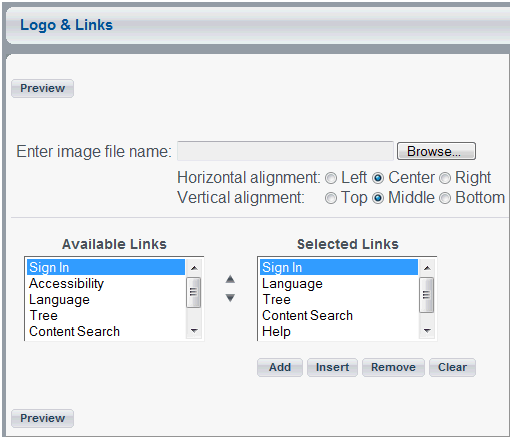
The Logo & Links window contains the image file name field with horizontal and vertical alignment radio buttons, an Available Links list box for adding links, and a Selected Links list box to order or remove links.
The following image shows the Logo & Links window.

The following table provides information about the maximum height and width supported for the logo image in each template.
|
Look Template # |
Height (pixels) |
Width (pixels) |
|---|---|---|
|
1 |
48 |
413 |
|
2 |
53 |
207 |
|
3 |
74 |
354 |
|
4 |
80 |
200 |
|
5 |
91 |
160 |
|
6 |
64 |
188 |
The Logo & Links window opens.
Note that the image must be a GIF, JPG, or BMP file.
The default is Center.
The default is Middle.
| WebFOCUS |