How to: |
Users permitted to Manage Users can manage user views (public, group, and personal) from the View Builder. The Manage Users option allows you to view, update the content of a personal page, and change the appearance of their Dashboard views.
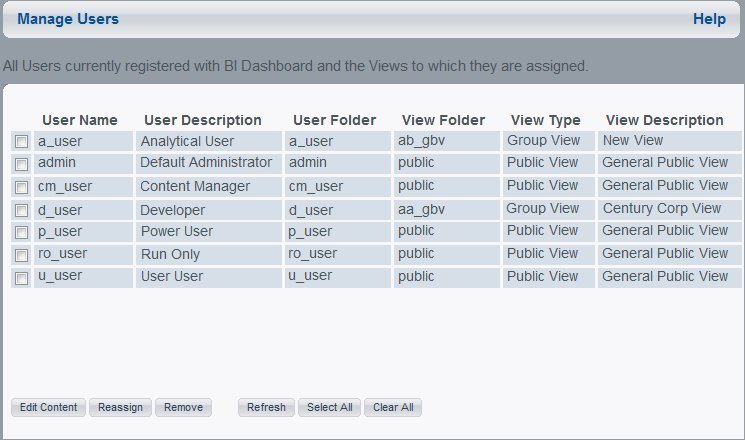
The following image shows the Manage Users Window.
The Manage Users window provides the following information:
The Content window opens.
Note: You can only edit content for one user at a time.
When you replace content, the users still have access to all of the domains (and the items in those domains) they are assigned to. Only Dashboard-specific items, such as content pages and content blocks, are replaced. The Favorites and Recent lists of users are cleared when you select the Replace User Content with View Content check box.
This procedure only removes the user from Dashboard, not Managed Reporting. If a user is accessing Dashboard when you remove them using the View Builder Manage Users page, a HTTP 500 error is displayed in the browser window. If the user accesses Dashboard again, the user will appear in the Manage Users list again.
| WebFOCUS |