In this section:
How to: |
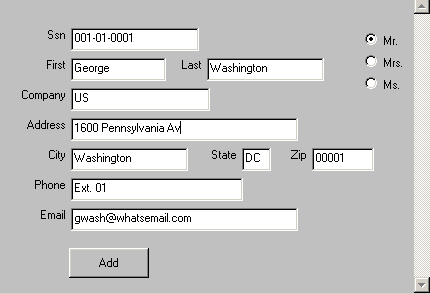
An example of the first form that you will create for the FanClub application is shown in the following image.

This form enables end users to add a new fan to the data source.
The information typed into this form will be written to the fannames data source, so it should correspond to the fields in the data source. The fastest way to create the fields on the form is to use the existing data source fields. Therefore, your first task is to add data source fields to the form.
WebFOCUS Maintain opens the Select Segment Fields dialog box. You must specify which data source stack fields you want to display on your form. First, you need to understand the role of data source stacks in your project.
How to: |
WebFOCUS Maintain procedures do not directly display or manipulate information in a data source. Instead, use data source stacks as intermediaries between end users and the data source.
A stack is a non-persistent (or in-memory) table where you can store and manipulate data from one or more data sources. WebFOCUS Maintain procedures use stacks to hold values you read from the data source and to manipulate data before writing it back to the data source.
Since this is a new procedure, there are no stacks yet. You are going to create one named AddFanStack, instead of using the default CustomerStk. The structure of the stack is based on the fields in the data source, in other words, the stack is going to have the columns SSN, LASTNAME, FIRSTNAME, and so on. However, this stack will be empty until you do something to put data in it.
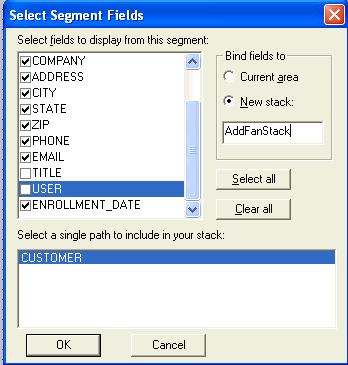
WebFOCUS Maintain places all of the fields from the CUSTOMER segment except TITLE and USER into the form.
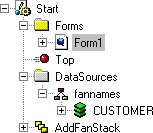
In the Project Explorer, there have been some additions to the components of Start:
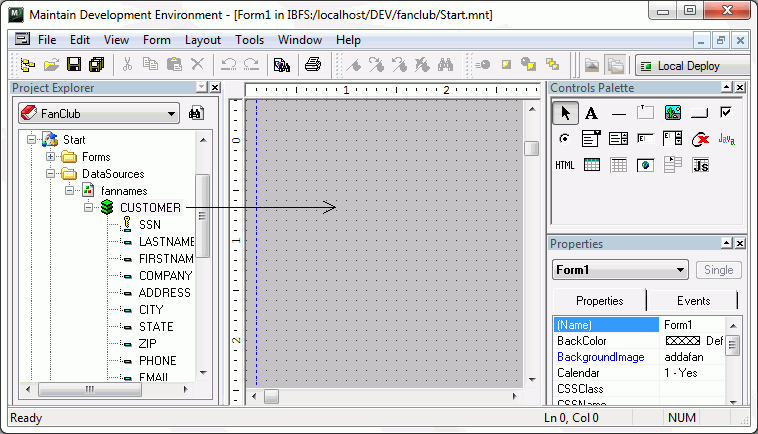
In the Form Editor, you design the user data adapters for your applications. The Form Editor design tools are identified in the following image.
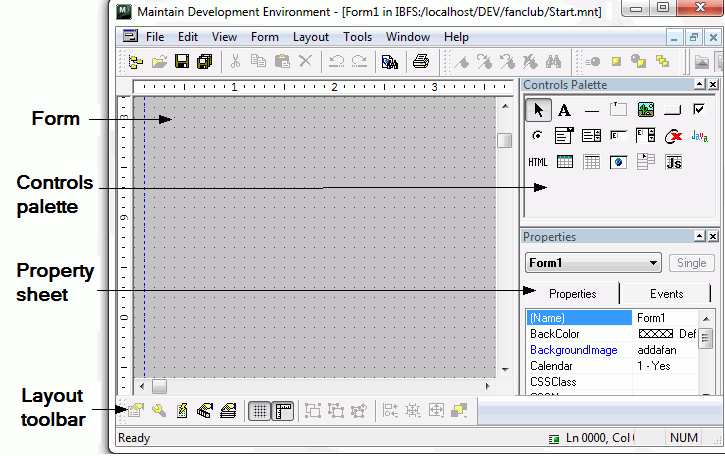
Note: The screen may look different from what you see here. The windows have been moved.
The following are the main components of the Form Editor:
Note: When you select an object, the mouse pointer changes to a crosshair so that you can draw it on a form. You can use the arrow keys to move the object to a specific location.
Note: The layout toolbar usually appears at the bottom of the application. If it is not visible, click the Tools menu, click Customize toolbars, then select Layout.
How to: |
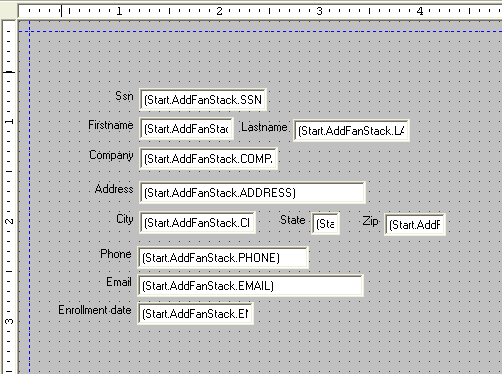
When you placed these fields on the form, WebFOCUS Maintain placed them in a column. This is not an optimal arrangement for the fields. Rearrange them so that the Firstname and Lastname fields are next to each other in a row, and City, State, and Zip fields are also next to each other.
 on the Layout toolbar. Make sure the form is the active window.
If the grid is on, when you move controls on your form, the Form Editor automatically snaps them to the closest grid point. This feature enables you to keep controls easily aligned on a form.
Since the grid is on, you preserve the correct vertical spacing between fields.
An example of this is shown in the following image.
How to: |
While Firstname and Lastname are certainly descriptive field prompts, they are definitely not English words. Rename these two field prompts to First and Last.
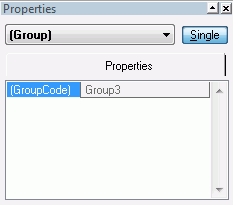
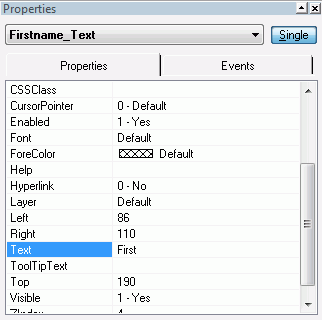
Notice that the control in the property sheet says (Group), indicating that the Firstname field is not a single control, but is actually two controls grouped together, as shown in the following image. It is useful to group controls so that WebFOCUS Maintain treats them as a unit. This means that you cannot move one without moving the other.
Firstname is made up of two controls: a text box named Firstname_Text that serves as the prompt, and an edit box control named Firstname_Edit where the end user types a value for the Firstname field. Together they are called a prompted edit box.
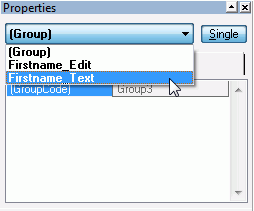
You can then see the properties for Firstname_Text.
How to: |
If you have been moving these controls around in the window and renaming prompts, your fields have probably become misaligned. The Form Editor enables you to align controls easily.
One of the alignment tools is designed especially for aligning entry fields such as these, which are made up of a text control and an edit box control.
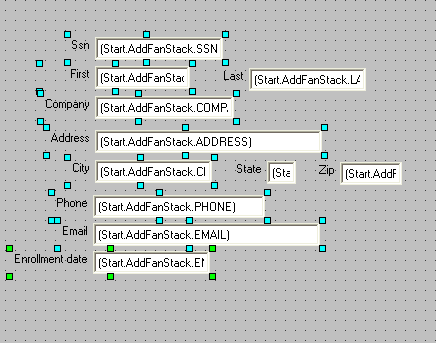
You can multiselect fields by selecting the first one and then holding down the Shift key or the Control key while you select the remaining fields.
Notice that one of the fields has green handles, while the other ones have blue handles. The field with green handles is the anchor control, meaning the field with which all the other fields are aligned, as shown in the following image.
or
In the Layout toolbar, click the Align Edges button  .
.
Then click the Center vertically button  in the pop-up toolbar.
Note: You can adjust the fields manually to refine your layout.
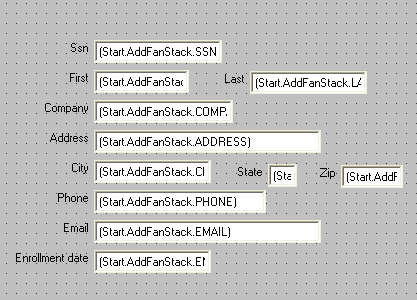
Your entry fields should look like this:
| WebFOCUS |