How to: Reference: |
The Data Flow interface consists of:
As shown in the following image, when you create a new flow, the Data Flow tab opens by default, with an SQL object in the workspace to anchor the flow. By default, the Synonyms button in the navigation pane is active and ready for you to add data source objects. You can change this from the Options dialog box by deselecting the Automatically switch filters check box on the General page. The Flow tab is also active.
You can add data source objects and data target objects, and use the SQL object to establish rules for extracting and moving data between them.
For more information on the Data Flow Interface, see Working in the Data Management Console.
On the Home tab, in the Filter group, clicking Procedures shows saved flows, procedures, and user functions. You can add flows and procedures to a process flow by dragging them from the navigation pane into the workspace.
If
you right-click a flow  or a
procedure, or highlight one and press the menu key
or a
procedure, or highlight one and press the menu key  ,
a shortcut menu opens, as seen in the following image.
,
a shortcut menu opens, as seen in the following image.
The following options are available:
Places the flow or stored procedure in the workspace.
Opens the code behind the flow in the workspace.
Note: If you change the text behind the flow, those manual changes will be lost if you edit and resave the flow in the DMC. This option is only available for a flow.
Submits the flow to the server. This option is only available for a flow. Log information is written to the DataMigrator Log.
Runs the flow or stored procedure immediately. Log information appears in the console log window.
Has the following option:
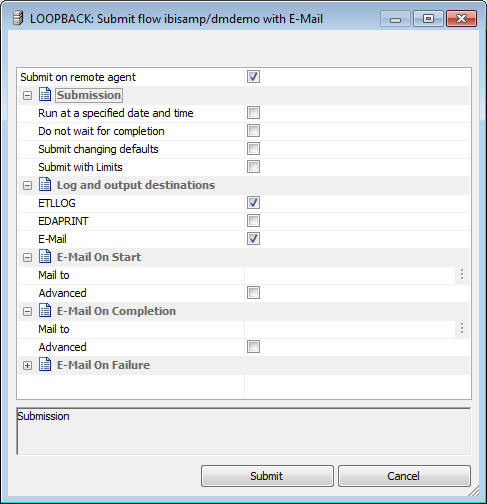
Sends an email when the procedure begins.
Sends an email when the procedure completes.
Only used if the procedure fails.
Is the field where you enter the email address that the message is being sent to.
On Completion or Failure, the email message will contain attachments of the log and output from the procedure, if there are any.
Has the following options:
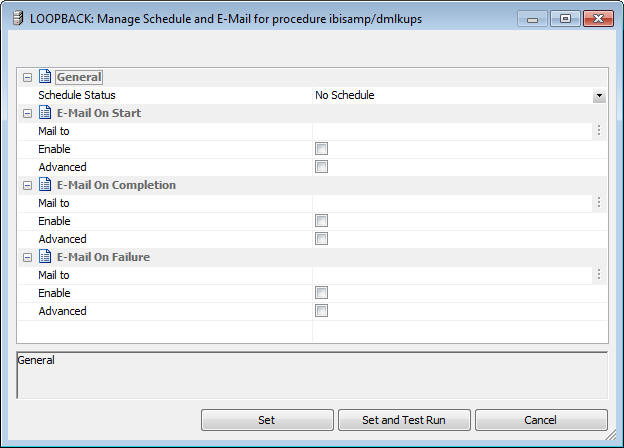
For more information about scheduler options, see Schedule Attribute Pane. For more information on email notifications, see Flow Properties Pane - Email Attribute.
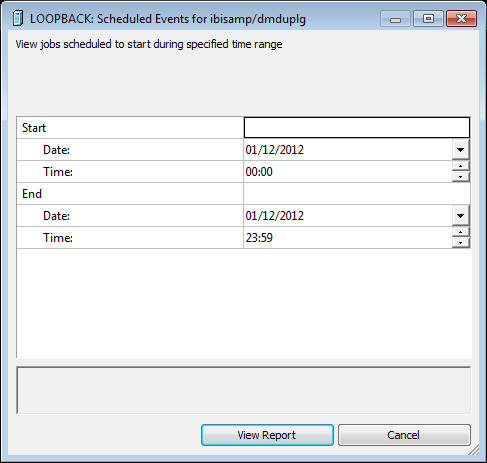
The Scheduler must be active to run the Scheduler Events report.
Has the following options:
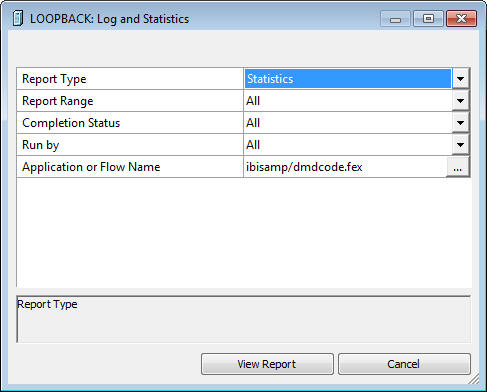
Allows you to select either a log or statistics report.
Allows you to select to view the last report, all the reports, or a report specified within a select time range.
Allows you to view the log for all flows, all completed flows, all flows completed successfully, or all completed flows that contained errors.
Allows you to view reports for all flows, including those initiated by the scheduler or submitted by the user. This includes flows initiated from the DMC, WC, and CMRUN.
Opens a report that shows every flow or stored procedure that calls the selected flow.
Opens a report that shows all synonyms used by the selected data flow and all flows and procedures used by the selected process flow.
Provides a summary of the attributes of the flow. This option is only available for flows.
Cuts, copies, deletes, or renames the flow or stored procedure.
This option is only available if the server is started with security enabled. For more information, see Manage Privileges Dialog Box.
This option only appears if you have a source management program configured on your machine. It has the following options:
Adds or checks files into source management.
Checks files out of source management.
Cancels a check out.
Provides the source management history of a file.
Opens a Properties dialog box of the selected flow or stored procedure.
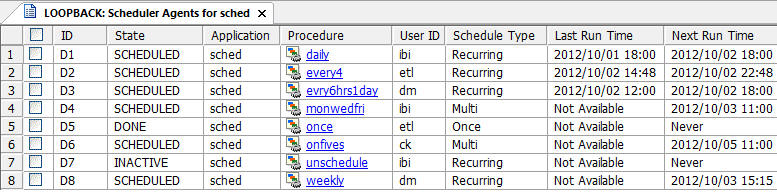
The Scheduler Agents for window opens, as shown in the following image.
On the Home tab, in the Filter group, click Synonyms to show synonyms that describe the data. You can use them as data sources or data targets in your flow. The synonym type is listed after its name. The type of synonyms available will depend on the adapters that are configured on your server.
If you right-click a
synonym, or highlight one and click the menu key ,
the following options are made available:
Opens the synonym in the workspace. The file, segments, and columns appear on the left, and their attributes and values appear on the right.
Places the synonym code in the workspace where it can be edited.
Places a relational synonym Access File in the workspace where it can be edited. This option is not available for FOCUS files.
In WebFOCUS Developer Studio, this option enables you to create a business view of a synonym by limiting the columns available to any retrieval request that references the business view.
Note: The use of Business Views as a source in DataMigrator is planned for a future release.
Shows a sample of the data associated with the synonym.
Provides the data characteristics for synonym columns. This selection has the following options:
Shows the values for the selected synonym only.
Shows a count of the number of rows in the selected source table. For a multi-segment synonym, it shows the count for each segment.
Allows you to select the columns that you would like to analyze as potential keys to the source table.
Refreshes the selected synonym. Updates the synonym with changed field information while preserving its old title, description, usage, DEFINE field, and DBA information.
This selection has the following options:
Deletes the data and recreates the underlying DBMS table of the synonym.
Synonyms created in Release 7.7.04 or later include information about database indexes.
Note: Use caution when using this command if the database table was created using the data description language of a particular RDBMS. Some attributes of relational database tables, including the column order and database constraints, are not reflected in the synonym, and therefore, cannot be recreated.
Deletes the data from a synonym. This is useful to clear a synonym that will be used as a data target.
Drops the underlying table from the database.
Loads the synonym with sample records (for relational and flat file synonyms). You will be prompted for the number of sample records to load into the table.
Note: If you are inserting sample data into a flat file, the synonym must contain a DATASET statement indicating where to put the data.
Allows you to view and edit data in a database table.
Creates a simple Data Flow that selects all rows and columns from a source table.
Allows you to assess the impact of a change to the synonym on this server and any subservers that use it. Lists all flows, stored procedures, or reports using the synonym. For data flows, it will indicate whether the synonym is used as a source or a target. Flows and stored procedures are referred to generically as procedures.
For a synonym that contains a cluster join or multiple tables, all synonyms directly referenced by the selected synonym will be shown.
This option only appears if you have a source management program configured on your PC. It has the following options:
Adds or checks files into source management.
Checks files out of source management.
Cancels a check out.
Provides the source management history of a file.
For more information regarding source management programs, see Source Management.
Cuts, copies, deletes, or renames the synonym.
This option is only available if the server is started with security enabled. For more information, see Manage Privileges Dialog Box.
Opens a Properties dialog box of the selected synonym, as shown in the following image.
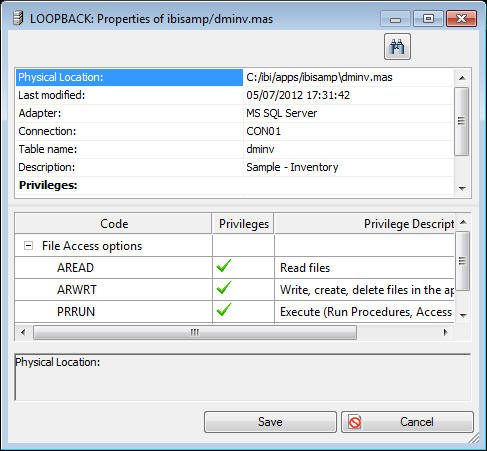
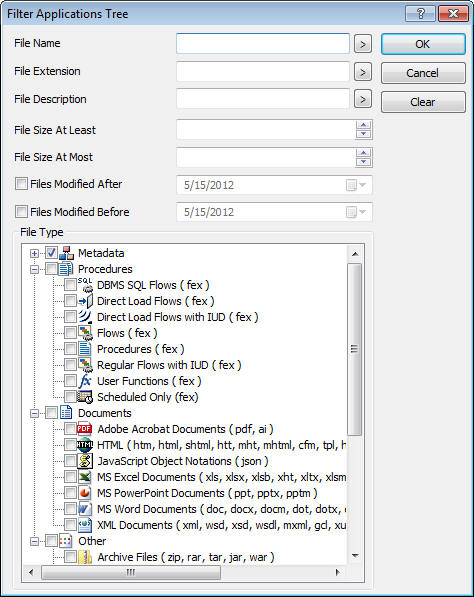
The Advanced command gives you finer control over the file types that appear in the navigation pane. For example, you could specify that you only want to see synonyms for the MS SQL Server tables. It also lets you restrict display to files with specified names (using wildcards) or descriptions, files modified in a specific time period, or those of a specified size.
| iWay Software |