Creating Page Drill-Down Links in BI Portal
Using page drill-down links,
you can dynamically navigate to pages and reports within your portal.
This feature is especially useful in portals with multiple pages, because
it allows you to link to a specific item or point in your content.
You can also pass a parameter from a link to its output, such as
a chart or report.
To build page drill-down links, you need to perform the following
steps:
-
Create Drill-Down Links. Create hyperlinks within
a report, which you will later configure to point to a page and
parameterized content.
-
Create Parameterized Content. Create charts and reports
to which the drill-down links will point.
-
Set Up a Portal for Drill-Down Links. Create the landing
page for the drill-down links.
-
Configure Drill-Down Links. Specify the output location
for the drill-down links.
xStep One: Creating Drill-Down Links
In this step, you will create a simple report with hyperlinks,
which you will later configure to point at a specific output in
a portal.
x
Procedure: How to Create Drill-Down Links in a Report
-
Sign-in to WebFOCUS as a designer or administrator.
-
Right-click a folder, point to New,
and then click Report.
WebFOCUS InfoAssist opens.
-
Select a data source file and click OK.
-
Drag fields from the Data pane onto the canvas or into
the Query pane to create a report.
For more information on how to create a basic report, see
the Getting Started With InfoAssist chapter, in the InfoAssist
User’s Manual.
-
Click the field that you want to use for the drill-down
function to highlight it.
-
In the Field tab, in the Links group,
click Hyperlink.
The Drill Down dialog box opens.
-
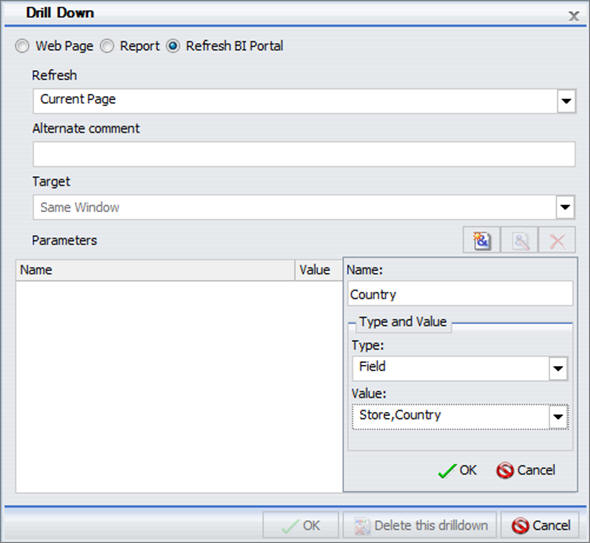
Select the Refresh BI Portal radio button.
-
From the Refresh list, click All Pages.
-
Click the Add Parameter button.
-
Type a name for the parameter.
Note: Remember the name of the parameter. You will
use it in the subsequent steps.
-
In the Type list, click Field.
-
In the Value list, click the field that you have highlighted,
and then click OK.
The following image shows the example of the Drill Down
dialog box, where Country is the name of
the parameter.
-
Click OK.
The drill-down links are added to the entries of the highlighted
field.
Note: The drill-down links remain inactive and
evoke no error messages until the target value is configured.
-
Save the report.
xStep Two: Creating Parameterized Content
In this step, you build parameterized reports and charts
that will serve as outputs for your drill-down links.
x
Procedure: How to Create Parameterized Content for Drill-Down Links
-
From InfoAssist, click the application
button, then click New.
Click Build a Report.
-
Select the same data source file that you used for the
drill-down report, and then click OK.
-
Drag fields from the Data pane onto the canvas or into
the Query pane to create a report.
-
In the Data tab, in the Filter group,
click Filter.
The Create a filtering condition dialog box opens.
-
Double-click the Double-click or press F2
to edit! text.
-
Set the following values:
-
In the Field drop-down list, click the same
field for which you have created drill-down links in the previous
report.
-
Keep the Equal To default value.
-
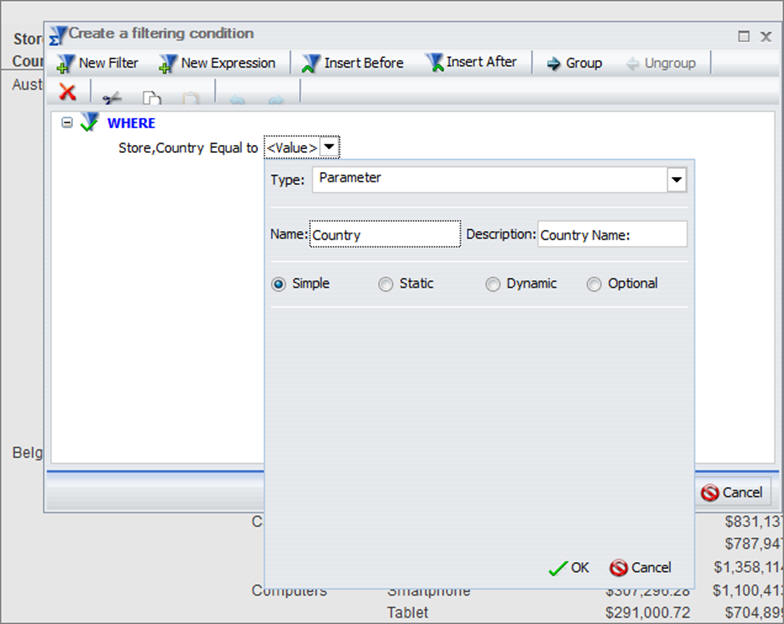
In the Value dialog box, set Type to Parameter,
keep the Simple radio button selected, and type the name of the
parameter that matches the parameter in the drill-down report, and
then click OK.
The following image shows an example of the filtering condition,
where Country is the name of the parameter.
-
Click OK.
-
Save the second report and close WebFOCUS InfoAssist.
-
In the Resource tree, right-click the new report, point
to Edit With, and then click Text
Editor.
-
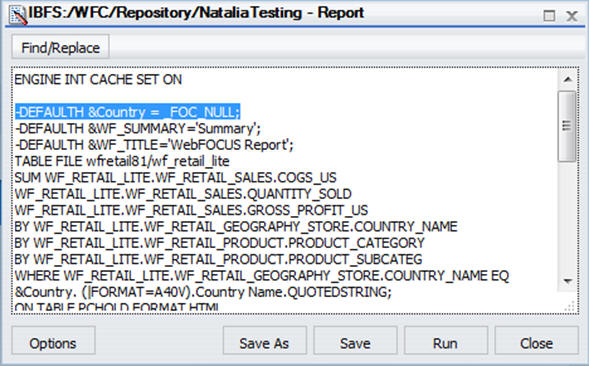
Incorporate the following line of code into your report:
-DEFAULTH &Parameter = _FOC_NULL;
where:
Parameter
is
the name of the Parameter that you have previously created.
The
following image shows an example of the report syntax, where the
_FOC_NULL statement is added with Country as a name of the parameter.
-
Click Run.
Note: Instead of an auto-prompt form, standard for
parameterized content, the report displays all fields by default.
-
Click Save and close the Text Editor.
-
Repeat steps 1-12 to create more content.
xStep Three: Setting Up a Portal for Drill-Down Links
In this step, you will create a landing page for the
drill-down links and incorporate the drill-down report that you
created in Step One: Creating Drill-Down Links, to a Portal.
x
Procedure: How to Set Up a Portal for Drill-Down Links
-
In the Resource tree, right-click the
Portals node, the click New Portal.
-
Populate the fields of the New Portal dialog box.
For more information on creating a new portal, see Launching the Portal Designer.
-
Click OK.
The Portal Designer opens.
-
Click the New Page button
 .
.
The new page opens.
Note: In the Properties
panel, note the value of the Page Name field. You will use this
value in the subsequent steps.
-
Right-click the page canvas, and then click Page Layout.
The Choose a Layout dialog box opens.
-
Select the layout type for your page.
In this example, we select Two Column layout.
-
Click the first column.
-
In the Insert tab, in the Containers group,
click Panel.
A Panel container is inserted inside the first column.
-
Click the content area of the container.
-
In the Properties panel, type the new value in the Content
Area field, as shown in the following image.
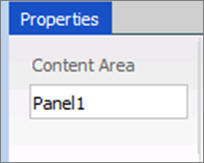
Note: This
value will be used in the subsequent steps.
-
Repeat steps 7-10 for other columns.
-
In the Insert tab, in the Content group,
click WebFOCUS Resources.
The Resource tree opens.
-
Drag the drill-down report to the Page1 canvas.
-
Drag the remaining content to the panels on Page 2.
xStep Four: Configuring Drill-Down Links
In this step, you edit the drill-down report to specify
the output location for the drill-down links.
x
Procedure: How to Configure Drill-Down Links
-
In the Resource tree, right-click the
initial report, point to Edit With, and then
click Text Editor.
The report opens in the Text Editor window.
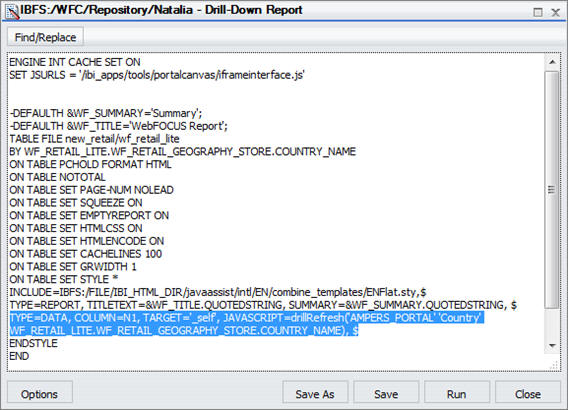
-
Scroll down to the syntax line, containing the text JAVASCRIPT=drillRefresh.
The following image shows an example of the drill-down
report syntax. You will need to edit the highlighted line.
-
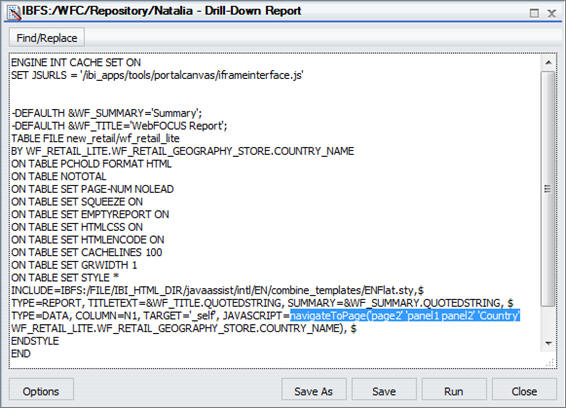
Edit the code as follows:
-
Change drillRefresh to navigateToPage.
-
Change AMPER_PORTAL to the name of the landing page
for your drill-down links.
-
After the page name, insert the names of the panels,
separated by spaces. Ensure that you enclose these names in single
quotation marks.
The following image shows an example of modified drill-down
syntax.
-
Click Save and close the Text Editor.
-
Optionally, customize your portal to achieve the desired
style and layout.
-
Click the Save button and close the Portal Designer.
-
In the Resource tree, right-click your new portal, and
then click Run.
-
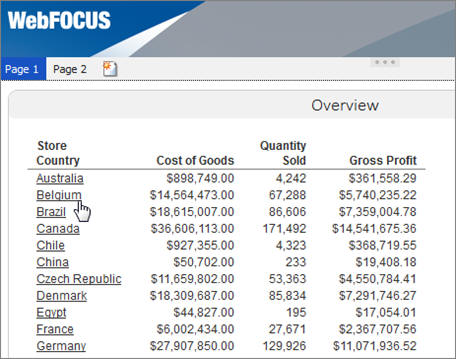
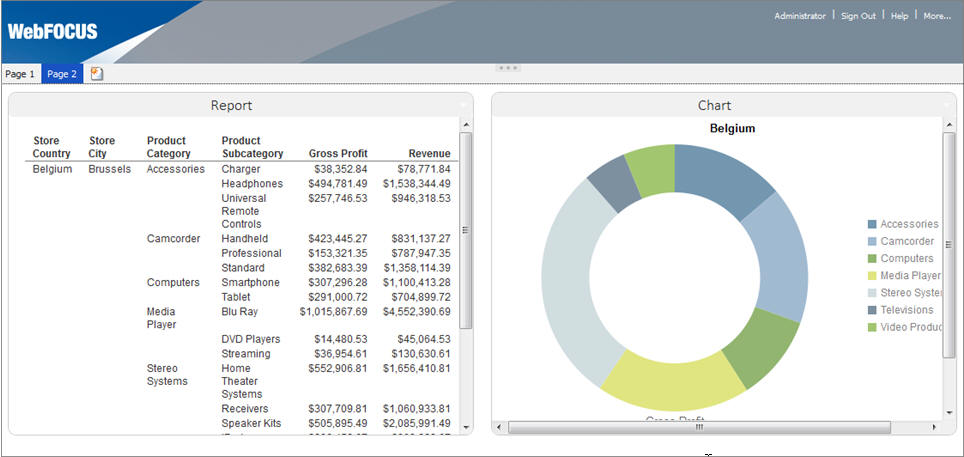
At run time, click any link on the first page of the
portal.
The second page displays, and the panel refreshes to show
the correct data.
Note: If you drill down to a page
that has changed, you will not receive an error message, and must
ensure that your syntax values are set correctly.
The following
images show the drill-down function at run time.