A Global filter enables you to link and filter several
items of content with a single control. This creates a dynamic view
that allows quick access to the correct portion of data. To build
a Global Filter, you need to perform the following:
-
Create Parameters. Create Where statements, which
you will later use to build controls.
-
Create Controls. Create selection controls for your filter.
-
Set Trigger Actions. Configure a trigger action for each
control.
-
Apply a Global Filter to a Portal. Incorporate a Global
Filter into a portal layout and apply it to existing parameterized
content.
To create a Global Filter, you will need access to a WebFOCUS
desktop product, such as App Studio or Developer Studio. This example
uses WebFOCUS App Studio.
xStep One: Creating a Parameter
In this step, you create a parameterized
report, using the Report canvas in WebFOCUS App Studio.
x
Procedure: How to Create a Parameter in App Studio
-
Launch
WebFOCUS App Studio.
-
In the Environment Tree panel, in the Content node, right-click
a folder, point to New, and then click Report.
The Report Wizard opens.
-
Click Next.
-
Select a Master File. In this example, we use wf_retail_lite.mas.
-
Click Finish.
-
On the Report tab, in the Filter group,
click Filter, and then click Where.
The Expression Builder opens.
-
In the Data section, double-click a field that you want
to use as a first parameter.
-
In the Expression Grid, make the following selections:
-
equals from the Logical Relation
column
-
Parameter (Dynamic) from the Compare
Type column
-
From the Data section, draft a field that you want to
use as a second parameter to the (Where) section.
-
In the Expression Grid, make the following selections:
-
equals from the Logical Relation
column
-
Parameter (Dynamic) from the Compare
Type column
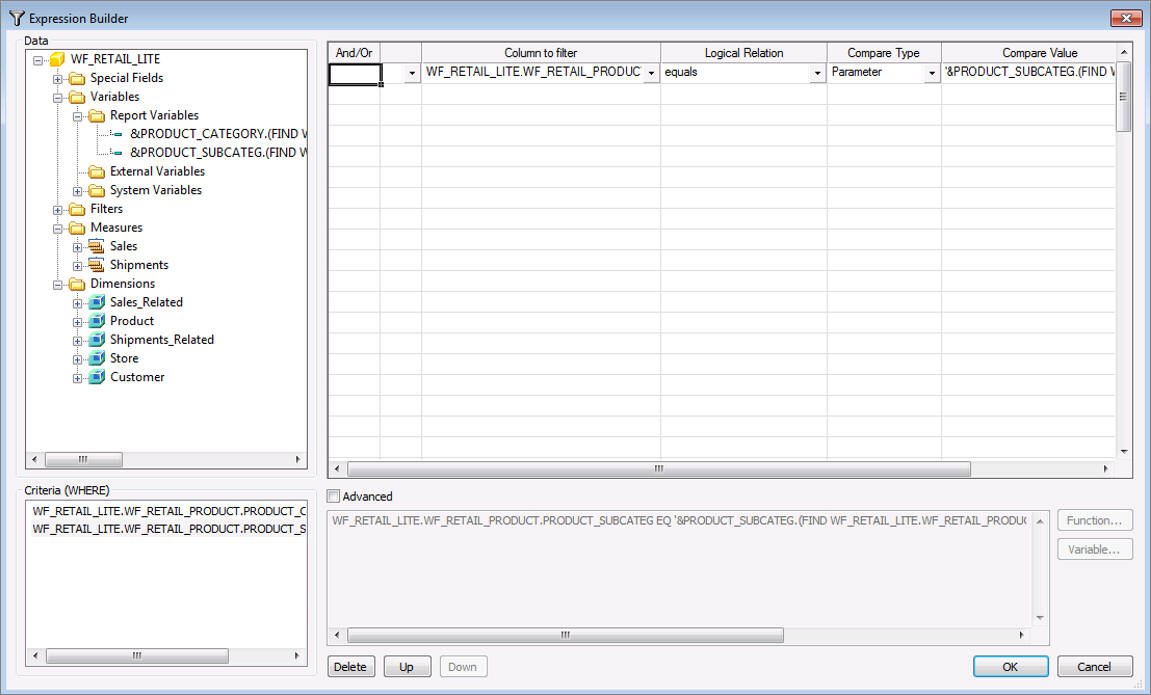
The following image shown an example of the completed expression,
with Product,Category and Product,Subcategory as parameters.
-
Click OK.
-
Save and close the report.
xStep Two: Creating a Control for a Global Filter
In this step, you will build a selection control, which
will be based on the parameter you created in Step One: Creating a Parameter. To do this, you will use the HTML
canvas in WebFOCUS App Studio.
x
Procedure: How to Create a Control for a Global Filter
-
In the Environments Tree panel, right-click
a folder, point to New and then click HTML/Document.
The HTML/Document Wizard opens.
-
Click Finish.
-
In the Properties panel, under Page properties, set Theme
to Plain.
-
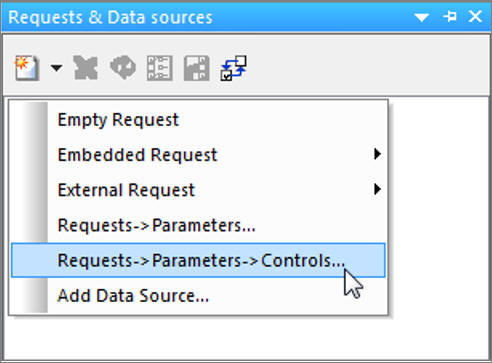
In the Requests and Data sources panel, click New,
then click Requests->Parameters->Controls,
as shown in the following image.
The
Open file dialog box opens.
-
Select the report that you created in Step One: Creating a Parameter, and click Open.
The New Parameter dialog box opens.
-
In the Control Type column of each parameter, right-click,
and then click List box.
-
From the Parameter grouping options drop-down list, select Do
not create a form.
-
Select the Don’t create run button check box.
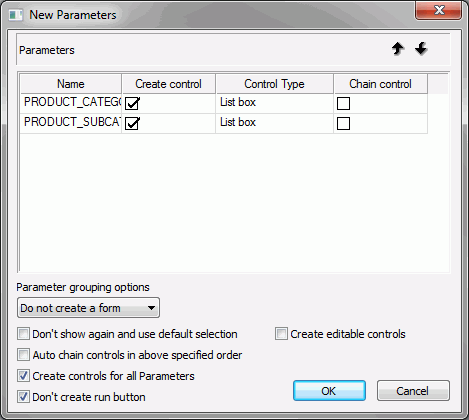
-
Click OK.
The canvas refreshes and displays your controls.
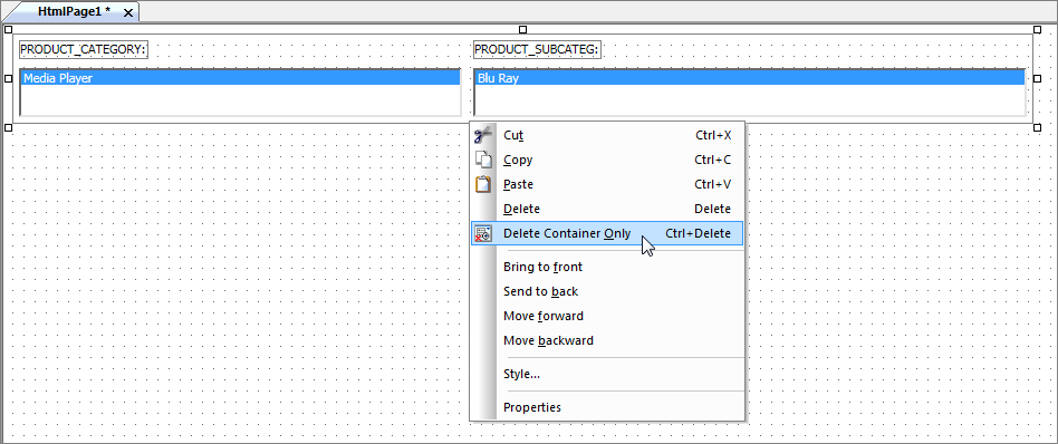
-
Right-click the outer container around the controls,
and then click Delete Container Only, as
shown in the following image.
-
Using the Properties panel, make the following formatting changes:
-
Label1
-
Listbox1
- Width: 115px
- Height: 140px
-
Label2
- Width: 115px
- Left: 15px
- Top: 200px
-
Listbox2
- Width: 115px
- Left: 15px
- Top: 220px
- Height: 170px
The following image shows the completed layout.
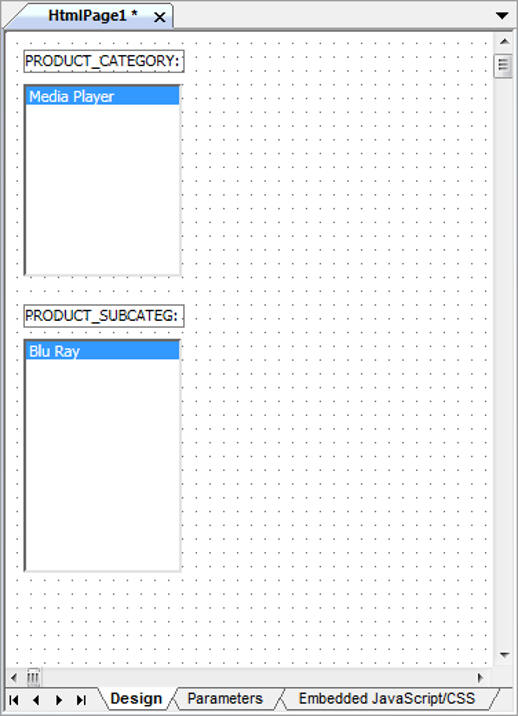
You
can double-click control labels and edit the text.
xStep Three: Setting Trigger Actions
In this step, you will configure trigger actions for
each control using the Tasks & Animations panel in WebFOCUS
App Studio.
x
Procedure: How to Set Trigger Actions for a Global Filter
-
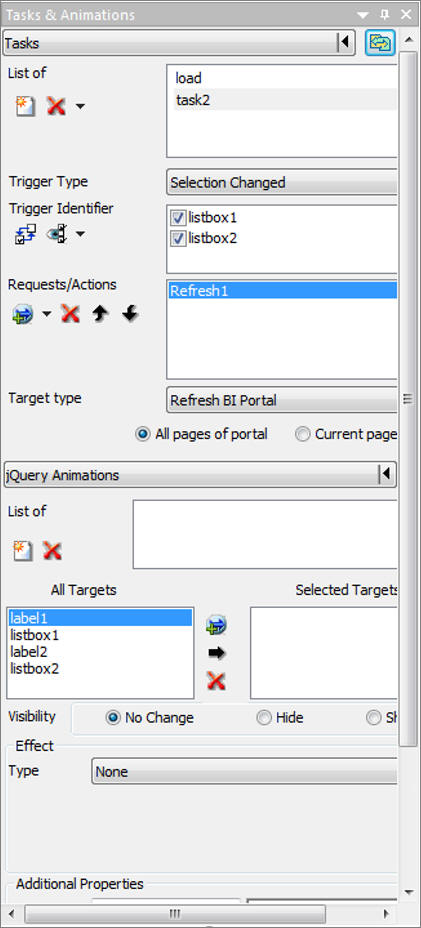
In the Tasks & Animations panel,
click the New button.
A new task, labeled task2, is added to the list
of tasks.
-
In the Trigger Type drop-down menu, click Selection Changed.
-
Click the icon under Trigger Identifier, and click All,
as shown in the following image.

The Trigger Identifier section is populated with listbox1
and listbox2.
-
Select the listbox1 and listbox2 check boxes.
-
Click the drop-down arrow next to the Request Selections
button, and then click Refresh.
A new refresh request, labeled Refresh1, displays
in the Requests/Actions section.
-
In the Target type drop-down menu, click Refresh
BI Portal.
-
Select All pages of portal radio
button.
The following image shows the completed fields.
-
Save and close the HTML page.
-
Close WebFOCUS App Studio.
xStep Four: Applying a Global Filter to a Portal
In this step, you will incorporate a Global Filter into
a Portal and apply it to the existing parameterized content.
x
Procedure: How to Apply a Global Filter to a Portal
-
Sign in to WebFOCUS as a designer or administrator.
-
In the Resource tree, right-click the Portals node,
then click New Portal.
The New Portal dialog box opens.
-
Populate the fields of the New Portal dialog box.
For more information on creating a new portal, see Launching the Portal Designer.
-
Click Create.
The Portal Designer opens.
-
Click the page canvas to select it.
-
On the Layout tab, in the Portal group, click Banner.
The Choose Banner Areas dialog box opens.
-
Click Left, and close the Choose
Banner Areas dialog box.
The left banner is added to the page.
-
Click the banner to select it.
-
On the Insert tab, in the Content group,
click WebFOCUS Resources.
The Resource tree opens.
-
Drag the HTML page that you created previously into the
left banner.
-
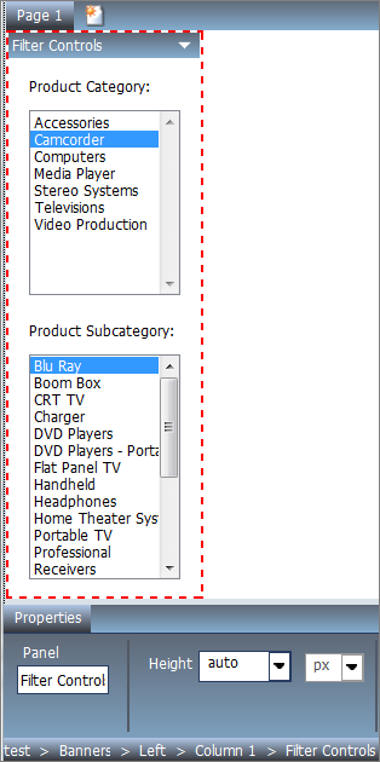
Click inside the panel to select it.
-
In the Properties panel, set Height to auto.
The following image shows a banner with the filter controls.
-
Populate the page canvas with content, such as charts,
reports, or visualizations.
Note: For the Global Filter to work, the content
must contain the same parameters as the ones you used for the filter
controls.
-
Run your portal controls to see changes in your content
from the select values.
-
Save your Portal.
You can run, publish, or share your Portal.