How to: Reference: |
When using a coordinated compound document, any report component that exceeds the designated vertical coordinates within the page layout automatically generates an overflow page at run time. You may customize the layout of the subsequent pages by adding a new overflow layout page for the selected page layout. This enables you to add different headers and footers between the first page of the report and the overflow pages of the report.
In general, each report appears once for each page layout and continues until the data is complete. The new overflow page option enables you to specify reports or graphs that should repeat on each subsequent page to create different headers or footers.
For example, the outline below details how adding a new overflow page may be useful in creating headers and footers for overflow data.
Tip: A report component added to the overflow page, as a header, may contain data such as variable data inserted through a report.
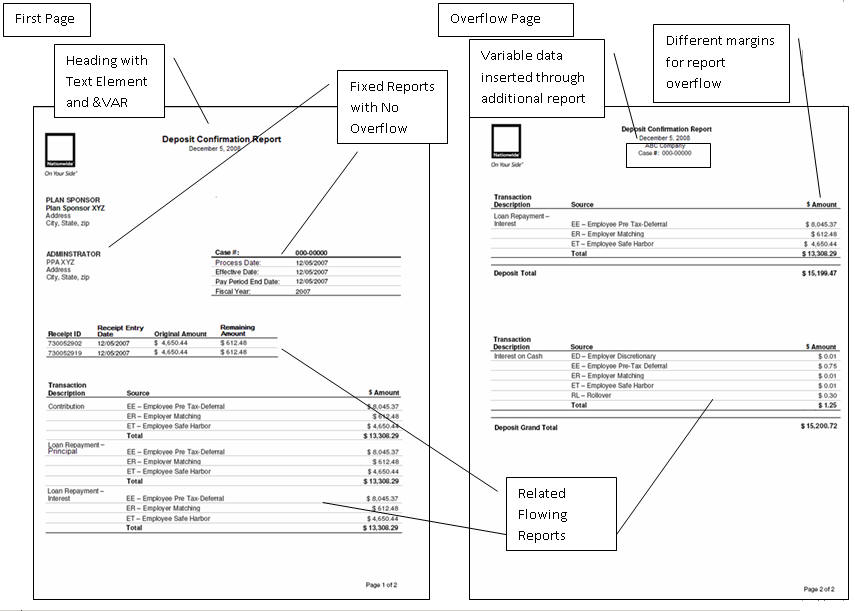
The following image is an example of a coordinated compound report with a customized overflow page. The header on the first page contains an image and a text box with an embedded variable. An additional report has been added to the header for the overflow page only.
This section describes How to Add a New Overflow Page to a Page Layout, How to Add Header and Footer Information to the Overflow Page, and Usage Notes for Adding Components to an Overflow Page.
Each page layout works independent of any other page layout in the coordinated compound document. This enables you to add a new header and footer for each individual page layout and associated overflow pages. The following procedure describes how to add a new overflow page from the page layout.
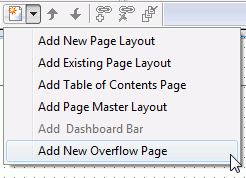
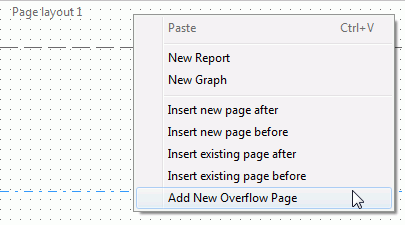
You may use any of the following methods to create an overflow page:
Select the report component in the page layout, right-click, and select Customize Fixed Overflow from the context menu.
The overflow page, displaying a copy of the fixed component (with the original size and position) from the page layout, is added after the page layout in Design View. This enables you to move and resize the overflow object, and add reports and graphs (as header and footer information) around the overflowing object.
Select Add New Overflow Page from the New Page Layout drop-down list.
The overflow page is added after the page layout in the Design View. You may add reports and graphs to the overflow page.
Note: If there is a flowing report component, any flow margins defined on the page layout will also appear on the overflow page. This enables you to move and resize the flow margins, and add reports and graphs (as header and footer information) around the flow margins.
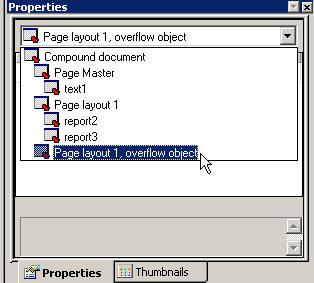
The overflow page is identified as Page layout n, overflow object, where n is the number of the corresponding page layout. The overflow page can also be accessed from the drop-down list of objects in the Properties window.
You may add report and graph components on the overflow page as header and footer information for the overflow data, and position and size the components as desired. You may copy existing components from the page layout, or add new report and graph components. All components added to the overflow page are automatically assigned as fixed components on the overflow page.
Note: The report and graph components added as headers and footers should not generate additional overflow.
The overflow page appears in the layout.
The component is copied to the overflow page, maintaining the size and position from the page layout.
Note: If the component was flowing on the original page layout, it is then automatically changed to a fixed object on the overflow page.
The overflow page appears in the layout.
Note: You may also add these components through the Insert menu, or the Components toolbar, of Document Composer.
The cursor changes into a crosshair.
Note: Keep in mind that these objects are acting as header and footer information, so they should not generate additional overflow.
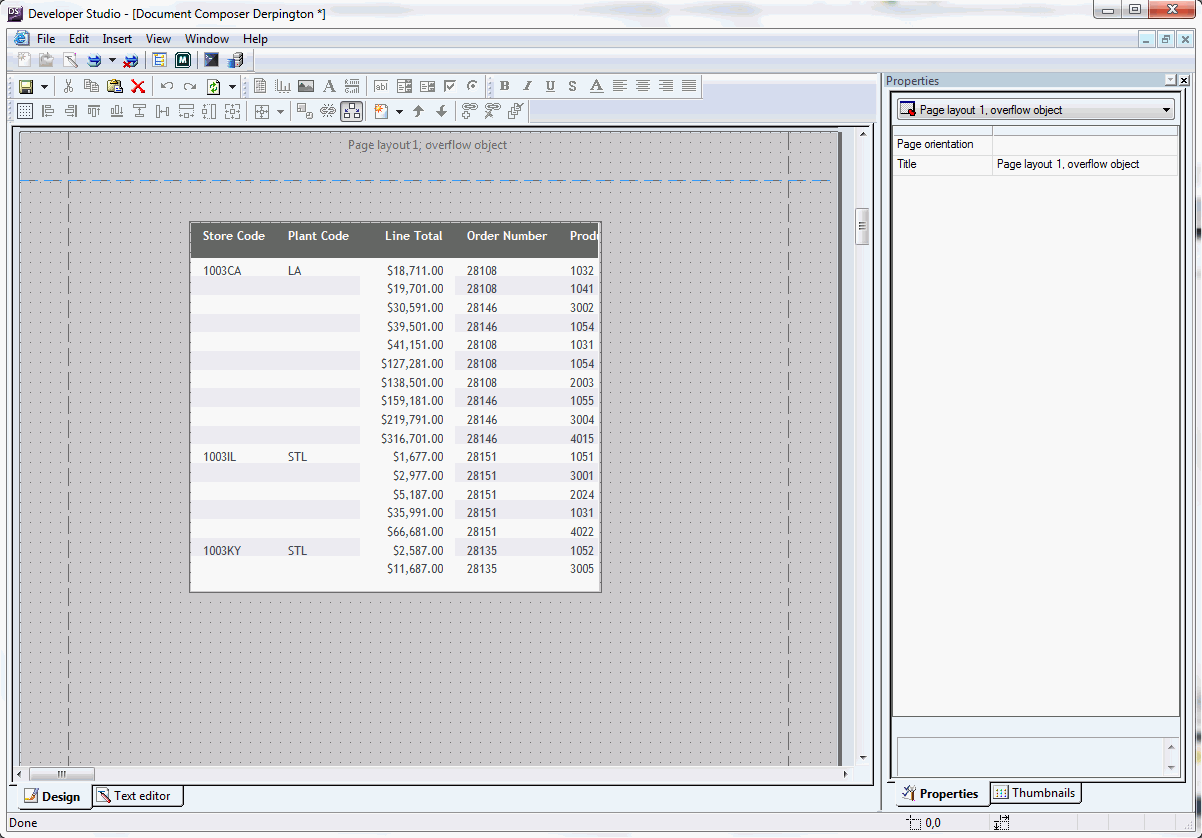
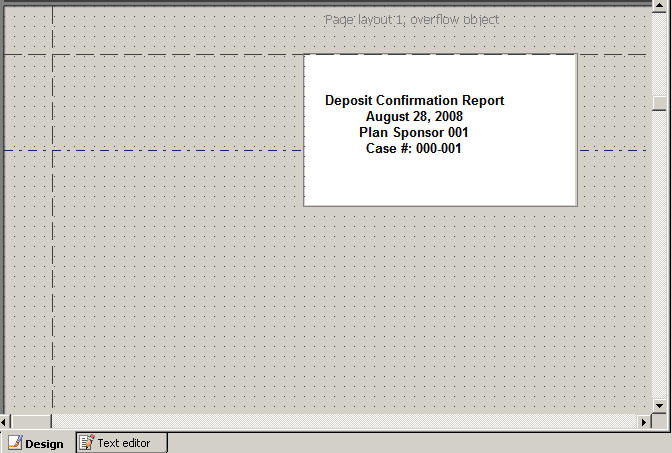
The following image is an example of an overflow page with a report component added as header information. The report contains a variable added to the page heading of the report with styling applied to the text (within the report) in the page heading.
The following apply to adding reports and graphs as header and footer information to an overflow page:
| WebFOCUS |