Selecting a Data Target

How to:

Reference:

You need to specify the data target(s) to which your data will be copied. You can choose to use an existing table as your target, or create a new target.

A data target can be a relational data target, non-relational data target, or a flat file. In some cases, relational targets can provide the ability to write to remote tables. For more information see, Reviewing Your Data Targets.

Note: This is only supported for existing targets. The name of the remote server must match the real server name of the subserver. This option should only be used for small data volumes. For large volumes, you should install the DataMigrator server on the platform where the data will be loaded.

You can load your data into as many as fifteen tables in a single data flow.

After selecting a data target, you can do the following:


Top of page

x
Reference: Data Target Types

The following data target types can be used:


x
Procedure: How to Create a New Data Target
  1. Right-click in the space to the right of the SQL Object, select Add Target and then New.

    A target object appears in the workspace.

  2. Right-click the new target and select Properties.

    The attributes of the target open in a new pane.

  3. Select an Adapter from the drop-down menu to specify the target type.

    Note: Only data targets types that are configured on the server and supported by DataMigrator will appear.

  4. Select an Application Directory for the synonym that will be created for the target.
  5. Optionally, enter a synonym name which is the name of the data target.

    If you have chosen a FOCUS/FDS, XFOCUS, flat file, delimited flat file, or formatted file, when you press the Enter key, the data file name will automatically change to match the synonym name. This can be changed.

    Note: If you do not provide a synonym name, it will default to target01 for the first new target, target02 for the second, and so on.

    New targets will automatically contain the same columns that were selected in the SQL Object. For information about managing columns, see Selecting Columns.

    Note: If the columns selected from the source have descriptions, these descriptions will be included with the corresponding columns in a new target.

    For relational database targets, you can specify connection (if applicable), application directory, synonym, and table name. For details, see How to Set Options for Relational Targets.

    For FOCUS/FDS or XFOCUS files you can specify synonym application directory, synonym, data application directory, and dataset (name of file). For details, see How to Set Options for FOCUS/FDS or XFOCUS Targets. Synonym names for FOCUS/FDS files cannot be longer than eight characters.

    For flat files you can specify synonym application directory, synonym, data application directory, and dataset (name of flat file). For details, see How to Set Options for Flat, Delimited Flat, Formatted, and XML File Targets.

    For formatted files you can specify format, synonym application directory, synonym, data application directory, and dataset (name of formatted file). For details, see How to Set Options for Flat, Delimited Flat, Formatted, and XML File Targets.

    Note: On IBM z/OS to create a file in HFS (hierarchical file system) enter the name, to create a dataset enter the name as

    //’qualif.tablename.type’

    where:

    qualif

    Is the fully qualified location.

    tablename

    Should match the synonym name.

    type

    Is DATA or FOCUS, by convention.

  6. Set the load options. For more information, see Specifying Data Target Options.
  7. Click OK.
  8. Right-click the target and select Target Transformations.
  9. Select the key column(s) in the Target Columns grid.
  10. Click OK.

Top of page

x
Procedure: How to Create a New Data Target With a Variable Name

When creating a new target table, the name of the synonym that describes that table is normally entered as text and saved with the flow. This procedure should be used when you desire to specify the name of the target table dynamically when the flow is run.

  1. Right-click in the space to the right of the SQL Object, select Add Target and then New.

    A target object appears in the workspace.

  2. Right-click the new target and select Properties.

    The attributes of the target open in a new pane.

  3. Select an Adapter from the drop-down menu to specify the target type.

    Note: Only data targets types that are configured on the server and supported by DataMigrator will appear.

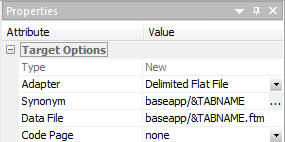
  4. For the synonym name, enter a name starting with an ampersand (&) to indicate that it is a variable.

    MS SQL Server table target:
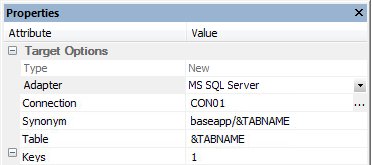
    MS SQL Server Table target

    Delimited Flat File target:

    Delimited Flat File target

  5. By default, the variable name you entered is automatically used as the name for the Table (relational database target) or Data File (flat file, delimited file, xml target). If needed, another name can be used.
  6. To test the data flow, click the Run button and select Run.

    A dialog box opens requesting a value for the variable.
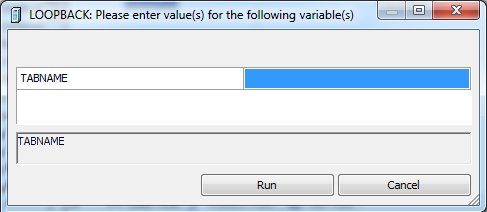
    Dialog box with request

  7. Click Run to run the flow.

Top of page

x
Procedure: How to Submit or Schedule a Data Flow With a Variable Name

To submit a data flow with a variable name, or to schedule such a flow, the value for the variable must be assigned. This can be done with a process flow that calls the data flow.

  1. Right-click an application directory in the navigation pane, select New and then Flow.

    The data flow workspace opens.

  2. Click the Process Flow tab to open the process flow workspace.
  3. Drag the data flow with the variable target name in to the process flow workspace.

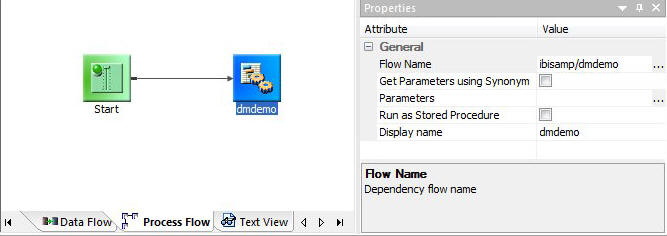
    Right-click the Start icon, drag a line connecting to the data flow icon, and release. Then double-click the data flow icon to open its properties.

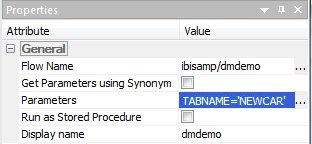
    Data flow properties

  4. Click the ellipsis in the Parameters entry area.

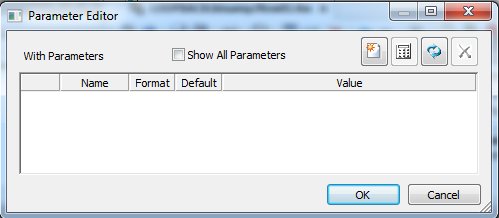
    The Parameter Editor opens.

    Parameter Editor

  5. Click the Add Parameter button.

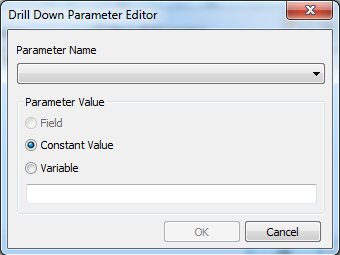
    The Drill Down Parameter Editor dialog opens.

    Drill Down Parameter Editor

  6. Select the name of the variable from the Parameter Name drop-down menu and enter a name for the table. Click OK twice to close the Parameter Editor dialog box. The parameter now appears in the target properties window.

    Target Properties Window

  7. Click the Save button to save the data flow. The process flow can now be submitted, or scheduled, with the specified table name.

Top of page

x
Procedure: How to Select an Existing Data Target

In the DMC, drag a synonym object from the navigation pane to the right of the SQL Object in the workspace.

or

Right-click in the workspace to the right of the SQL Object, select Add Target and then Existing. Open an Application Directory, select an object, and click Select.

The data target is automatically connected to the SQL Object.


Top of page

x
Procedure: How to Change a Data Target in a Data Flow

With the data flow open in the workspace:

  1. Right-click the target object that you want to change and select Change Target.

    The Select Source dialog box opens.

  2. Select the replacement synonym and click the Select button.

iWay Software