Creating Reports in Dashboard
In this section: How to: Reference: |
You can create new reports in the My Content folder or other
folders you are permitted to create content in and write to. New
reports can be created using the tools and reporting features you
are authorized to access. The following tools are available to create
reports: Alert Assistant, InfoAssist, Reporting Object, and Text
Editor.
From the My Content folder or other folders, you can also upload
(import) an external data file for use with the reporting tool,
documents, and images. For details, see Uploading Data Files.
Note:
- An administrator
authorizes groups and users to create content in the WebFOCUS Repository.
- Application server
security or third-party security authentication may block certain characters,
which could impact creating and running reports. For example, SiteMinder blocks
a single quotation mark (’) in a query string.
x
Procedure: How to Create New Folders
-
In the tree, expand the My Content
folder or a folder you are permitted to create folders in.
-
Right-click
the folder and select New, then Folder.
-
Enter a
title for the new folder in the New Folder dialog box and click OK.
-
The new
folder appears within the folder you selected the New Folder option
from.
x
Procedure: How to Create a Report Using InfoAssist
InfoAssist is the web-based ad hoc reporting tool in WebFOCUS.
It is a Rich Internet Application (RIA) that uses AJAX
(Asynchronous JavaScript and XML) technology. It delivers its cutting-edge
functionality using a familiar Microsoft Windows® ribbon interface.
This highly intuitive environment shields users from the underlying technical
complexities associated with ad hoc reporting features, while providing
access to all the functionality needed to address mission-critical
information requirements.
-
In the tree, expand the My Content
folder or other folders you are permitted to create content in and
write to.
-
Right-click the folder.
The context menu
displays the options you are permitted to access.
-
Select New,
and if you are permitted to access InfoAssist, select Report, Chart, Dashboard,
or Document.
InfoAssist opens,
and you will be prompted to select a data source for the procedure.
-
Alternately, you can right-click a
Reporting Object and select New, then Report, Chart, Dashboard,
or Document.
-
Design and
then save your report.
For details on using InfoAssist, see the InfoAssist
User’s Manual.
Note: If
you log off Dashboard without first closing InfoAssist, you must
manually close the tool.
x
Procedure: How to Create an Alert Procedure
When you select a new Alert from the Business Intelligence
(BI) Portal or BI Dashboard, the WebFOCUS Alert Assist tool opens
for the creation of components. Alert Assist launches in a separate
browser window.
-
In the tree, expand the My Content
folder or other folders you are permitted to create content in and
write to.
-
Right-click the folder.
The context menu
displays the options you are permitted to access.
-
Select New,
and then select Alert from the menu.
For the full procedure, see Creating an Alert.
x
Procedure: How to Create a Reporting Object
With WebFOCUS Managed Reporting, a developer can easily transform
complex views of data into simple objects labeled with common business
terminology that every user can understand, such as Weekly Sales
or Revenue. Developers create Reporting Objects that present available
data using terms and formats meaningful to users. Users can then
use Reporting Objects as templates for the creation of a wide range
of reports and charts.
-
In the tree, expand the My Content
folder or other folders you are permitted to create content in and
write to.
-
Right-click the folder.
The context menu
displays the options you are permitted to access.
-
Select New,
and then select Reporting Object from the
menu.
For the full procedure, see Reporting Object Tool.
x
Procedure: How to Edit a Report Procedure (FEX)
Note: Edit only one report at a time when using
InfoAssist.
-
In the tree, expand the folder containing
the report you want to edit.
-
Right-click the desired report and
select Edit.
The
report will open in Alert Assist, InfoAssist, Reporting Object,
or the Text Editor, depending on which tool was used to create the
procedure. For details on using:
-
Alternately,
you can choose to edit the procedure in a specific tool by right-clicking
and selecting Edit With, and then either InfoAssist or Text Editor.
-
Edit the
report as necessary and save any changes.
-
To change
the title of the report that displays in the tree, right-click the report
and select Change Title or Properties.
From the Properties dialog box, you can also
change the Name and Summary field information. The Summary field
allows you to provide additional information on the purpose of the
report.
-
Click OK.
x
Procedure: How to Create a Procedure With the Text Editor
The Text Editor enables you to write the code for a procedure.
-
In the tree, expand the My Content
folder or other folders you are permitted to create content in and
write to.
-
Right-click the folder.
The context menu
displays the options you are permitted to access.
-
Select New,
and Text Editor.
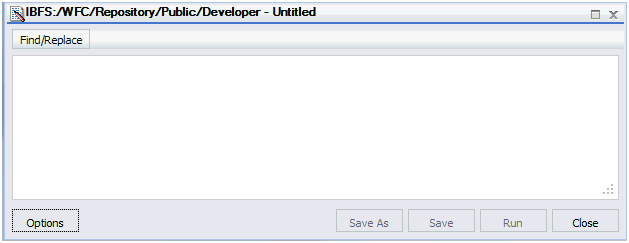
The Text Editor dialog
box title displays the folder path and the file name when editing
an existing file. When creating a new file, the title displays the
folder path and Untitled, as shown in the following image.
-
Enter the
code for your procedure.
You can click Run to
see the report in a new window.
-
When you
are finished coding, click Save.
Note: You can also create HTML files,
WebFOCUS StyleSheets (STY), and cascading style sheets (CSS) with
the Text Editor.
x
You can use the Text Editor to create and edit report
procedures (FEX), HTML files, WebFOCUS StyleSheets (STY), and cascading
style sheets (CSS).
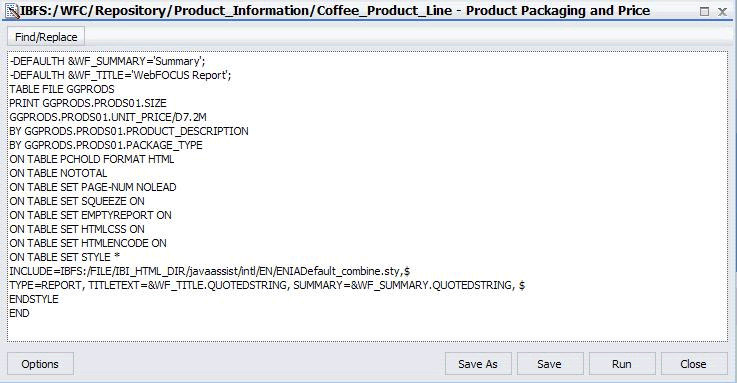
The following image shows the
Text Editor with a sample file in the editing window.
The following list
describes all of the functions available in the Dashboard Text Editor.
-
Options
-
Allows you to select the file type to create
report procedures (FEX), HTML files, WebFOCUS StyleSheets (STY),
or cascading style sheets (CSS).
You can
also assign a specific server or application path for the procedure.
-
Save
-
Saves the code currently displayed. Acts
as Save As the first time you save the content.
-
Save As
-
Displays the Save dialog box which allows
you to specify a title value and select a folder in which to create
the new item. You can also choose a different file type.
-
Run
-
Runs the currently displayed code. Report
procedures are submitted to the Reporting Server. HTML files are
viewed in a new browser window. WebFOCUS StyleSheets (STY) and cascading
style sheets (CSS) will not produce a report when run. They can
be selected from within InfoAssist to apply their specific styling.
-
Close
-
Exits the Text Editor. If you made changes
to the original report, a window prompts you to save or cancel the
changes.
Note:
- After editing with
the Text Editor, you will not be able to open reports created using
InfoAssist if the request is modified to contain code that is not
supported by InfoAssist.
- Use the standard
control keys (Ctrl+X, Ctrl+C, Ctrl+V) to cut, copy, and paste.
x
Procedure: How to Copy or Move a Report in Dashboard
-
In the tree, expand the My Content
folder or other folders from which you are permitted to copy or
cut reports.
-
Right-click
the existing report that you want to copy or move.
-
Perform one of the following:
-
Right-click
a folder you are permitted to create or write reports in.
-
Select Paste.
When you copy or cut and paste a file within
a folder you are permitted to create content in and write to, the
request is evaluated based on the destination folder and whether
or not the name or the title of the source file exists in the destination folder.
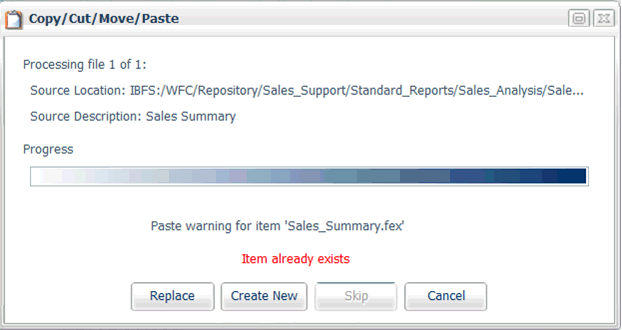
If you paste a file in the same folder, you are warned
that the Item already exists, and you can choose to replace
the existing file or create a new file with a new name, as shown
in the following image.
If you choose to create a new file,
a copy number is appended to the file name.
If
you are pasting multiple files, each file will be evaluated. You
can specify that your selection applies to all files being processed
by selecting the Apply selection to all items check
box. If you do not want to proceed with the paste request for only
the file being processed, select Skip.
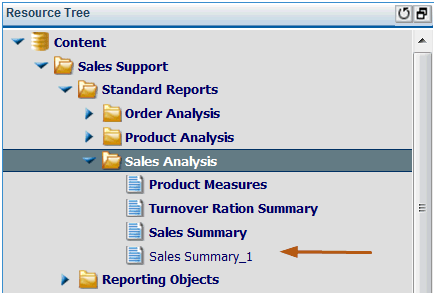
For example, when you copy and paste a file named
Sales Summary within the same folder, the copy appears in the tree
as Sales Summary (Copy #), as shown in the following image. The
new name is sales_summary_1.fex (special characters and spaces are
replaced with underscores).
Note:
- After pasting a file,
you can change the title that displays in the tree by right-clicking
the file and selecting Change Title (F2)
or by using the Properties dialog box. This does not change the
name (filename.ext) of the file.
- Managed Reporting
uses the name value to access the report, as well as in procedures
to reference drill downs, -INCLUDE statements, and style sheet attributes.
x
Procedure: How to Delete Folders
To delete a folder you are permitted to delete, right-click
the folder and select Delete.
x
The URL Tool enables you to create a URL link to a website.
x
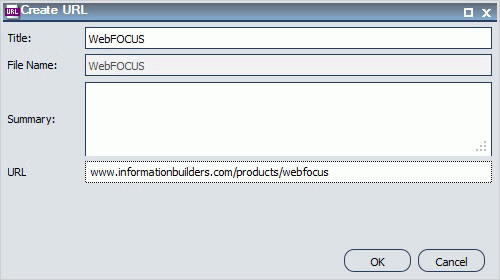
A URL is a link to a website. To create one, right-click
a folder in the Content section of the tree, point to New, and select URL. In
the Create URL dialog box that opens, type a display title, a file
name, and the URL itself. Optionally, you can provide a summary
that is displayed in a ToolTip when the mouse pointer rests on the
URL in the tree.
The Create URL dialog box is shown in the following image.
If you insert a URL inside the portal, be aware that some sites
may not work, as their owners may not allow them to run inside a
frame. Internet Explorer will show a message. Firefox® and Chrome™
browsers display just a blank frame.


