This section provides detailed
descriptions of new features for the Social Media adapters.
x
The Adapter for Facebook® has been introduced in this
release and is available as a named adapter on the Web Console in
the Social Media folder.
The adapter provides reporting capabilities from Facebook objects
and Graph API SQL tables. It obtains publicly-accessible posts and
comments placed on the page/user/app walls. The adapter can access
any other textual information in accordance with user-granted permissions.
Page administrators and app owners have access to the Facebook insights information.
The adapter can retrieve correlated information from multiple tables
and an object in a single execution.
- The APIs allow you to copy data from Facebook to a private
repository. Data can be copied using relational models or search,
depending on how much of the unstructured text you want.
- When using the search method, some aggregate analytics are employed.
This is often done through entity extraction when the data is loaded
in the index.
x
The Facebook Wizard provides a step-by-step
process to:
- Create a Facebook connection.
- Analyze posts.
- Create synonyms and reports.
- Run, submit with email, or schedule a report.
- Return to the console.
The Facebook Wizard displays these steps on the ribbon and in
the navigation pane, as shown in the following image.
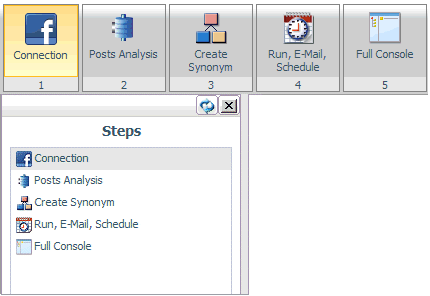
The Facebook Wizard is available from the Facebook icon  above
the main menu.
x
Procedure: How to Use the Facebook Wizard to Create a Connection
-
Launch the Facebook Wizard by clicking
the Facebook icon above the main menu, as shown in the following image.

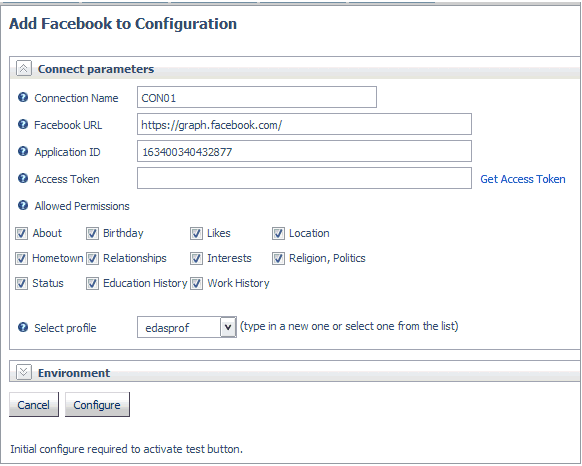
The Add Facebook to
Configuration pane opens, as shown in the following image.
-
Enter a name in the Connection Name field.
-
Enter the URL of the Facebook Graph API request. The
default value is:
https://graph.facebook.com/
-
Click Get Access Token to obtain
the Access Token.
You must be have a Facebook account and must be logged
in.
The Access Token will be populated automatically.
-
Select check box preferences from the Allowed Permissions
section to access specific Facebook items.
-
Select a profile from the drop-down menu. The default
value is edaprof.
-
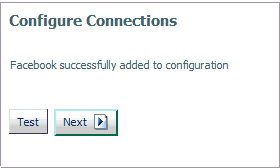
Click Configure.
A confirmation message is displayed, as shown in the following
image.
-
Click Test to test the configuration.
Data from your Facebook profile is displayed.
-
Click Next to move to the Posts
Analysis step.
x
Procedure: How to Use the Facebook Wizard to Configure Adapters to Analyze Posts
-
Click Next from
the Configure Connections pane, or select Posts Analysis from
the ribbon or navigation pane.
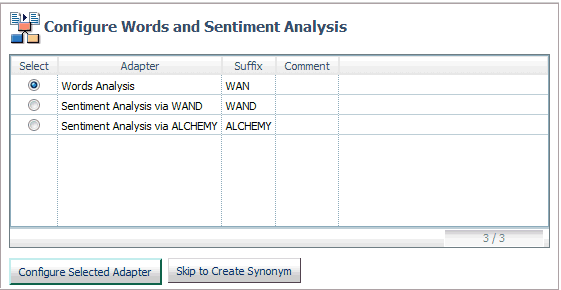
The Configure Words and Sentiment Analysis pane opens,
as shown in the following image.
-
Click Configure Selected Adapter to
configure the Words Analysis adapter.
A confirmation message is displayed, as shown in the following
image.
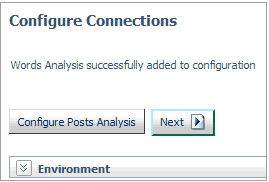
Alternately, if you
have already configured the adapter, select Skip to Create
Synonym to move to that step.
-
Select Configure Posts Analysis to
configure a Sentiment Analysis adapter or Next to
move to the Create Synonym step.
-
Select a radio button for a Sentiment Analysis adapter
and click Configure Selected Adapter.
-
Supply the required parameters for the specific adapter
and click Configure.
A confirmation message is displayed.
-
Click Test to test the connection
or Next to move to the Create Synonym step.
x
Procedure: How to Use the Facebook Wizard to Create Synonyms
-
Click Next from
the Configure Posts Analysis Adapters pane, or select Create Synonym from
the ribbon or navigation pane.
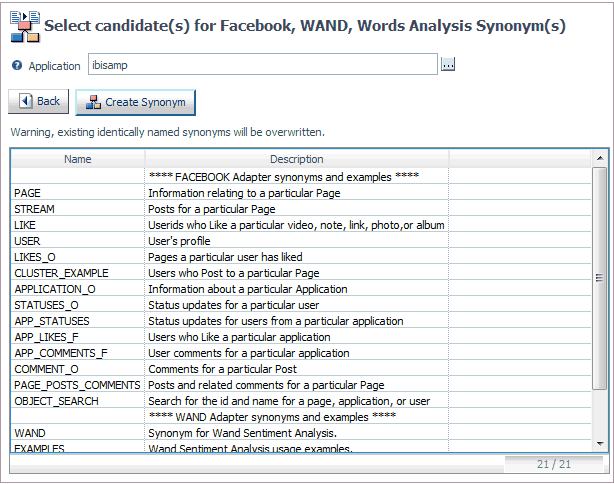
The Select candidate(s) for Facebook pane opens, as shown
in the following image.
-
Enter an application in the Application field
or click the selector (...) and navigate to one.
-
Click Create Synonym.
A confirmation message is displayed.
-
Click Next.
The Run, E-Mail, Schedule pane opens.
x
Procedure: How to Use the Facebook Wizard to Run, Submit With Email or Schedule a Procedure
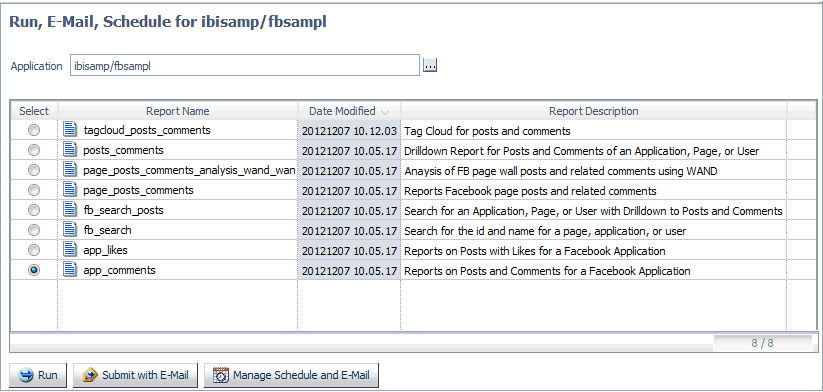
After
you create a synonym, the Facebook Wizard moves to the Run, E-Mail,
Schedule pane, as shown in the following image.
-
Select a radio button for
a specific procedure.
-
Click Run to run the procedure.
-
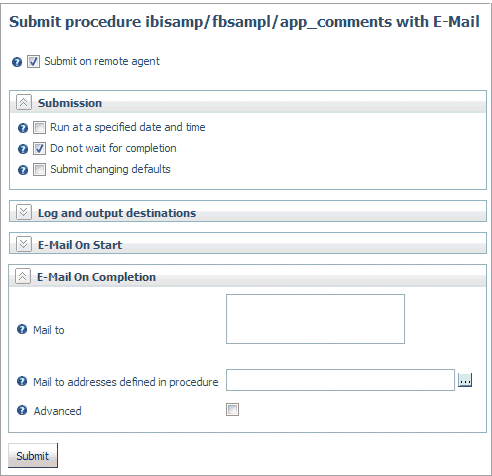
Click Submit with E-Mail to submit
the procedure and specify start or completion email.
The Submit procedure with E-Mail pane opens, as shown in
the following image.
-
To schedule the procedure, click Manage
Schedule and Email.
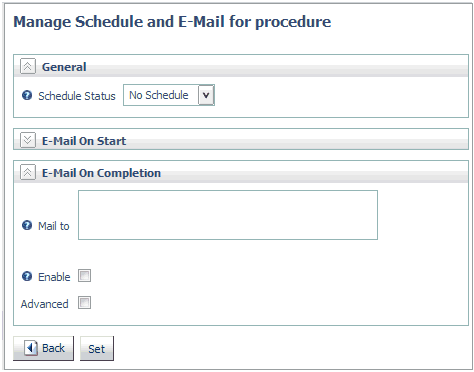
The Manage Schedule and E-Mail for procedure pane opens,
as shown in the following image.
For
information on email and scheduling options, see the Server Administration
for UNIX, Windows, OpenVMS, IBM i, and z/OS manual.
x
The Adapter for Alchemy has been introduced in this
release and is available as a named adapter on the Web Console in
the Social Media folder. It provides sentiment analysis of documents
or web pages.
x
The Adapter for WAND® has been introduced in this release
and is available as a named adapter on the Web Console in the Social
Media folder. It provides consumer sentiment analysis using software
from WAND, Inc.
xAdapter for Words Analysis
The Adapter for Words Analysis has been introduced in
this release and is available as a named adapter on the Web Console
in the Social Media folder. It performs word analysis on text fields.
x
The Adapter for Twitter® is a Candidate for Release and
is available as a named adapter on the Web Console in the Social
Media folder. It provides the ability to read tweets for a specific
Screen Name and perform a search on words indexed by Twitter for
tweets.
Note: The Twitter API only returns the last 3,200 tweets
for a particular Screen Name.
x
The Twitter Wizard is a Candidate for Release.
The Twitter Wizard enables you to easily configure and use the
Adapter for Twitter. You can:
- Create a Twitter connection.
- Analyze posts.
- Create synonyms and reports.
- Run, submit with email, or schedule a report.
- Return to the console.
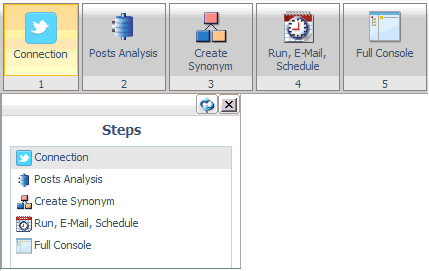
The Twitter Wizard displays these steps on the ribbon and in
the navigation pane, as shown in the following image.
The Twitter Wizard is available from Twitter icon  above
the main menu.
x
Procedure: How to Use the Twitter Wizard to Create a Connection
-
Launch the Twitter Wizard by clicking
the Twitter icon above the main menu, as shown in the following
image.

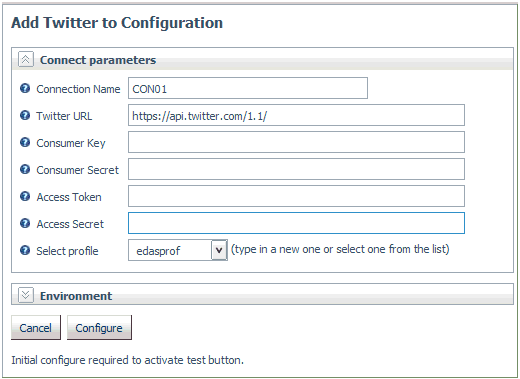
The Add Twitter to
Configuration pane opens, as shown in the following image.
-
Enter a name in the Connection Name field.
-
Enter the Twitter URL. The default
value is:
https://api.twitter.com
-
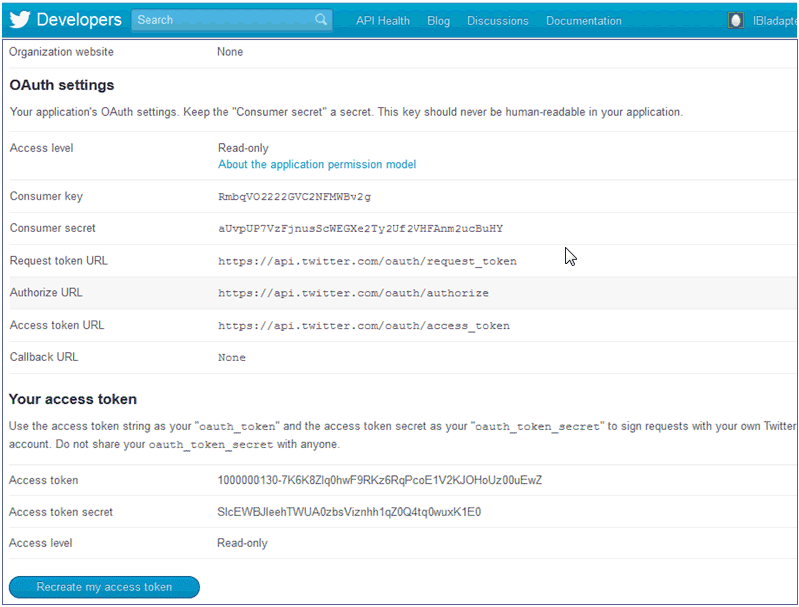
Enter your Consumer Key and Consumer
Secret. These values identify your application to Twitter.
Obtain these values from the settings page of your Twitter
application, as shown in the following image, at:
https://dev.twitter.com/apps
-
Enter your Access Token and Access
Secret. These values identify the user that your application
is acting on behalf of.
Obtain these values from the settings page of your Twitter
application at:
https://dev.twitter.com/apps
-
Select a profile from the drop-down menu. The default
value is edaprof.
-
Click Configure.
A confirmation message is displayed.
-
Click Test to test the configuration.
Data from your Twitter account is displayed.
-
Click Next to move to the Posts
Analysis step.
x
Procedure: How to Use the Twitter Wizard to Configure Adapters to Analyze Posts
Note: If
you already have Posts Analysis adapters configured, the wizard
will skip this step.
-
Click Next from the Configure Connections
pane, or select Posts Analysis from the ribbon
or navigation pane.
The Configure Words and Sentiment Analysis pane opens,
as shown in the following image.

-
Click Configure Selected Adapter to
configure the Words Analysis adapter.
A confirmation message is displayed, as shown in the following
image.

Alternately, if you
have already configured the adapter, select Skip to Create
Synonym to move to that step.
-
Select Configure Posts Analysis to
configure a Sentiment Analysis adapter or Next to
move to the Create Synonym step.
-
Select a radio button for a Sentiment Analysis adapter
and click Configure Selected Adapter.
-
Supply the required parameters for the specific adapter
and click Configure.
A confirmation message is displayed.
-
Click Test to test the connection
or Next to move to the Create Synonym step.
x
Procedure: How to Use the Twitter Wizard to Create Synonyms
-
Click Next from
the Configure Posts Analysis pane, or select Create Synonym from the
ribbon or navigation pane.
The Select candidate(s) pane opens, as shown in the following
image.
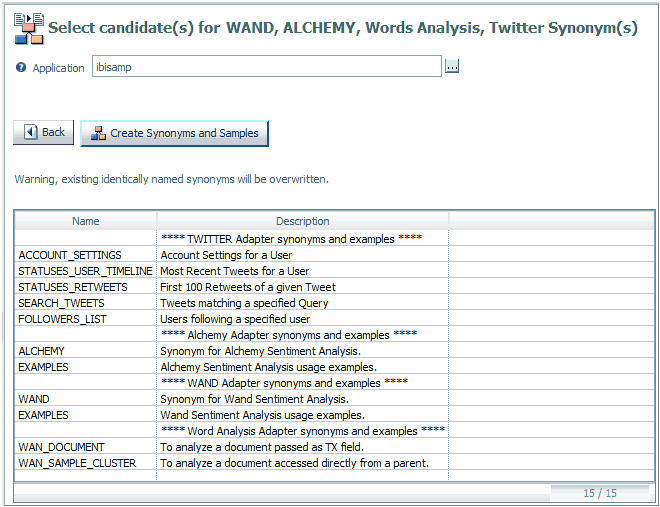
Note: Candidates
will appear for all of the Social Media adapters that you have configured.
-
Enter an application in the Application field
or click the selector (...) and navigate to one.
-
Click Create Synonyms and Samples.
A confirmation message is displayed.
-
Click Next.
The Run, E-Mail, Schedule pane opens.
x
Procedure: How to Use the Twitter Wizard to Run, Submit With Email or Schedule a Procedure
After
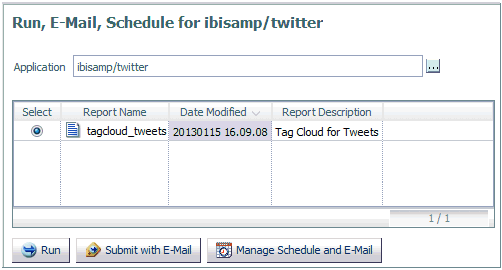
you create synonyms and samples, the Twitter Wizard moves to the
Run, E-Mail, Schedule pane, as shown in the following image.
-
Select a radio button for
a specific procedure.
-
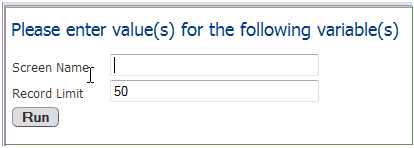
Click Run to run the procedure.
The Please enter value(s) for the following variable(s)
pane opens, as shown in the following image.
-
Enter values.
-
Click Run.
The results are displayed in a separate browser window,
as show in the following image.

-
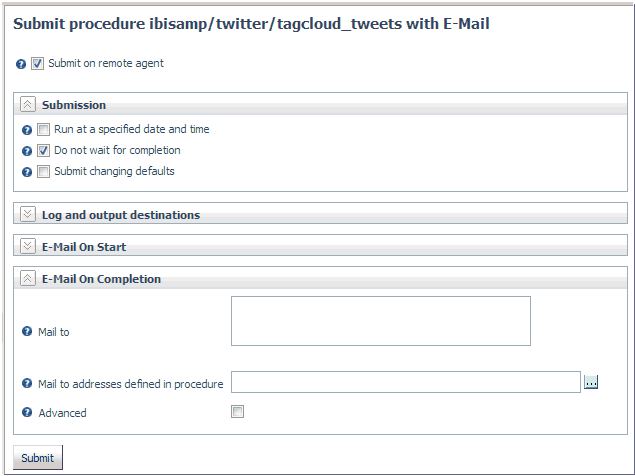
Click Submit with E-Mail to submit
the procedure and specify start or completion email.
The Submit procedure with E-Mail pane opens, as shown in
the following image.
-
To schedule the procedure, click Manage
Schedule and Email.
The Manage Schedule and E-Mail for procedure pane opens,
as shown in the following image.

For
information on email and scheduling options, see the Server Administration
for UNIX, Windows, OpenVMS, IBM i, and z/OS manual.

![]() above
the main menu.
above
the main menu.


