Applications

In this section:

This section provides detailed descriptions of new features for server applications.


Top of page

x
Upload Wizard

How to:

The Upload Wizard enables you to upload files from your local machine to server application folders and to load them into a DBMS for use in creating synonyms and reports. You can then run a report with or without email, or schedule it.

The wizard enables you to:

The Upload Wizard displays these steps on the ribbon and in the navigation pane, as shown in the following image.
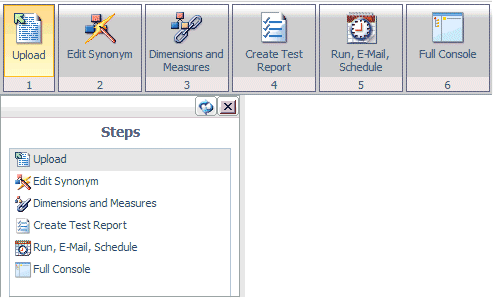
When you complete a task, the wizard automatically moves to the next step.


x
Procedure: How to Use the Upload Wizard to Upload a File and Create a Synonym
  1. From the Web Console, click the Upload Wizard icon, as shown in the following image.

    The Upload Wizard opens to the Upload pane, as shown in the following image.
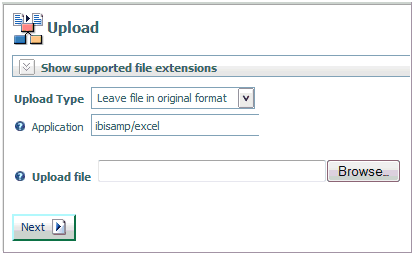
  2. Select a type from the Upload Type drop-down menu.

    The options are:

    • Leave file in original format. This will copy the file to the application folder.
    • Upload into relational DBMS. This will upload the file into your database.

    If you choose Upload into relational DBMS, you will need to provide the target parameters, as shown in the following image.

  3. Select a configured adapter from the Adapter drop-down menu.
  4. Select a connection from the Connection drop-down menu.
  5. Select a load type from the Load Type drop-down menu.

    The options are:

    • Insert Records From Memory. This option speeds the loading of the data target by inserting a block of rows at once. You can set the row interval to commit or write transactions and the number of records to load in a block.
    • Bulk Load Utility Via a Disk File. This option uses database bulk loaders to insert data into a target.
  6. Enter the full path and file name in the Upload file field, or click the Browse button and navigate to one.
  7. Click Next.

    The synonym creation screens will vary, depending on the type of file uploaded.

  8. Enter parameters for the synonym, and click Create Synonym.

    The synonym is created, as shown in the following screen.
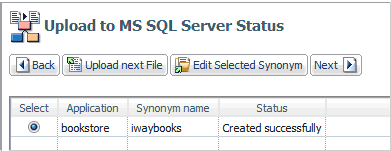
  9. Click Next.

    The Edit Synonym pane opens.

  10. If you do not want to edit the synonym(s) or create a cluster synonym, you can click Create Test Report from the ribbon or navigation pane.

You can then run the report with email or schedule it to run once or multiple times.

To exit the Upload Wizard, click Full Console.


x
Procedure: How to Use the Upload Wizard to Edit a Synonym

After you have created synonym(s), the wizard moves to the Edit Synonym step, as shown in the following image.
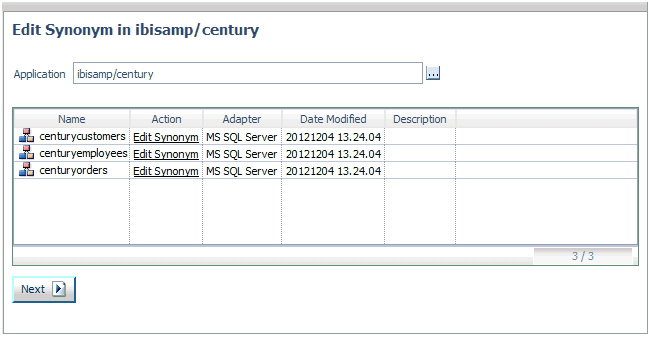
  1. For a particular synonym, double-click Edit Synonym in the Action column, or right-click it and select Edit.

    The Quick Edit pane opens, as shown in the following image.
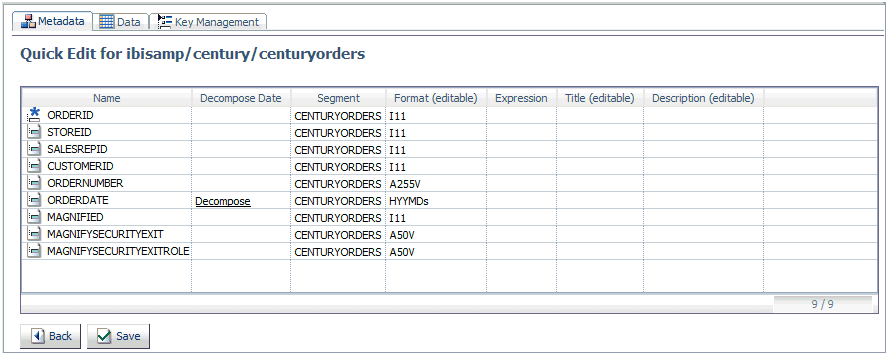
    The Quick Edit pane has three tabs:

    • Metadata.
    • Data.
    • Key Management.
  2. Make your edits on the applicable tab.
  3. Click Next or click Cluster (Dimensions) on the ribbon or in the navigation pane to move to the Cluster Synonym step.


x
Procedure: How to Use the Upload Wizard to Create to a Cluster Synonym

You can create a cluster synonym with the Upload Wizard using the same process as the Metadata Wizard.

If you do not want to create a Cluster Synonym, click Create Test Report from the ribbon or navigation pane.


x
Procedure: How to Use the Upload Wizard Create a Test Report

If you did not create a cluster synonym, click Create Test Report from the ribbon or navigation pane.

The Select Synonym for report pane opens.

  1. Enter the full path to the synonym or click the File Picker (...) and navigate to one.
  2. Click Next.

    The Select Report Measures pane opens, as shown in the following image.
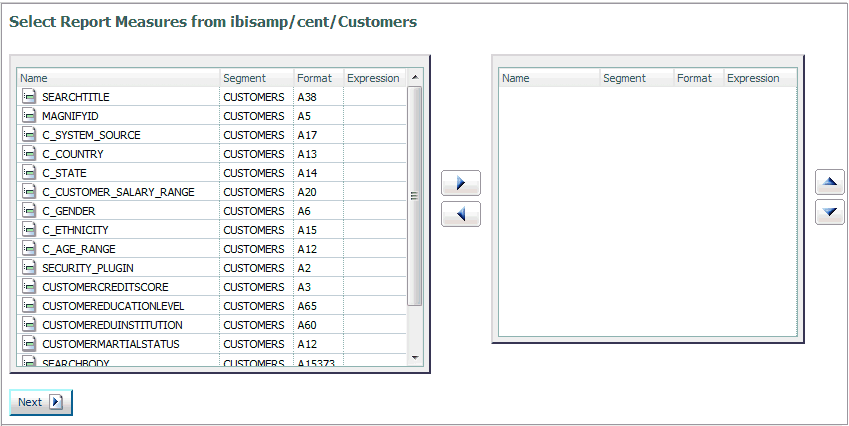
  3. Select fields from the left side, use the arrow key to move them to the right, and click Next.

    The Select Report Rows pane opens, as shown in the following image.
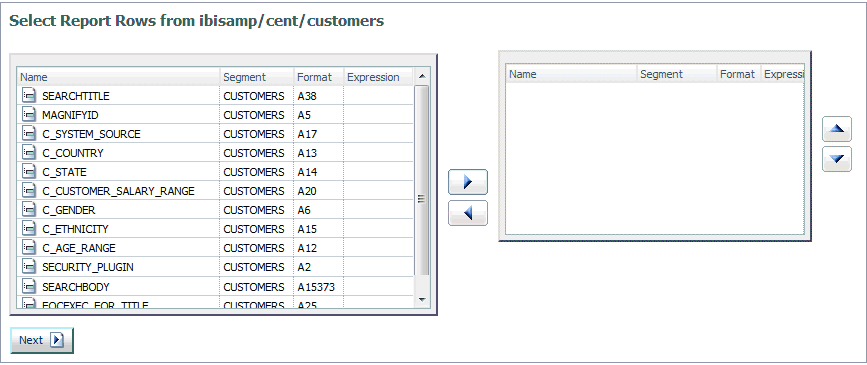
  4. Select fields from the left side, use the arrow key to move them to the right, and click Next.

    The Select Report Columns pane opens, as shown in the following image.
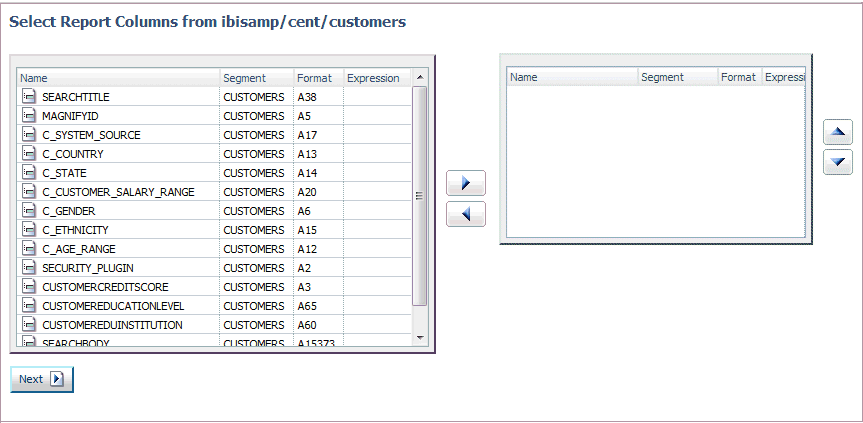
  5. Select fields from the left side, use the arrow key to move them to the right, and click Next.

    The Reporting Wizard completed pane opens, as shown in the following image.

  6. Click Run to run the procedure.

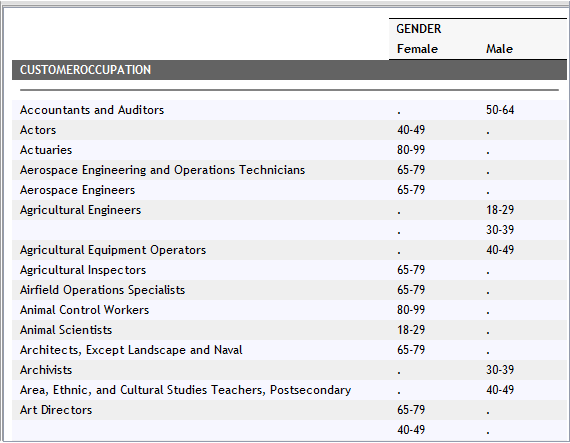
    The resulting report is displayed, as shown in the following image.
  7. Click Next (Scheduler and E-Mail) to submit the procedure with email or schedule it.


x
Procedure: How to Use the Upload Wizard to Run, Email, or Schedule a Procedure

After you have created a test report with the Upload Wizard, you can run the procedure, submit it to run with email, or schedule it.

  1. From The Reporting Wizard completed pane, click Next (Scheduler and E-Mail) or click Run, E-Mail, Schedule from the ribbon or navigation pane.

    The Run, E-Mail, Schedule page opens, as shown in the following image.
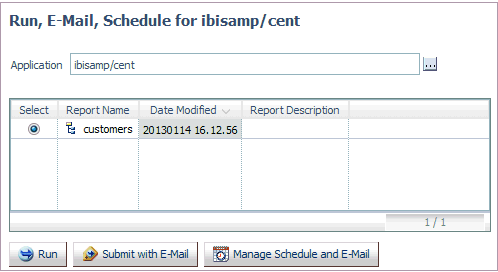
  2. Click Run to run the report.
  3. Click Submit with E-Mail to submit the procedure and specify start or completion email.

    The Submit procedure with E-Mail pane opens.

  4. To schedule the procedure, click Manage Schedule and Email.

To exit the Upload Wizard, click Full Console.

Top of page

x
Storing Applications in an SQL Database

How to:

You can now store the contents of an application folder in an SQL database. You must first create a new SQL Repository. After that, this feature is available when you create a new application folder.

Warning: It is advisable to create a separate SQL Connection to use in creating an SQL Repository. If an existing SQL Connection is used, only Server Administrators or users with WSCFG privileges will be able to use the synonyms from this SQL connection in the application. This provides protection for the SQL Repository, preventing unauthorized users (without administrator privileges) from accessing the contents of the SQL Repository through a synonym.


x
Procedure: How to Create an SQL Repository to Store Applications

You must have an adapter connection configured to an SQL database.

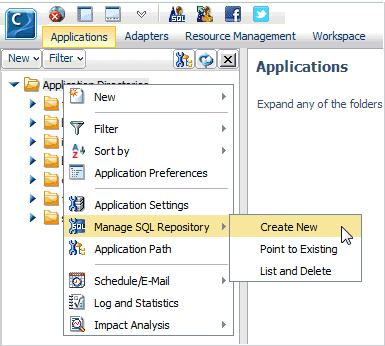
  1. From the Applications page, right-click the Application Directories folder in the navigation pane, and select Manage SQL Repository, and then Create New, as shown in the following image.

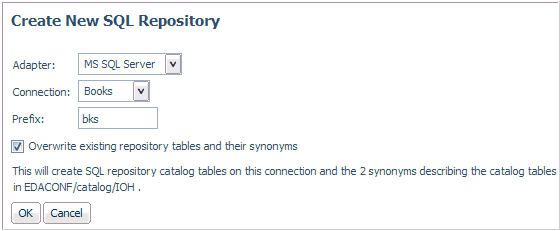
    The Create New SQL Repository page opens, as shown in the following image.

  2. Select a configured adapter from the Adapter drop-down menu.
  3. Select a connection from the Connection drop-down menu.
  4. Enter a prefix in the Prefix field.
  5. Optionally, select the Overwrite existing repository tables and their synonyms check box.
  6. Click OK.

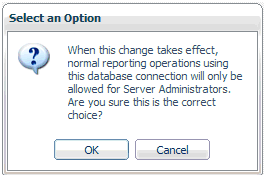
    A warning message is displayed, as shown in the following image.

  7. Click OK.

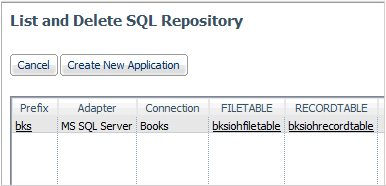
    Two SQL Repository catalog tables are created with this connection, as shown in the following image.

    The tables are:

    prefixIOHFILETABLE
    prefixIOHRECORDTABLE

    Two synonyms describing the catalog tables are also created in EDACONF/catalog/IOH.

  8. Optionally, click Create New Application.

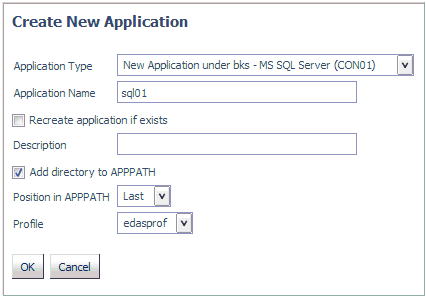
    The Create New Application page opens, as shown in the following image.


x
Procedure: How to Create an Application With SQL Content

You must have created an SQL Repository.

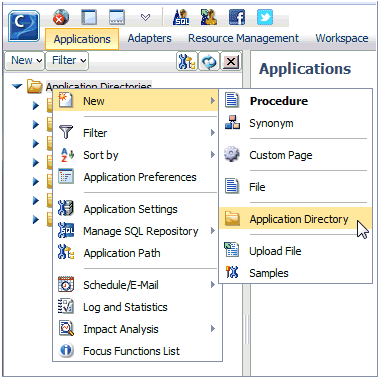
  1. From the Applications page, right-click the Application Directories folder in the navigation pane, select New, then Application Directory, as shown in the following image.

    The Create New Application page opens.

  2. Select New Application under repository - DBMS (Connection name) from the Application Type drop-down menu, as shown in the following image.

    Note: The choices will include the repository, adapter type, and connection name. In this example, they are the bks repository, Adapter for Microsoft SQL Server, and CON01 connection.

  3. Enter a name in the Application Name field.
  4. Optionally, select the Recreate application if exists check box.

    Warning: Choosing this option will overwrite the existing application and any content in it.

  5. Optionally, enter a description in the corresponding field.
  6. Optionally, deselect the Add directory to APPPATH check box. The application is added to the APPPATH by default.
  7. Select a position for the application from the Position in APPPATH drop-down menu. The choices are Last or First. The default value is Last.
  8. Select a profile from the Profile drop-down menu. For server administrators, the default value is edaprof. For non-administrators, their user profile is the default value.
  9. Click OK.

The application is added to the navigation tree. You can now use this application to store procedures, synonyms, data files, and other content.


Top of page

x
Using an SQL Repository to Store Home Applications

How to:

Home applications can now be stored in an SQL Repository. You must first create an SQL Repository, as described in Storing Applications in an SQL Database.


x
Procedure: How to Store Home Applications in an SQL Repository

You must first create an SQL Repository.

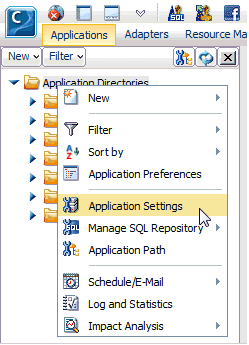
  1. From the Applications page, right-click the Application Directories folder in the navigation pane, and select Application Settings, as shown in the following image.

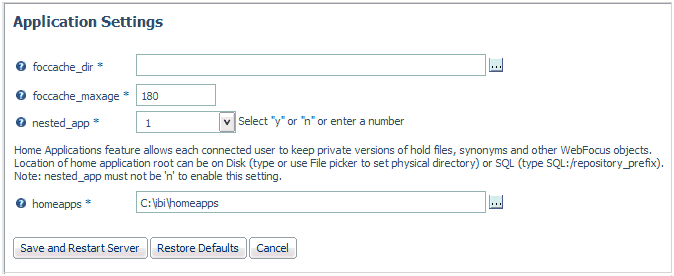
    The Application Settings page open, as shown in the following image.

  2. Click the selector button (...) next to the homeapps field.

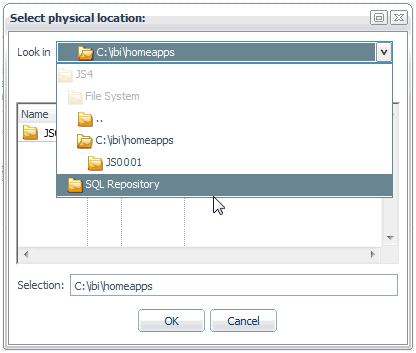
    The Select physical location dialog box opens.

  3. Select SQL Repository from the drop-down menu, as shown in the following image.

  4. Select a subfolder, and click OK.

    The subfolder is entered in the homeapps field, as shown in the following image.

  5. Click Save and restart Server.

WebFOCUS