Startup and Setup Tasks

In this section:

This tutorial assumes that your DataMigrator Server and DataMigrator Client software have been installed and configured.

You will need to complete the following startup and setup tasks before you begin to design your data flow:


Top of page

x
Start Your DataMigrator Server and Data Management Console

Using whatever method is appropriate for your operating system:

  1. Start your DataMigrator Server.
  2. Start the DMC.
  3. If you are not going to configure an additional server node, right-click the default LOOPBACK node in the navigation pane and select Connect.

Top of page

x
Configure a Server Node From the Data Management Console (Optional)

For the tutorial, we will create an additional node and name it DEMO. We will store and work with flows and related files in this location.

We have added this setup task since many users prefer or need to establish additional server nodes that point to the DataMigrator Server they will be using in the course of their work.

However, you may wish to use the DataMigrator Server node that you configured during the DataMigrator client installation. The node is simply a name that, by way of its properties, points to the DataMigrator Server. You can have as many nodes as you like pointing to the same server.

If you wish to use the node name you set up during the DataMigrator Client installation, skip to Create Sample Data and Metadata and Create an Application Directory, but keep in mind that when an instruction in the tutorial refers to DEMO, you must apply the instruction to the name of the server node you are using.

  1. If the DMC is not already open, choose iWay Software/iWay 77 Client or Server, then Data Management Console from the Windows Programs menu. The DMC opens, with the server node you configured during installation listed under Servers in the navigation pane at the left.

    The X that appears over the server name indicates that the DMC is not currently connected to the DataMigrator Server. You will connect shortly.

    Notice that the Console Log at the bottom of the screen has tracked your startup steps. It will continue to track each step in your work process.

  2. For the tutorial, we will name the new node DEMO. To make the DEMO server available, you will define the server node.

    Right-click Servers and select Add Server Node. The Server Node Configuration window opens.
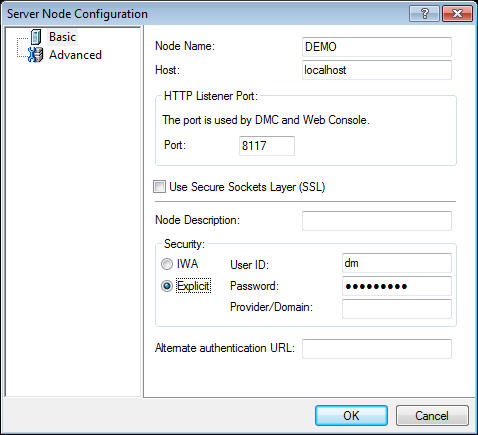
    Server Node Configuration window

  3. Enter the following settings:
    • In the Node Name field, enter DEMO as the name for the Server node.
    • In the Host field, enter the machine name or IP address where the DataMigrator Server is running.
    • In the Port field, enter the Port number of the DataMigrator Server. If you used the defaults when you installed your DataMigrator Server, the port number is 8117.
    • Optionally, enter a description of the node in the Node Description field.
    • Leave the Explicit check box selected under Security.
    • Enter a valid user ID and password, and if required, a domain or provider name.
    • Click OK.

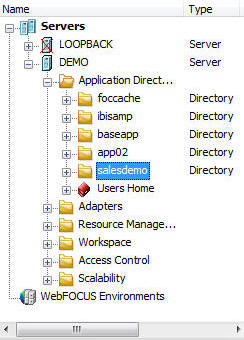
    The DEMO node is now added to the Servers list.

  4. Right-click the DEMO server node in the navigation pane, and select Connect.

Top of page

x
Create Sample Data and Metadata and Create an Application Directory

Your first task is to create the sample data and metadata you will be using in the tutorial.

To create the sample data and metadata from the DMC, see How to Create Sample Procedures and Data.

After you have created your sample data, let us set up a separate application directory called salesdemo in the Application Directory tree. This application directory will contain the flows and other files you will be creating.

  1. Connect to the DEMO server using a user ID with server administrator privileges.
  2. Under the DEMO server, right-click Application Directories, select New, and then Application Directory.

    The Create New Application dialog box opens.

  3. In the prompt box that opens, enter salesdemo as the new application directory name, and click OK.

    The salesdemo application directory is now listed in the approot tree in the navigation pane. Notice that ibisamp, the directory in which sample data is installed, is already in the Application Path box, which means it is in the application path of the server.

    If the directory is not listed, right-click Application Directories and select Application Path. Check that the box in the In Path column is selected for salesdemo. Select Save to save your changes.

    Tip: In addition to salesdemo and ibisamp, the Application Directory tree contains a directory called baseapp. This is a default directory that is added automatically to your Application Path during installation. There is no need to add baseapp explicitly to your Application Path.

    The salesdemo folder you created in the Web Console now appears in the Application Directories list.

    Application Directories list

Next step: Your setup is complete. Let us create a Data Flow.


iWay Software