
In this section: |
|
You can change the options that apply to an active report. The Active Report Options tab is located at the top of the App Studio interface and is accessible only when you have selected an active report output. The Active Report Options tab is shown in the following image.
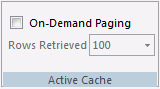
You can change the paging of a report and the number of rows retrieved. The Active Cache group is shown in the following image.
The commands are:
When on-demand paging is enabled, the viewer displays one page of report output and navigational controls. You use the navigational controls to change the report page that appears in the viewer.
Your browser consists of two frames, the Report Frame and the Viewer Control Panel frame. The Report Frame is the larger frame and contains one page of report output. When you first run a report, the Report Frame contains the first page of report output.
The Viewer Control Panel frame contains the controls you use to navigate through the report and to search for a string. The navigational controls allow you to display the next or previous page, the first or last page, or to display a specific page. You use the searching function to locate a page of the report that contains the search string you specify.
Sets the number of rows displayed in the output. 100 is the default.
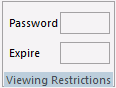
You can set a password to access an active report, and set an expiration date so that an active report is no longer viewable past that date. The Viewing Restrictions group is shown in the following image.
The commands are:
Sets a password that must be entered to view the active report output.
It is a character string up to 32 characters in length. Only standard alphanumeric English characters are allowed in the password for an active report in AHTML format. National Language Support (NLS) characters are not allowed in the password. Any NLS character in the password for an AHTML report makes the password invalid.
The date when an active report expires and the report output can no longer be viewed (displayed).
Enter the expiration date in year, month, day (yymmdd) format or in day format (1-999 DAYS) where the value indicates the number of days from the current date that the report expires. Valid values are 1 to 999 days. Note that you must enter the number and the word DAYS as part of the value.
You can change which chart engine to use when creating charts. The Chart Engine group is shown in the following image.

The commands are:
You can select which engine to use when creating a chart. The options you can select are:
<not set>. No selection has been made.
Standard. The default JavaScript charts will be used.
Flash. This option will change the engine to use Fusion charts.
HTML5. This option will change the engine to use High charts. This is the default chart engine for AHTML and FLEX formatted reports.
Flex. This option will change the engine to use Flex charts, if available.
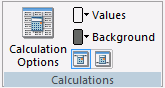
You can set the color, position, and options available for calculations. The Calculations group is shown in the following image.
The commands are:
Enables you to turn on calculations for fields in the report. All visible fields in the report appear in the Column list in the order they appear in the report. Hidden fields do not appear in the Column list.
You can select a calculation for each field in the Column list from the Calculation drop-down list. Calculation options are determined by the field type. If the field is in an alphanumeric format, the drop-down list contains Count and Count Distinct. If the field is a numeric format, the drop-down list contains Sum, Average, Count, Count Distinct, Minimum, and Maximum.
Opens the Color dialog box, where you can set the color of calculation values.
Opens the Color dialog box, where you can set the background color of calculations.
Displays calculations at the top of the report.
Displays calculations at the bottom of the report.
You can change the visibility, collapsibility, and position of the legend. The Legend Options group is shown in the following image.

The commands are:
Sets the legend to always be visible.
Sets the legend to be collapsible.
Minimizes the legend and moves it to the bottom left.
Minimizes the legend and moves it to the bottom center.
Minimizes the legend and moves it to the bottom right.
You can use this group to display multiple reports differently. The Window Display group is shown in the following image.

The commands are:
View multiple reports with default windows.
View multiple reports with cascading windows.
View multiple reports in one window with a tab for each report.
You can freeze the selected column and all columns to the left of that column. The Freeze Columns group is shown in the following image.

The command is:
Freezes the report at a particular point so that columns to the left of the freeze point remain in view while you scroll through the other report columns. You can select any of the fields present on the report canvas to freeze the report at that point, or you can select None to turn off the Freeze option.
If the report can be fully viewed in the browser window, then freeze is not applied.
The Freeze columns option is not available for expandable report (Accordion) views.
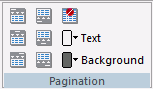
You can set the location and color of the status bar and page navigation bar. You can also specify whether or not to display these bars. The Pagination group is shown in the following image.
The commands are:
Sets the record status bar and page navigation bar to display on the top left.
Sets the record status bar and page navigation bar to display on the top center.
Sets the record status bar and page navigation bar to display on the top right.
Sets the record status bar and page navigation bar to display on the bottom left.
Sets the record status bar and page navigation bar to display on the bottom center.
Sets the record status bar and page navigation bar to display on the bottom right.
Sets the record status bar and page navigation bar to not display.
Sets the text color for the record status bar and page navigation bar. Opens the Color dialog box.
Sets the background color for the record status bar and page navigation bar. Opens the Color dialog box.
You can apply data visualization to numeric fields in an active report. You can designate the colors of the bars and set different colors for positive and negative values. The default color for positive and negative values is black. The Visualize group is shown in the following image.

The commands are:
Sets the color for positive numeric values. Opens the Color dialog box.
Sets the color for negative numeric values. Opens the Color dialog box.
Sets which icon set to use for your active report.
You can set the color of a row of data when you pause the mouse pointer on the row or when you select the row. The Row Selection group is shown in the following image.

The commands are:
Sets the color of a row of data when you pause the mouse pointer on the row. Opens the Color dialog box.
Sets the color of a row of data when you select that row. Opens the Color dialog box.
You can make specific options available in the active report and set the color of menu items. The Menu Options group is shown in the following image.

The commands are:
Adds pagination options when selected.
Adds filter options when selected.
Adds freeze options when selected.
Adds calculation options when selected.
Adds hide options when selected.
Adds chart options when selected.
Adds exportation options when selected.
Adds visualization options when selected.
Adds sorting options when selected.
Adds rollup options when selected.
Adds pivot options when selected.
Adds comment options when selected.
Adds window options when selected.
Adds restoration options when selected.
Adds email options when selected.
Adds save options when selected.
Adds print options when selected.
Adds accordion options when selected.
Adds tool options when selected.
Adds grid options when selected.
Sets the color of menu text. Opens the Color dialog box.
Sets the color of menu text when you pause the mouse pointer on menu text. Opens the Color dialog box.
Sets the background color of menu text. Opens the Color dialog box.
Sets the background color of menu items when you pause the mouse pointer on the menu items. Opens the Color dialog box.
Sets the color of the border for menu text. Opens the Color dialog box.
Sets the width and height of FLEX or APDF formatted active reports. The Application Container group is shown in the following image.
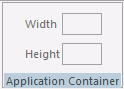
Sets the width of the active report container for FLEX or APDF formatted reports.
Sets the height of the active report container for FLEX or APDF formatted reports.
| WebFOCUS |