The Manage tab provides components that Administrators can access to manage dimensions, sources, fields, measures, schedules, owners, functional roles, scorecard security, access roles, dashboards (gadgets), content, units of measure, time ranges, and system settings.
The following image shows the Manage tab.
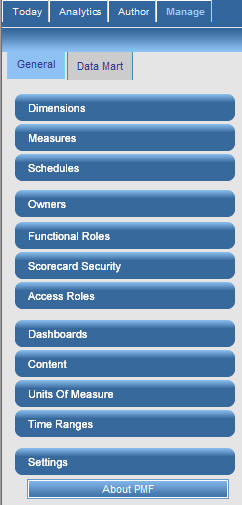
On the Manage tab, you (the administrator) can manage metadata for the following components:
- Dimensions. Enables you to create new dimensions and access the Dimension Loader to load dimensions.
- Measures. Enables you to create and modify measures metadata, which controls the measure series. Each measure series is a distinct measure that you can link to an objective in a PMF scorecard. You can also load measures with the measure loader.
- Schedules. Enables you to schedule load-related activity.
- Owners. Enables you to add new system users, make existing users active or inactive, and modify the start tab (Today tab) for each user.
- Functional Roles. Enables you to create and modify functional roles to control the level of access to all of the systems in PMF for all users assigned to a functional role. The default roles in PMF are administrator, author, planner, analyst, and consumer.
- Scorecard Security. Enables you to control scorecard user access. You can control which scorecards each user can access, and also determine which users have access to a specific scorecard. Access levels include no access, viewer, editor, and administrator.
- Access Roles. Enables you to create and modify access roles to control the level of access to measures and dimensions for all users assigned to an access role.
- Dashboards. Enables you to design types of gadgets (classes), create and modify individual gadgets, and add gadgets to dashboard pages. A gadget is usually a small graph or data grid.
- Content. Enables you to select the specific content to be displayed on the Today tab for each user. A variety of content can be available in the application. This component also enables you to create up to 10 custom categories for the content that you manage.
- Units of Measure. Enables you to create and modify units of measure, which determine the types of actual quantities being measured in PMF. Each measure is linked to a unit of measure.
- Time Ranges. Enables you to create and modify time ranges, which can be used wherever trending data appears in views throughout PMF.
- Settings. Enables you to set system and default settings, such as organization name, corporate logo, style sheet, indicator set, Today date, and more.
- About PMF. Displays the version and release dates.
The Dimensions panel button provides access to the dimensions and measures loaders. These tools are fully integrated into your Administration view. Unlike most systems, in which the creation of the underlying data used for analysis is performed using a separate tool, the loaders enable you to perform data loads right in the context of the framework. After a load is complete, you can immediately switch to a data-bearing view and test the new measures you have loaded right in the system.
For details on the Dimension Loader, see Designing a Simple Dimension Load.
The Measures panel button provides access to all aspects of working with measures. You can access the Edit Measures form. The Edit Measures form controls the measure and its connected rows of values, which you can optionally link to an objective. For details on the fields and buttons in the Edit Measures form, see How to Access and Save Measures.
You can also access the Measure Loader form. The Measure Loader form enables you to load data for a selected measure by specifying the dimension key values, field maps, and filters. For details on the Measure Loader, see How to Design a Simple Measure Load.
The Edit Schedule form enables you to edit or delete a saved schedule for a dimension or measure load. Schedules are created during the load process. For details on creating a schedule for a dimension load, see Running and Scheduling a Dimension Load. For details on creating a schedule for a measure load, see Scheduling a Measure Load.
To access the Edit Schedule form, click the Schedules panel button and select a dimension or measure load schedule in the navigation tree.
You can change the job description and interval at which to run the load. You are prompted for information that applies to the selected interval. For example, you are prompted for the days of the month if you select a monthly interval.
Enter the value for time in 24-hour notation. For example, to schedule a load at 8:00 a.m., enter 0800.
The Edit Owner form enables you to edit the properties assigned to an owner. Owners are constituents who use PMF. They are known as owners because they own the responsibilities for measure records, projects, processes, objectives, and scorecards.
Note that each owner ID tends to exactly match a login ID used in the system. You cannot have an owner ID without a matching login ID because that user ID could never be validated for basic access to the PMF system.
The Owners record contains an optional password field. This field is designed to allow the Owners table to double as a basic authentication table in cases where the customer does not have an external security system. For example, the standard PMF demo uses the Owners table for this purpose.
To edit the properties assigned to an owner, click Owners in the Manage tab and expand the tree structure. Click the desired owner name to open the Edit Owner form.
The same fields used to create an owner in the New Owner form are used to edit owner properties in the Edit Owner form. The only exception is the Owner ID field, which cannot be updated when editing the rest of the fields in the form. For details on the fields in the New Owner and Edit Owner forms, see Fields in the Owner Panels.
The Edit Functional Role form enables you to control the system-level functions each type of user is allowed to perform. As administrator, you can change the access allowed for the default roles that ship with PMF. You can also add and personalize as many roles as necessary for system maintenance.
For more information on setting access levels for functional roles, see Access Levels for Functional Roles. For details on creating a new functional role, see How to Create a New Functional Role.
Provides access to the Edit Scorecard User Access forms, which enable you to control scorecard user access. You can control which scorecards each user can access, and also determine which users have access to a specific scorecard. Access levels include no access, viewer, editor, and administrator.
The Edit Owner Access form provides a way to control measure access for a group of owners linked to an access role by enabling you to set the level of dimension values that each owner can access.
From the drop-down menus for each dimension, select the level of access for the selected access role. The owners linked to this access role will only be able to see measures at or below the dimension level you set.
For details on setting measure access for access roles, see How to Set Measure Access by Access Role.
There are two types of panels used to design and implement gadgets in your views and pages.
- The Gadget Designer form enables you to create a class of gadgets, which is required before you can create a gadget within that class. A class points to a WebFOCUS gadget procedure and lets you define its properties. The Gadget Designer form is also used to edit existing gadgets.
- The Dashboard Designer form enables you to add gadget instances to a view or other type of page.
The following tables lists and describes the fields used in the Edit Gadget Designer form:
|
Field |
Description |
|---|---|
|
Name |
The name of the gadget. |
|
Scorecard filters |
Specify whether the current scorecard filters should be used. |
|
Width |
Set the number of pixels in width for this gadget. |
|
Height |
Set the number of pixels in height for this gadget. |
|
Preview image |
The preview image of the gadget. |
|
Enable Broadcasts |
Select to enable the broadcast feature. |
|
Enable Moonbeam |
Select to enable the moonbeam feature. |
|
Content Type |
Select which type of content will be added as the gadget. |
|
Content Display |
Select which type of content will be displayed. |
|
Aggregation at Level |
Select the appropriate level of the dimension at which data will be aggregated. |
|
Reset Dashboard defaults |
Select to reset Dashboard default values. |
|
Remove user preferences |
Select to remove user preferences for the gadget. |
|
Description |
A description of the gadget. |
|
Display |
Select from the following Display elements to include in the gadget being created. (Use the drop-down menu next to each element to select Not Used, Optional, or Required.)
|
|
Groupings |
Select up to three Groupings elements to include in the gadget being created. (Use the drop-down menu next to each element to select Required or Optional.) - - Select a grouping - - (select one of the following)
|
|
Filters |
Select up to three Filters elements to include in the gadget being created. (Use the drop-down menu next to each element to select Required or Optional.) - - Select a filter - - (select one of the following)
|
The New Content and Edit Content panels enable you to create content and edit existing content. Content is a default reference to any WebFOCUS procedure that displays automatically when users log on to PMF. PMF content management lets you link PMF measures, objectives, projects, and processes to WebFOCUS operational reports and webpages. PMF ships with default content. You can configure additional content by clicking the Content panel button in the Manage tab.
The New Content and Edit Content panels also enable you to create up to 10 custom categories for the content that you manage.
To create content, click the Content panel button and then click New. To edit existing content, click the Content panel button, expand all the folders in the tree structure, and select the desired content that you want to edit. The Edit Content panel opens. For more information on creating and editing content, see Managing Content.
To create a custom category on the Edit Content panel, select a User Type field, and rename it to reflect the nature of the new category. For more information on creating a custom category, see Creating a Custom Category.
The following table lists and describes the fields in both the Edit Content and New Content panels.
|
Field |
Description |
|---|---|
|
Name |
Contains the name of the WebFOCUS procedure that runs as content. The content must be placed in the Managed Report default repository used by PMF in order to run it. The maximum number of characters is 12. Note: If the optional Web Page check box is selected, this field becomes unavailable and displays URL. |
|
Content Type |
Select the content type that will be created. When you select Web Site, enter a website URL in the field which is labeled URL (normally labeled Parameters). |
|
Application |
Select the application that this content will use. This option is only available when WebFOCUS Procedure is the Content Type. |
|
Content |
Select the WebFOCUS procedure for the view that you want to add. This option is only available when WebFOCUS Procedure is the Content Type. |
|
User Type (check boxes)
|
Enables you to create up to 10 custom categories for the content that you manage. Left-click a User Type field and supply a category name of your choice. |
|
Owner |
The user who has responsibility for this content. |
|
Parameters (or URL)
|
Optional. When you select the Web Page check box, enter a URL in this field, which is renamed URL. |
|
Scorecards |
Enables you to select what Scorecards will show the selected content. |
|
Escape (button) |
When using the optional Parameters field, use this to convert parameters so they can be submitted in machine code format as part of a URL. |
|
Unescape (button) |
When using the optional Parameters field, use this to submit the parameters in readable text. |
|
Preview |
Opens the content in a new window where you can preview it. |
|
Email Certified (check box)
|
If you select the Email Certified check box, the content will be embedded in the body of an email (rather than included as an attachment) when you schedule the view. |
The Edit Unit of Measure form enables you to control the format of data displayed in PMF. There are many default measures included in PMF. You can customize the standard display format of any unit of measure to modify how that measure is displayed in the detail views in which it appears.
To edit units of measure, click Units of Measure in the left pane, and expand the tree structure. Click a unit of measure and the Edit Unit of Measure form opens.
The same fields in the Edit Unit of Measure form are required for input as for updating. The following table lists and describes fields in the Edit Unit of Measure form.
|
Field |
Description |
|---|---|
|
Unit name |
Type a name for the unit of measure. The maximum number of characters is 20. |
|
Default format |
A WebFOCUS numeric display format valid for the unit of measure. Valid format types are D (floating-point double-precision), F (floating-point single-precision), I (integer), and P (packed decimal). The formats are In, Dn.o, Fn.o, and Pn.d, where n represents the maximum number of digits to display, and .o, which is optional, and .d, which is required, represent the decimal point and the number of digits to display after the decimal point. The maximum number you can code before and after the decimal point is 10 for I, 15 for D, 7 for F, and 31 for P. For more information about numeric display options, see the Describing Data With WebFOCUS Language manual. |
|
Common symbol |
Type characters for the symbol used to represent the unit of measure. The maximum number of characters is 6. |
|
Place symbol |
The location of the symbol. Select one of the following:
|
|
Description |
Type a description or rationale for the unit of measure. The maximum number of characters is 100. |
The Edit Time Range form enables you to create new custom time ranges or edit existing time ranges. After you edit or create a time range, it can be used as a trending value throughout all PMF views, wherever measures or objectives are trended.
The following table lists and describes the fields in both the New Time Range and Edit Time Range forms.
|
Field |
Description |
|---|---|
|
Name |
The long, descriptive name of the time range, for example, Last 13 months. The maximum number of characters is 50. |
|
Abbreviation |
The short, abbreviated name of the time range, for example, 13M. The maximum number of characters is 10. |
|
Start and End are: |
Select between the following two values using the drop-down menu:
|
|
Start Type |
For the following start types, select:
|
|
Start Time Level |
Select Current Level, Year, Quarter, or Month from the drop-down menu. This level specifies the start of the time range. If you select Current Level, the time range will use the Current Time Level value from the Edit System Settings form. |
|
Start Value |
If you selected Relative in the Start Type field, enter a positive or negative number to start the time range that number of units in the future or past depending on the unit of time specified in the Start Level field. If you selected Fixed in the Start Type field, select the desired time period to start the time range using the Start Value drop-down menu. |
|
End Type |
For the following end types, select:
|
|
End Time Level |
Select Current Level, Year, Quarter, or Month from the drop-down menu. This level specifies the end of the time range. If you select Current Level, the time range will use the Current Time Level value from the Edit System Settings form. |
|
End Value |
If you selected Relative in the End Type field, enter a positive or negative number to end the time range that number of units in the future or past depending on the unit of time specified in the End Level field. If you selected Fixed in the End Type field, select the desired time period to end the time range using the End Value drop-down menu. |
Important: If you have a custom Time dimension, you may need to make adjustments to the following time periods, which are standard in PMF, to conform to the structure of your custom Time dimension: Last 13 months or weeks, Last 25 months or weeks, Last 5 periods, and Last 9 periods.
The adjustments may involve altering these time ranges or deleting them and creating new time ranges.
Otherwise, the default time ranges in PMF, which are based on the standard 12-month, 4-quarter Gregorian calendar, will not produce realistic results after your new Time dimension is loaded.
For more information on custom Time dimensions, see Designing a Custom Time Dimension Load.
The Settings panel button enables you to view and edit any of the default PMF settings. The settings are categorized into Debugging, Integration, Look, Security, Summarization, System, Tolerances, and UI. For more information, see Viewing and Editing Default Settings.
