- Launch Developer Studio and navigate to the Repository.
-
If the folder which will contain the Reporting Object
already exists, proceed to step 4. Otherwise, create the folder
by right-clicking the desired location in the Repository and selecting New,
then Folder, or right-click Repository and select New
Folder to create the folder directly under the root.
The New Folder dialog box appears, as shown in the following image.
-
Type the name of the Reporting Objects folder (the name
automatically appears in the Title field), optionally select a server
and an application path, and click Create.
Note: If you do not select a server or an application path, each will be set to the default server and application paths for your Developer Studio client. For more information, see the Managed Reporting manual.
-
Right-click the folder which will contain the Reporting
Object and select New, then Reporting
Object.
The New Reporting Object dialog box appears, as shown in the following image.
The Look in location is set to the folder you selected, although you can change it to another location.
-
Type the name of the new Reporting Object in the File name field
and click File to select the Master File on
which your Reporting Object will be based.
The WebFOCUS Table List dialog box appears, as shown in the following image.

Note: Depending on your environment, you may be prompted for WebFOCUS Server credentials when you click the File button.
- Select a table and click OK or, if you would like to create a new table, click Create New.
-
You may also make the following optional selections when
creating a new Reporting Object:
- Prompt for Parameters determines whether or not users will be prompted for parameters (values) when they create private reports from this object. This is selected by default.
- Schedule Only determines whether or not the Reporting Object runs as a scheduled report only. By default, this is not available.
- Run With OLAP determines whether or not the Reporting Object is OLAP-enabled. By default, this is not selected.
- Only allow user to Run determines whether or not only a specific user can run the Reporting Object. By default, this is not selected.
- Allow user to Run determines whether or not running the Reporting Object is restricted to a specific user. By default, this is not selected.
- Do not show on User’s List determines whether or not the Reporting Object is restricted from appearing in user lists. By default, this is not available.
- Only Run as Deferred Report sets the report to run as a deferred report. By default, this is not selected.
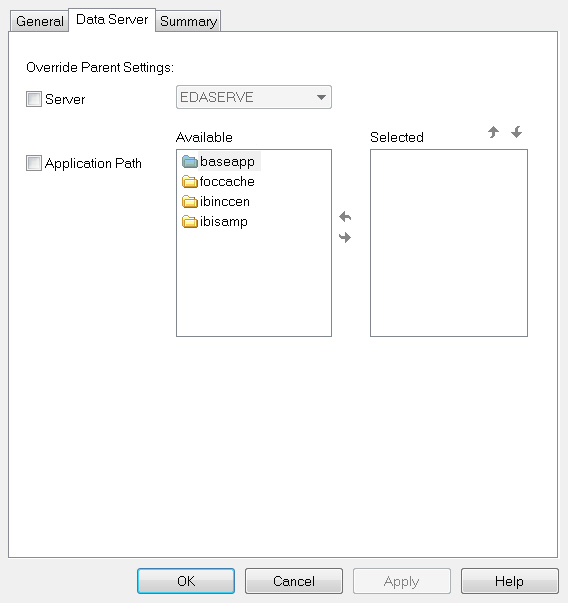
The Data Server tab allows you to manage the data server and the application path settings from which the Reporting Object retrieves information.
-
When you have selected all the desired options, click
Create.
The Reporting Object tool appears, as shown in the following image.
Note: Depending on your environment, you may be prompted for WebFOCUS Server credentials when you select the Create button.
- Double-click a Reporting Object component to begin customizing the object.
By default, the data server, which defines the Reporting Object, is the same data server from which it is accessed by users. However, you may wish to create a Reporting Object, which draws upon limited information from another data source, for example, to allow Sales managers to combine inventory information with personnel information to determine personnel performance.
To set a different data server for a Reporting Object:
-
While creating a new Reporting Object, select
the Data Server tab, as shown in the following image.

If the Reporting Object already exists, right-click the object and select Properties, then click the Data Server tab on the dialog box that appears.
- To change the application path but keep the current server, select Application Path. Move applications from the Available box to the Selected box by double-clicking them or by selecting them and using the movement arrows. Use the up and down arrows to change the preferred order of the application paths.
- To change the server, check Server and select from the available servers listed. Follow the directions above to set the application path of the new server.