Scheduling a Procedure

How to:

You can control when and how often a procedure is run using the Schedule/E-mail option on the navigation pane of the Applications page.


Top of page

x
Procedure: How to Schedule a Request to Run Once

You can schedule procedures from the Web Console or the DMC.

  1. From the Web Console menu bar, click Applications, or from the Data Management Console, expand the Server node folder.

    On the Web Console, the Applications page opens.

  2. Expand an application folder.
  3. Right-click a procedure, select Schedule/E-mail, and then Manage.

    The Manage Schedule and E-mail for procedure page opens, as shown in the following image.
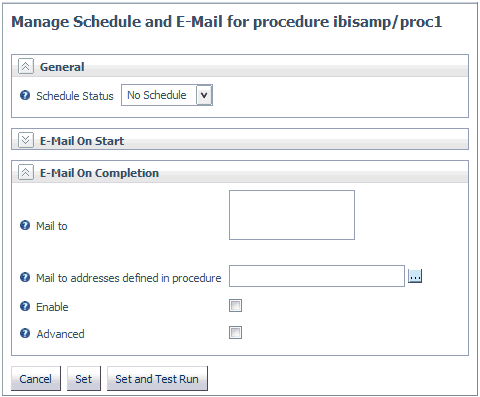
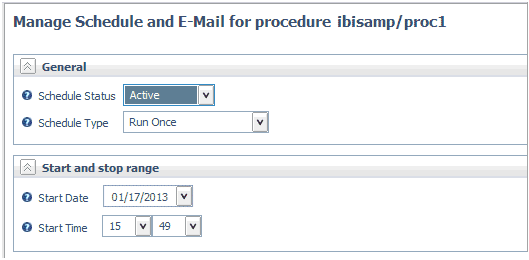
  4. Select the Active from the Scheduler Status drop-down menu.

    The Start and stop range section open, as shown in the following image.
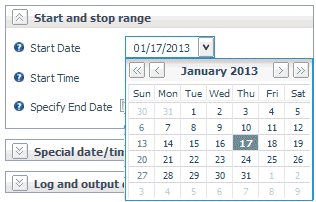
  5. To set a start date, click the Start Date drop-down menu to open a calendar, and select a date, as shown in the following image.
  6. To select a start time, select an hour and minute from the Start Time drop-down menus. Hours are listed for a 24-hour clock.
  7. Optionally, you can set up email notification when the procedure starts and/or ends in the E-Mail on Start and E-Mail on Completion sections.

    Note: To use email notification, the E-mail SMTP Server must be configured from workspace. For information, see E-mail SMTP Server Settings.

  8. Click Set or Set and Test Run.

Top of page

x
Procedure: How to Schedule a Recurring Request to Run

You can schedule procedures from the Web Console or the DMC.

  1. From the Web Console menu bar, click Applications, or from the Data Management Console, expand the Server node folder.

    On the Web Console, the Applications page opens.

  2. Expand an application folder.
  3. Right-click a procedure, select Schedule/E-mail, and then Manage.

    The Manage Schedule and E-mail for procedure page opens.

  4. Select the Active from the Scheduler Status drop-down menu.
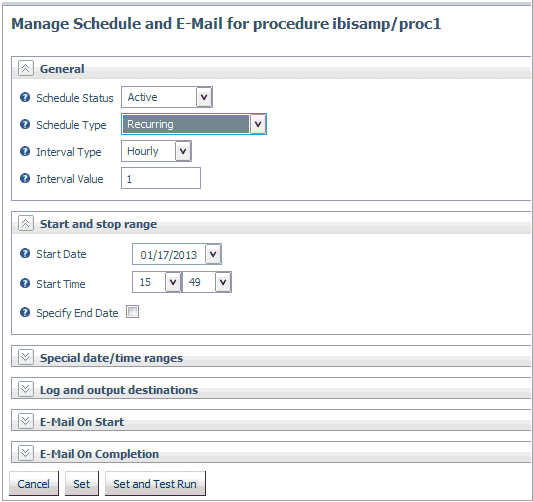
  5. In the General section, select Recurring from the Schedule Type drop-down menu.

    Additional parameters become available in the General Section, as shown in the following image.

  6. Select an interval from the Interval Type drop-down menu. The choices are Minutes, Hourly, Daily, Weekly, Monthly and Yearly.
  7. Enter a value in the Interval value field. This specified the frequency at which the procedure will run. For example, if you chose Weekly as the Interval Type, entering 2 will execute the procedure every two weeks.
  8. To set a start date, click the Start Date drop-down menu to open a calendar, and select a date, as shown in the following image.

  9. To select a start time, select an hour and minute from the Start Time drop-down menus. Hours are listed for a 24-hour clock.
  10. Optionally, you can select the Specify End Date check box, and select an end date and time.
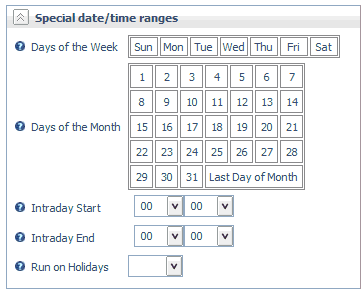
  11. Optionally, you can select days of the week or month, intraday start and/or end, as well as how to handle holidays, from the Special date/time ranges section, as shown in the following image.

    The Run on Holidays drop-down menu allows you to skip, run, or only run the report on holidays.

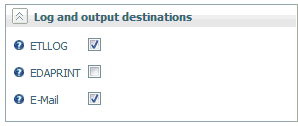
  12. Optionally, Optionally, you can expand from the Log and output destinations section and select destinations, as shown in the follow image.

  13. Optionally, you can set up email notification when the procedure starts and/or ends in the E-Mail on Start and E-Mail on Completion sections.

    Note: To use email notification, the E-mail SMTP Server must be configured from workspace. For information, see E-mail SMTP Server Settings.

  14. Click Set or Set and Test Run.

Top of page

x
Procedure: How to Schedule a Request to Run on Multiple Days

You can schedule procedures from the Web Console or the DMC.

  1. From the Web Console menu bar, click Applications, or from the Data Management Console, expand the Server node folder.

    On the Web Console, the Applications page opens.

  2. Expand an application folder.
  3. Right-click a procedure, select Schedule/E-mail, and then Manage.

    The Manage Schedule and E-mail for procedure page opens.

  4. Select the Active from the Scheduler Status drop-down menu.
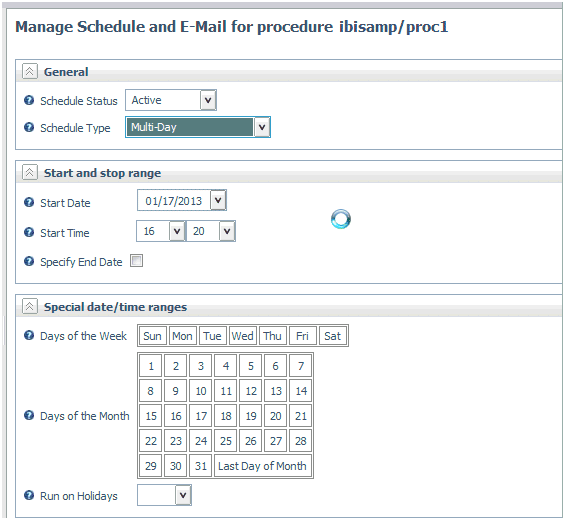
  5. In the General section, select Multi-Day from the Schedule Type drop-down menu.

    The Special date/time ranges section opens, as shown in the following image.

  6. To set a start date, click the Start Date drop-down menu to open a calendar, and select a date, as shown in the following image.

  7. To select a start time, select an hour and minute from the Start Time drop-down menus. Hours are listed for a 24-hour clock.
  8. Optionally, you can select the Specify End Date check box, and select an end date and time.
  9. Optionally, you can select days of the week or month, as well as how to handle holidays, from the Special date/time ranges section, as shown in the following image.

    The Run on Holidays drop-down menu allows you to skip, run, or only run the report on holidays.

  10. Optionally, Optionally, you can expand from the Log and output destinations section and select destinations, as shown in the follow image.

  11. Optionally, you can set up email notification when the procedure starts and/or ends in the E-Mail on Start and E-Mail on Completion sections.

    Note: To use email notification, the E-mail SMTP Server must be configured from workspace. For more information, see E-mail SMTP Server Settings.

  12. Click Set or Set and Test Run.

Top of page

x
Procedure: How to Schedule a Request to Run When the Server Starts

You can schedule procedures from the Web Console or the DMC. This procedure will run on every server start.

  1. From the Web Console menu bar, click Applications, or from the Data Management Console, expand the Server node folder.

    On the Web Console, the Applications page opens.

  2. Expand an application folder.
  3. Right-click a procedure, select Schedule/E-mail, and then Manage.

    The Manage Schedule and E-mail for procedure page opens.

  4. Select the Active from the Scheduler Status drop-down menu.
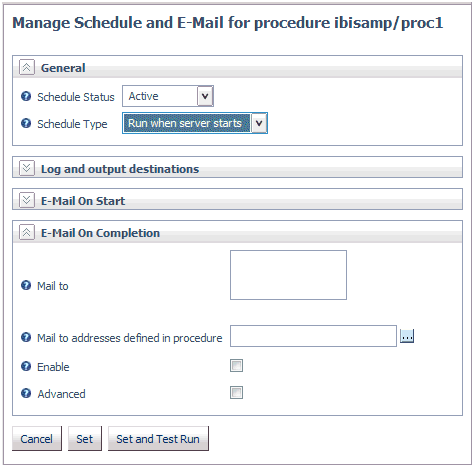
  5. In the General section, select Run when server starts from the Schedule Type drop-down menu.

  6. Optionally, you can set up an email notification when the procedure starts and/or ends in the E-Mail on Start and E-Mail on Completion sections.

    Note: To use the email notification option, the E-mail SMTP Server must be configured from the workspace. For information, see E-mail SMTP Server Settings.

  7. Optionally, you can expand from the Log and output destinations section and select destinations, as shown in the follow image.

  8. Click Set or Set and Test Run.

iWay Software