Creating a Map Service

How to:

You can create a map service using one of the following options:

To grant permissions, add your logon for the system where ArcCatalog is installed as a user to the agsadmin group in the ArcGIS Server system.


Top of page

x
Procedure: How to Publish a Map Service Using the ArcGIS Server Manager Console

To publish a map service using the ArcGIS Server Manager Console:

  1. From the Windows Start menu, select All Programs, ArcGIS, ArcGIS Server for the Java Platform, and then click ArcGIS Server Manager.

    The Login to ArcGIS Manager dialog opens.
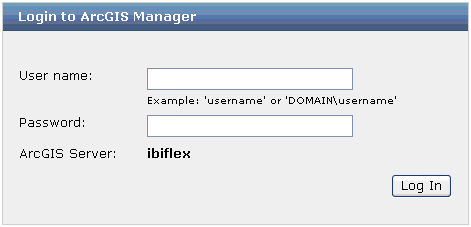
  2. Log in to the ArcGIS Server Manager Console using the account that you configured after installation.
  3. Click Log In.

    The ArcGIS Server Manager Console Home page opens.
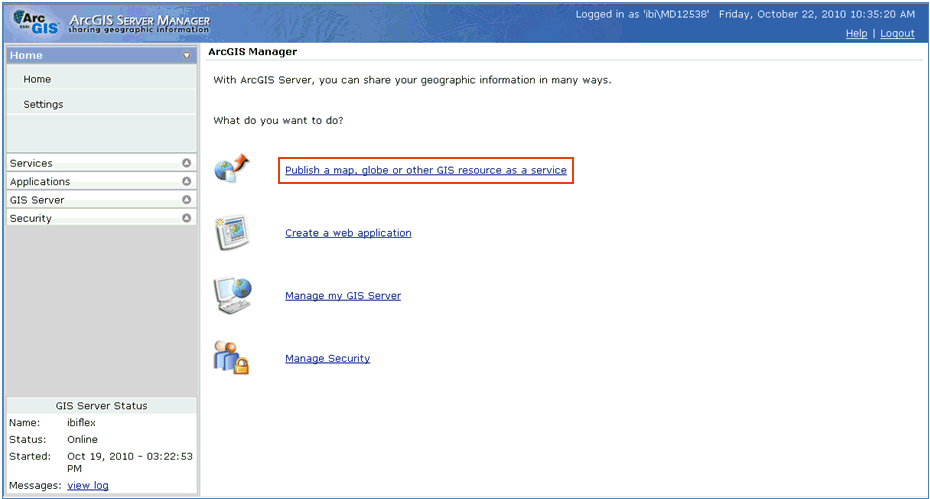
  4. Click Publish a map, globe or other GIS resource as a service.

    The Publish: General page opens.
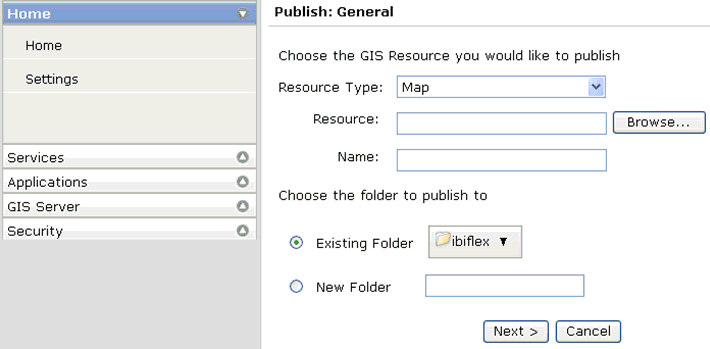
  5. From the Resource Type drop-down list, select Map.
  6. Specify the path to the map document (.mxd) in the Resource field, or click the Browse button to navigate to the location on your file system.
  7. In the Choose the folder to publish to section, select an existing folder or specify a new folder name in the New Folder field.
  8. Click Next.

    The Publish: Capabilities page opens.
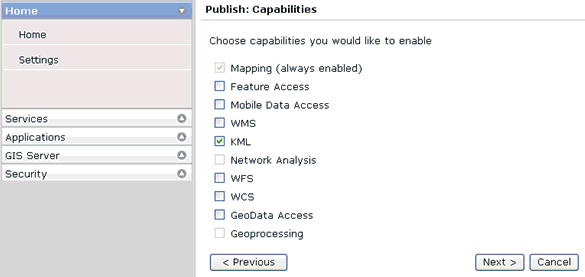
  9. Accept the default values and click Next.

    The Publish: Summary page opens.
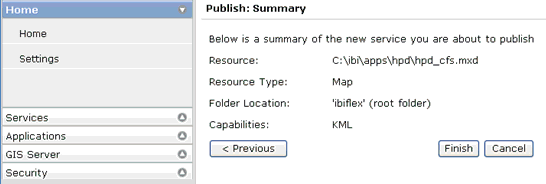
  10. Click Finish.

Top of page

x
Procedure: How to Use ArcCatalog to Connect to the ArcGIS Server and Create the Map Service

To use ArcCatalog to connect to the ArcGIS Server and create the map service:

  1. From the Windows Start menu, select All Programs, ArcGIS, and then click ArcCatalog.

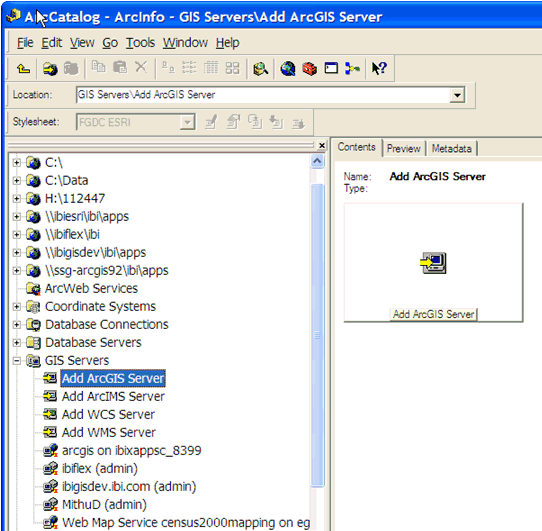
    The ArcCatalog opens, as shown in the following image.

    You must first create a connection to the ArcGIS Server.

  2. Expand the GIS Servers node and double-click Add ArcGIS Server.

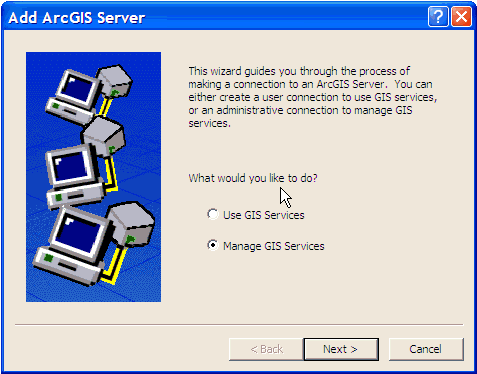
    The Add ArcGIS Server wizard opens, as shown in the following image.

  3. Select the Manage GIS Services option and click Next.

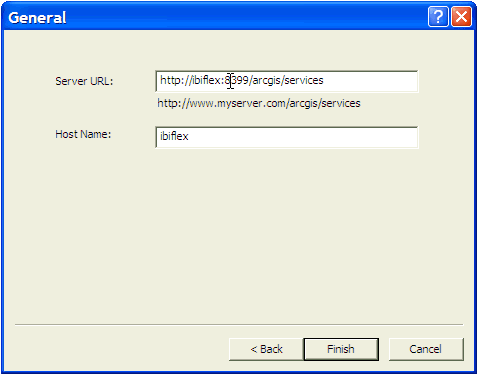
    The General pane opens.

  4. Enter the server URL using the following format:
    http://<ArcGIS ServerHost Name>:<port number>/arcgis/services

    This is the URL on which the map services are displayed. By default, ArcGIS Server listens on port 8399.

  5. Enter the host name.

    Typically, this is the ArcGIS Server host name.

  6. Click Finish.

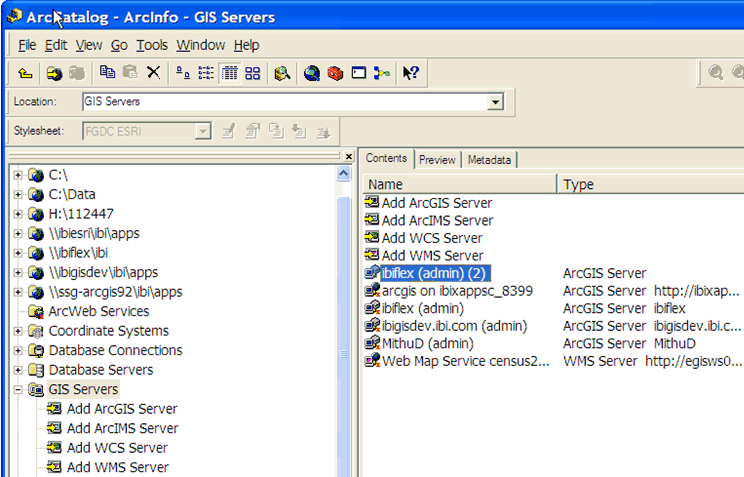
    The new connection is added to the ArcCatalog, as shown in the following image.

    You are now ready to create a map service.

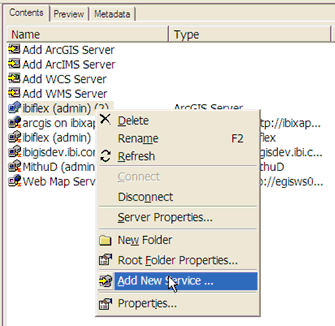
  7. Right-click the newly created ArcGIS Server connection in the ArcCatalog and select Add New Service from the context menu, as shown in the following image.

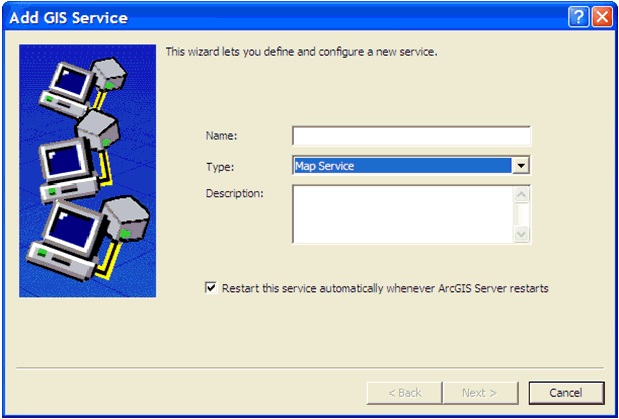
    The Add GIS Service wizard opens, as shown in the following image.

  8. Enter a name for the new map service in the Name field.
  9. From the Type drop-down list, select Map Service.
  10. Click Next.

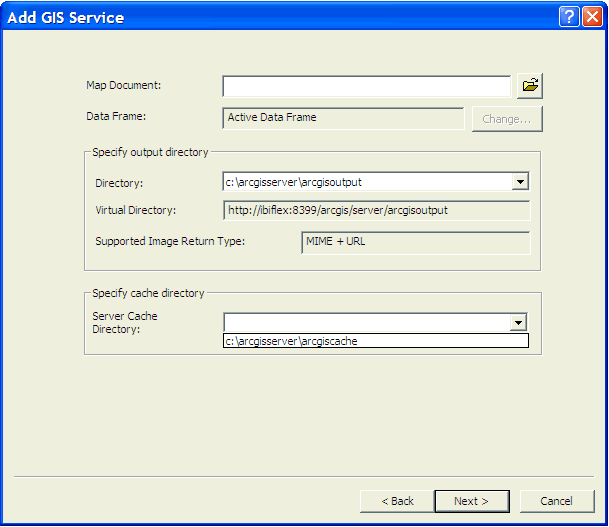
    The following pane opens, prompting you to specify the map document (.mxd), output directory, and cache directory.

  11. Specify the path to the map document (.mxd) in the Map Document field, or click the Browse button to navigate to the location on your file system.
  12. Accept the default values in the Specify output directory section, or specify your own custom values.
  13. Select an available cache directory from the Server Cache Directory drop-down list.
  14. Click Next.

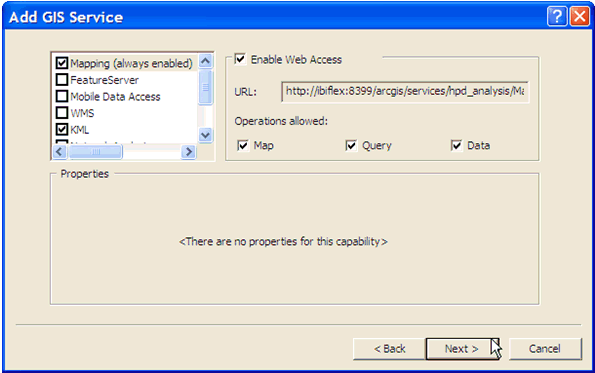
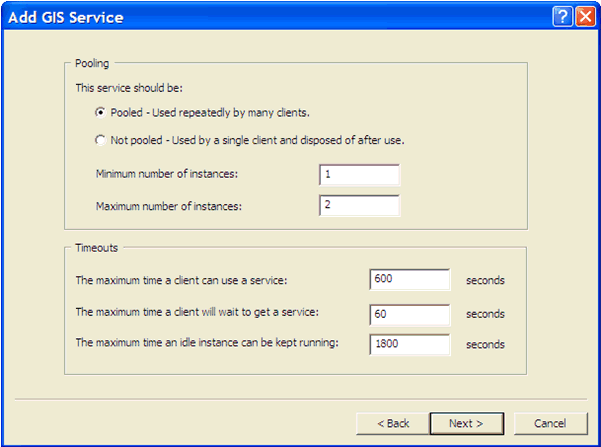
    The following pane opens.

  15. Accept the default values and click Next.

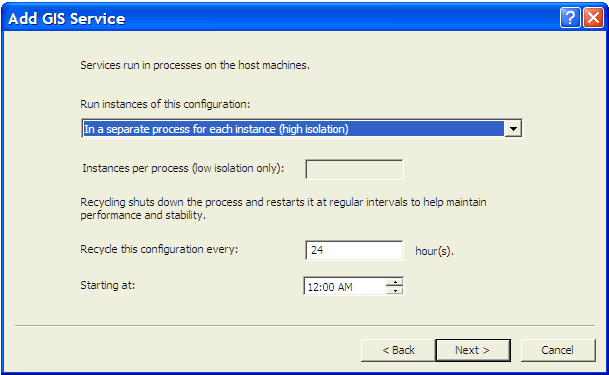
    The following pane opens.

  16. Accept the default values and click Next.

    The following pane opens.

  17. Accept the default values and click Next.

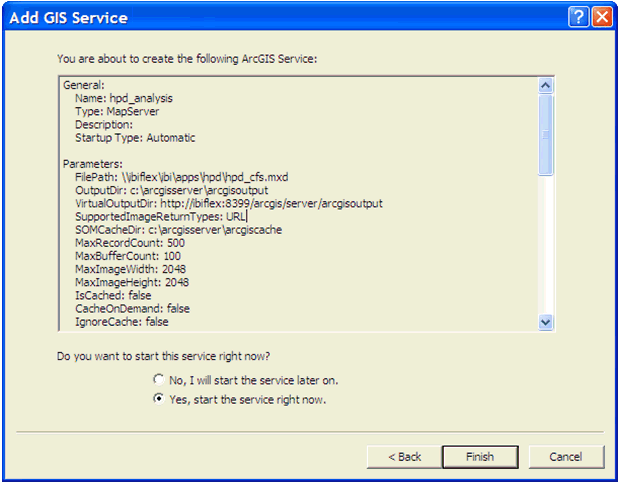
    The Summary pane opens, as shown in the following image.

  18. Click Finish.

    You have successfully created a new map service using ArcCatalog.

    You are now ready to create the map cache.


Top of page

x
Procedure: How to Create the Map Cache

To create the map cache:

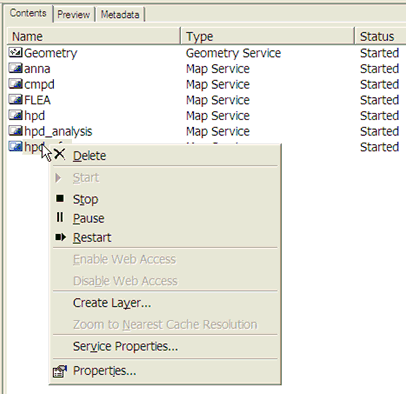
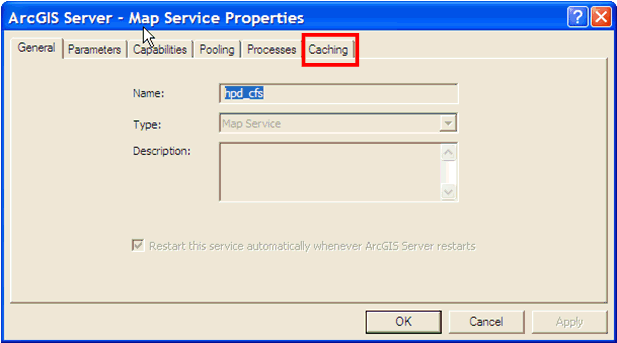
  1. Right-click the newly created map service and select Service Properties from the context menu, as shown in the following image.

    The Map Service Properties dialog opens.

  2. Click the Caching tab.

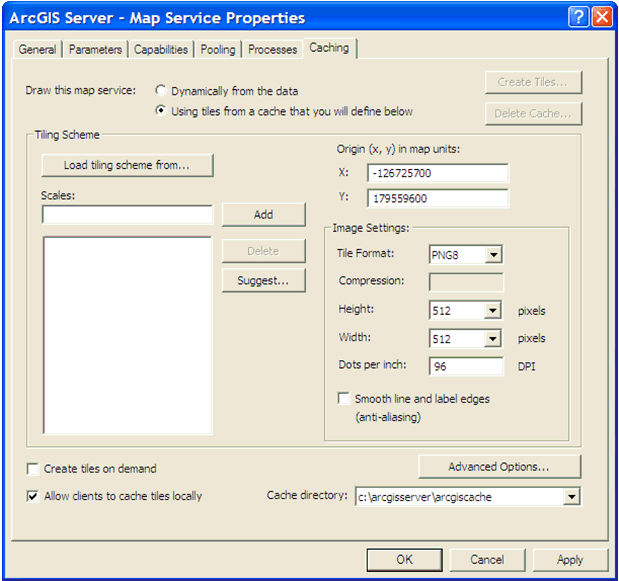
  3. In the Draw this map service section, select the Using tiles from a cache that you will define below option.
  4. Click Suggest in the Scales section if you are unsure of how to create the tile.

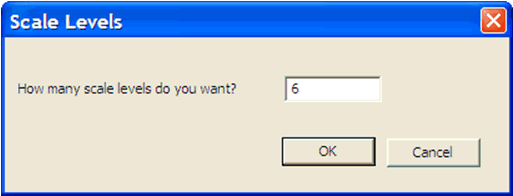
    The Scale Levels dialog opens.

  5. Enter a number in the field, which represents the number of zoom levels that will be allowed in the map navigation.
  6. Click OK.

    You are returned to the Caching tab of the Map Service Properties dialog.

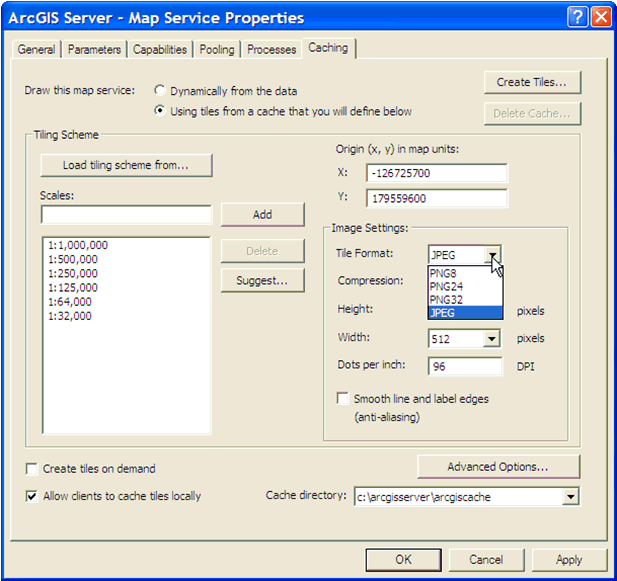
  7. In the Image Settings section, select JPEG from the Tile Format drop-down list.

    The JPEG format produces small tiles and will reduce the required disk space to store the cache. In addition, clients can also load the tiles faster.

    Note: This step assumes that you are not going to overlay this cache on another service. For overlay services, such as road and boundary networks, it is recommended to use the PNG8 format instead.

  8. Click OK.

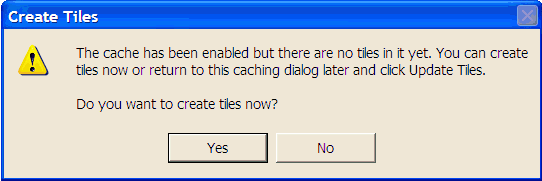
    The Create Tiles dialog opens.

  9. Click Yes.

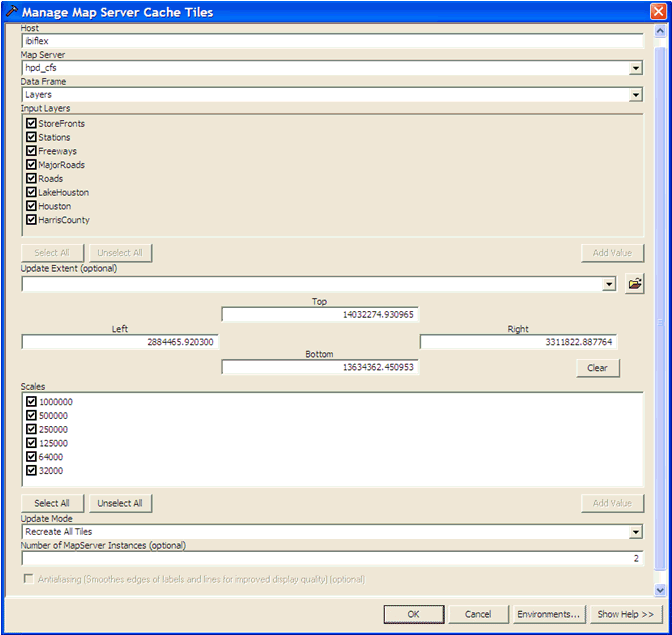
    The Manage Map Server Cache Tiles dialog opens, as shown in the following image.

  10. Ensure that Recreate All Tiles is selected from the Update Mode drop down list.
  11. Click OK to create the tiles.

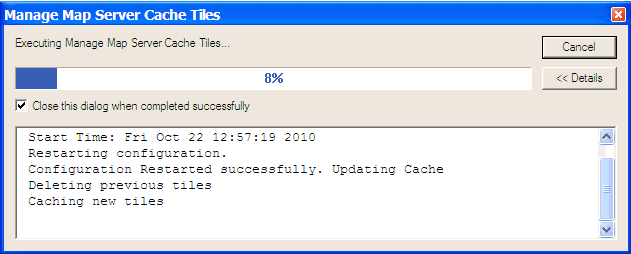
    The following dialog opens, which shows the progress of the tile creation process.

  12. Wait until the process has finished.

    Once the process has finished, you must clear the REST cache.


Top of page

x
Procedure: How to Clear the REST Cache

To clear the REST cache:

  1. Log on to the ArcGIS REST API Admin console using the following URL:
    http://<ArcGISServer>:8399/arcgis/rest/admin/

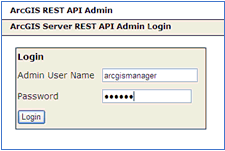
    The following login page opens.

  2. Enter a valid admin user name and password, and then click Login.

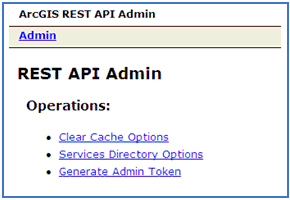
    The REST API Admin page opens, as shown in the following image.

  3. Click the Clear Cache Options hyperlink.

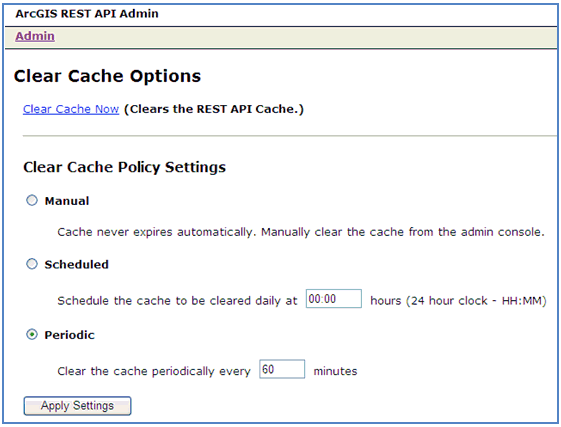
    The Clear Cache Options page opens.

  4. Click the Clear Cache Now hyperlink.

    You can also select the Scheduled or Periodic option to clear the cache automatically based on the time values that you specify.


WebFOCUS