How to: Reference: |
You can save any TAG, RECAP, or DATA row by posting the output to a file. These rows can then be used as though they were provided in a DATA row.
The row will be processed in the usual manner in the report, depending on its other options, and then posted. The label of the row is written first, followed by the numeric values of the columns, each comma-separated, and ending with the terminator character of a dollar sign ($).
For example:
AR       , 18829,     15954,$
INV      , 27307,     23329,$
- Select a TAG, RECAP, or DATA row in the Design matrix.
- Enter the ddname of the work file in the Post To input box for Row Properties, above the matrix.
- Right-click anywhere in the row (except on the label) and select Row Properties from the context menu. The selected Row Type dialog box opens.
- Click the General tab and enter a ddname in the Post To input box under Formatting Options.
The selected row is saved in the designated work file (in comma-delimited format) from which you can then pick it up for use in another financial report.
Repeat the process for each row you wish to save to a work file (either the same file or a different one).
Note: Remember that you must create a FILEDEF command to assign a logical (ddname) to the work file before you execute the request.
You can retrieve posted rows from a work file and use those rows as if they were provided in a TAG row.
Remember that you must create a FILEDEF command to assign a logical (ddname) to the work file before you execute the request.
From the matrix in which you want to pick up data:
- Select the row that will contain the picked up data. (If necessary, add or insert a blank row (see Formatting Financial Reports).
-
Click the Pickup icon
on the toolbar.
or
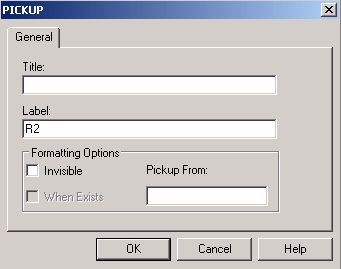
Right-click anywhere in the row (except on the label) and select Pickup from the context menu. The PICKUP dialog box opens at the General tab.
- Enter a title for the PICKUP row in the Title box. This title will appear in the report.
- To supply an explicit row label to replace the default label on the matrix, type it into the Label box. (The default label is retained internally.)
- In the Pickup From box, enter the ddname for the work file that contains the posted data, followed by a space and the label of the data row you want to pick up.
- To suppress the display of the PICKUP row, select the Invisible check box.
- Click OK.
PICKUP appears in the Row Type column on the matrix, along with the label and title you have defined and the data values retrieved from the designated work file.
Repeat this process to include additional PICKUP rows in the report.
General Tab
- Title
-
Specifies a title for the picked up data. This title will appear on the report.
- Label
-
Lists the default label for the PICKUP row. You can replace the default row identification label with an explicit row label that you want to reference in an expression.
- Formatting Options:
-
The following options apply to individual rows in the report.
- Invisible
-
Picks up data for use in a RECAP calculation, but does not display the retrieved data.
- Pickup From
-
Is the ddname of the work file that contains the data you wish to retrieve, followed by a space and the label of the PICKUP row.
In the following matrix, two rows are designated as PICKUP.
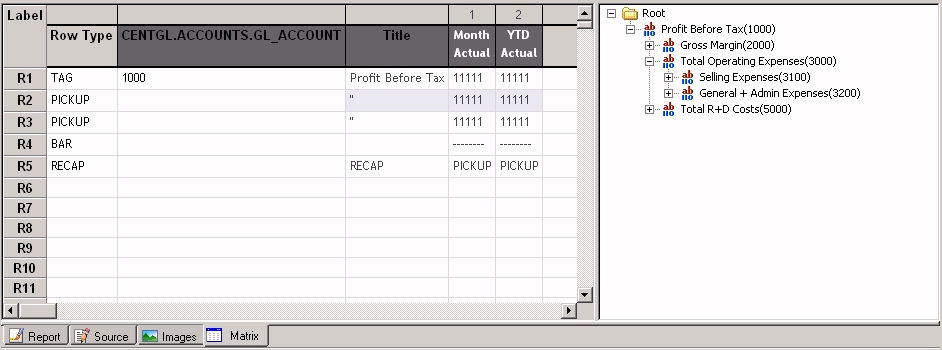
Notice that the labels for these rows are referenced in the RECAP formula.
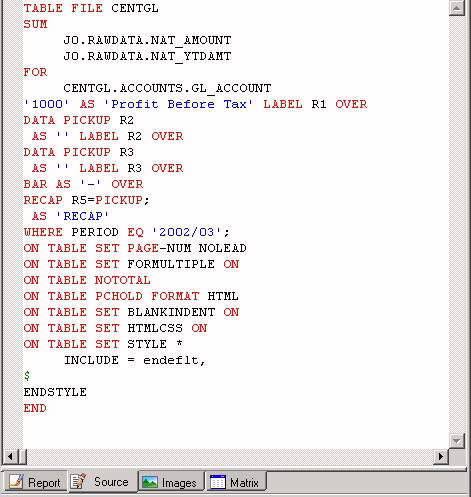
You can see the underlying source code, including the name of the work file to which the rows of data were posted, in the following screen.