In this section: |
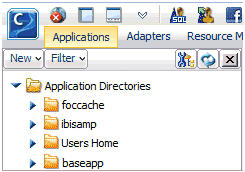
Path management tasks are available from the Applications page, which is accessed by clicking Applications on the Web Console menu bar. The Application Directories folder is on the navigation pane. Above this pane is a set of icons that provide the quickest way to initiate path management tasks.

A single click on one of the following icons is enough to get you started.
|
Icon |
Tool Tip |
Function |
|---|---|---|
|
|
Hide and Show tree |
Toggles the navigation pane on and off, allowing one or both panes to occupy the screen, as needed. Note that these icons are displayed in any context in which you might wish to toggle the navigation pane on and off. |
|
|
Filter |
This button opens the Filter Applications Tree page, where you can filter synonyms, procedures, DM flows, HTML files, and SQL files. |
|
|
Configure Application Path |
Opens the Application Path pane from which you can create applications, add applications to the search path, map and reorder applications, delete applications or mappings from the path. The Application Path pane provides additional icons designed to facilitate each of these tasks. |
|
|
Refresh |
Depending upon the selected context in the navigation pane, this icon refreshes the synonyms or procedures and HTML files listed in the application tree. Note that this icon is displayed in any context in which you might wish to refresh the display of objects on the navigation pane. |
Note: You can also right-click the Application Directories folder in both the Web Console and the Data Management Console to access the Application Path option.
How to: |
Applications are designed to group related components.
Applications can be created and mapped in either the Web Console or the Data Management Console.
Note: Application directory names must comply with the following rules:
|
' ' |
space character | |
|
* |
star character | |
|
? |
question mark | |
|
< |
less than sign | |
|
> |
greater than sign | |
|
& |
ampersand | |
|
\ |
backslash | |
|
, |
comma | |
|
. |
dot | |
|
: |
colon | |
|
" |
double quotation mark | |
|
' |
single quotation mark | |
|
\t |
tab | |
|
\0 |
null terminator character |
On the Web Console, the Applications page opens.
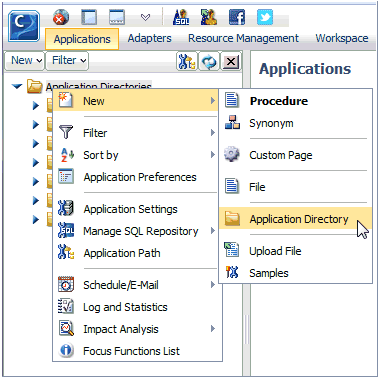
The Create New Application page opens.
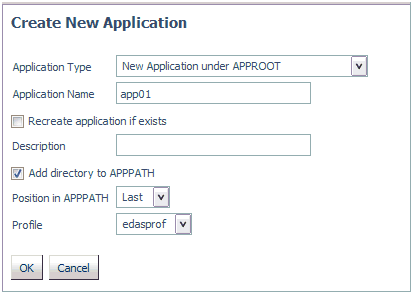
Warning: Choosing this option will overwrite the existing application and any content in it.
The application is added to the Application Directories folder.
You can map an application name to a physical directory anywhere in the file system. This application name can be then used in APP commands.
Application mappings can be added and deleted based on profiles from either the Web Console or the DMC.
On the Web Console, the Applications page opens.
The Create New Application page opens.
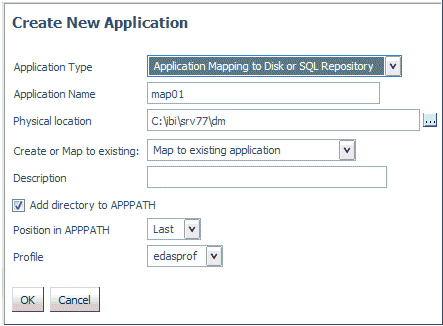
For platforms other than USS, in addition to using the selector button, you can enter the full path of the physical directory to be mapped, in the format required on your platform. (If there are spaces in the directory you are mapping, you must enclose the entire path in double quotation marks.)
For USS and PDS servers, in addition to using the selector button, you can enter values using the following formats:
ext=//DD:ddname[;ext2=//DD:ddname2][...][;extn=//DD:ddnamen]
whereextn are file type extensions.
/dir/subdir
entered manually or using the selector button.
For PDS servers, you can also inform the high-level qualifiers of the data set collection that comprise this application. Here is an example of the format:
iADMIN.SRV77.MAPAPP
where the user has the following datasets (not in approot):
IADMIN.SRV77.MAPAPP.FOCEXEC.DATA
IADMIN.SRV77.MAPAPP.MASTER.DATA
IADMIN.SRV77.MAPAPP.ACCESS.DATA
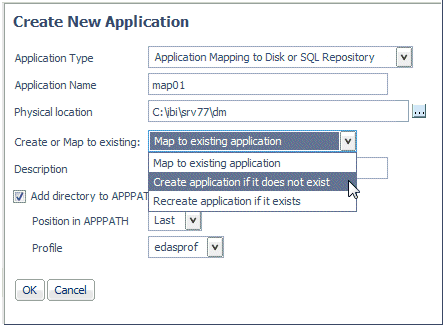
For Server Administrators, the default is edasprof. For all other users, the default is the user profile.
The mapping is added to the Application Directories folder.
Applications and application mappings can be deleted from either the Web Console or the DMC.
On the Web Console, the Applications page opens.
A confirmation dialog box opens.
Note: Deleting an application mapping will delete it from any APP PATH commands that reference it, if the APP PATH command is in the same profile as APP MAP.
How to: |
In addition to using a physical location, the contents of an application folder can also be stored in an SQL database. To use an SQL database, you must first create a new SQL Repository. After the repository is created, you can create applications mapped to the SQL Repository and store files there.
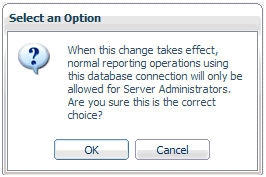
Warning: It is advisable to create a separate SQL Connection to use in creating an SQL Repository. If an existing SQL Connection is used, only Server Administrators or users with WSCFG privileges will be able to use the synonyms from this SQL connection in the application. This provides protection for the SQL Repository, preventing unauthorized users (without administrator privileges) from accessing the contents of the SQL Repository through a synonym.
You must have an adapter connection configured to an SQL database.
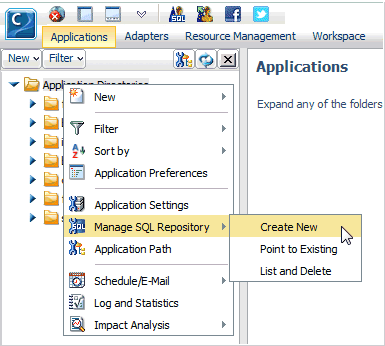
The Create New SQL Repository page opens, as shown in the following image.
A warning message is displayed, as shown in the following image.
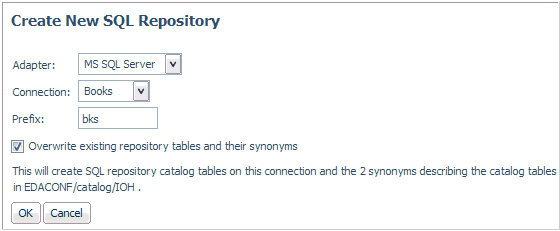
Two SQL Repository catalog tables are created with this connection, as shown in the following image.
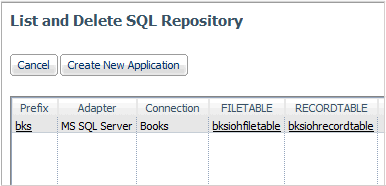
The tables are:
prefixIOHFILETABLEprefixIOHRECORDTABLETwo synonyms describing the catalog tables are also created in EDACONF/catalog/IOH.
The Create New Application page opens, as shown in the following image.
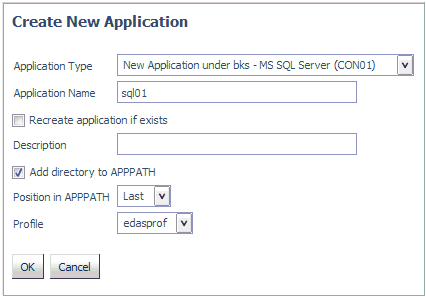
You must have created an SQL Repository.

The Create New Application page opens.

Note: The choices will include the repository, adapter type, and connection name. In this example, they are the bks repository, Adapter for Microsoft SQL Server, and CON01 connection.
Warning: Choosing this option will overwrite the existing application and any content in it.
The application is added to the navigation tree. You can now use this application to store procedures, synonyms, data files, and other content.
How to: |
A nested application directory is one created within a higher-level application. The server allows one level of nested application directories by default. The server must be configured for deeper or unlimited levels.
Nested application directories are implicitly added to the application path if the parent directory is on the application path.
For example, the following application tree has a directory named new1 that has a child directory named new2.
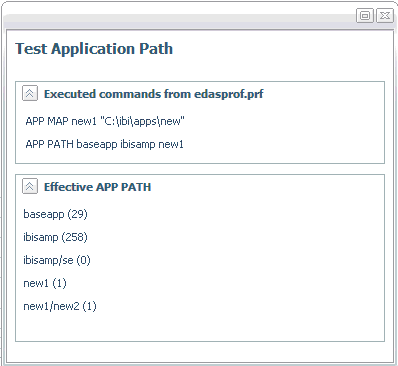
The APP PATH command explicitly places new1 on the application path:
APP MAP new1 "C:\ibi\apps\new"
APP PATH baseapp ibisamp new1
However, you can test the path to see all of the implicitly added directories by right-clicking the top level of Applications Directories tree and selecting Application Path. When the Application Path page opens, click Test:
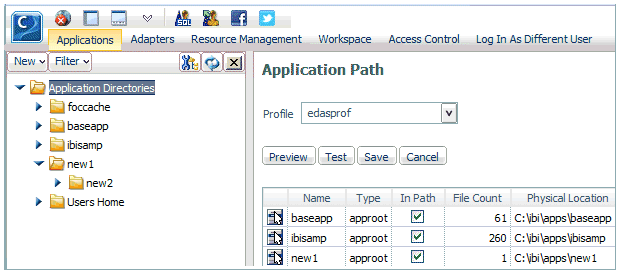
The effective application path also includes new1/new2:
The Application Settings page opens.
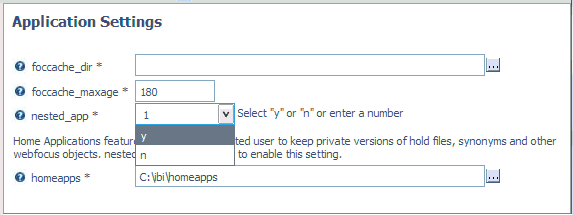
Note: For z/OS servers, this setting is only applicable to directory-style applications. It is not applicable to PDS-style applications nor to applications mapped as a collection of ddnames.
After the server restarts, you can create a new application subdirectory by right-clicking an application folder and selecting New and then Application Directory from the context menu.
Note: Nested applications must be in effect in order to create user home application directories.
On the Web Console, the Applications page opens.
The Create New Application Directory page opens.
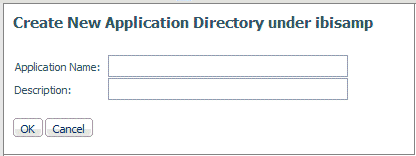
The nested application is added to the application tree under its parent application folder.
How to: |
You can configure the server to allow each user to have a home application directory. Providing a user home application directory gives each user a directory where he has full control to create, change, and run his applications.
Home application directories should be enabled only on secured servers. If the server runs with security OFF, all users have total control of files in all applications, and the home directories will not work as designed. Nested applications must be enabled in order to create user home application directories.
The Server Administrator can monitor and manage home application directories for all users and, therefore, all user home directories are visible and in the path on the Web Console application tree when the connected user has Server Administrator privileges.
When the server is enabled for home applications, user home application directories are not created automatically. Users can create them from the Web Console Application page, or ask their server admin to create them.
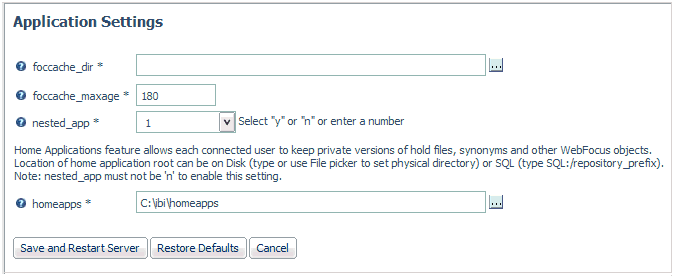
Home applications can also be stored in an SQL Repository. You must first create an SQL Repository and configure the application settings homeapps parameter to point to the SQL Repository, as described in Using an SQL Database to Store Application Contents.
After a home application directory is created for a user:
Note: This feature is available only for customers that are licensed for Managed Reporting or DataMigrator.
In order to set up home directories for individual users, you must first enable nested applications. The home directory under which user application directories will be created is set during installation. The default is homeapps. The homeapps directory can be changed to a different physical location on the Application Setting page. All user home directories will be nested under the home directory.
The Application Settings page opens.
When the server restarts, go to the Applications menu. For a user with Server Administrator privileges, a Users Home folder will appear under the Application Directories tree.
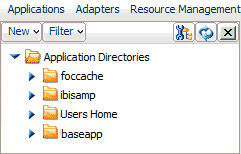
The navigation pane provides access to the Manage User Homes page where Server Administrators can copy, move, and delete home application folders and their subfolder.
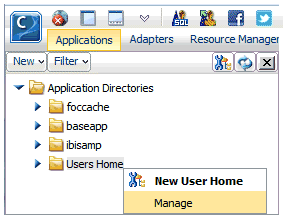
The Manage User Homes page opens.
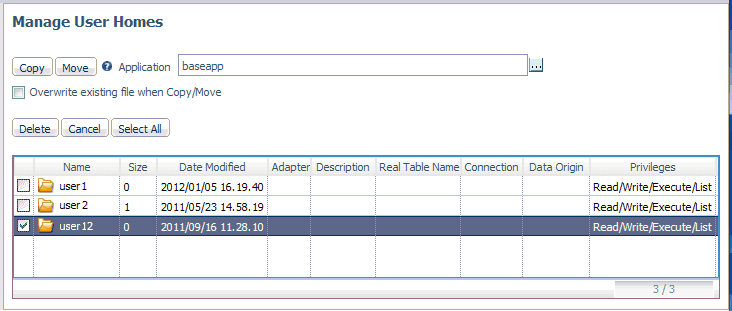
The Manage User Homes Status page confirms the result of the action.
For information on granting users privileges to your User Home folder, see Transferring File Permissions With the GRANT Privilege.
You must first create an SQL Repository. For information, see How to Create an SQL Repository to Store Applications.
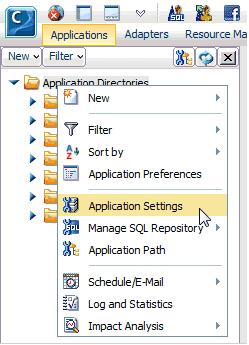
The Application Settings page open, as shown in the following image.
The Select physical location dialog box opens.
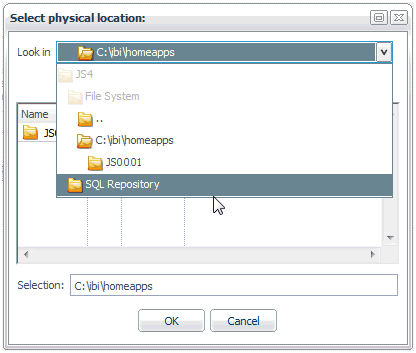
The subfolder is entered in the homeapps field, as shown in the following image.

Home applications that are created will now be stored in the SQL database.
How to: |
The applications available for inclusion in the search path are identified by name, type, and physical location. If the Add directory to APPPATH check box was selected when the application was created, it was automatically added to the search path. If not, you must explicitly add it to your search path.
Note: You can also create profiles from the Application Path page. Profiles are the locations in which the search path is saved.
You can configure the Application Path to add or remove applications or mappings from either the Web Console or the DMC.
On the Web Console, the Applications page opens.
 icon.
icon.
The Application Path page opens.
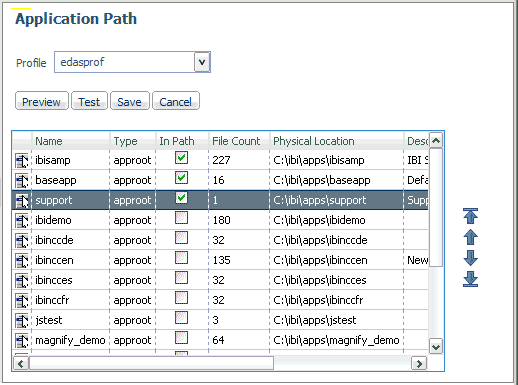

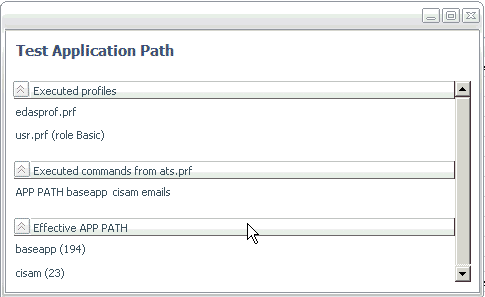
The Test Application Path pane shows:
The navigation pane is updated.
Note: You can also create a new profile from the Application Path page.
The Application Path can be configured from either the Web Console or the DMC.
On the Web Console, the Applications page opens.
 icon.
icon.
The Application Path page opens.
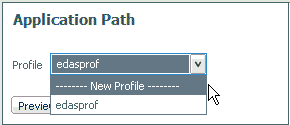
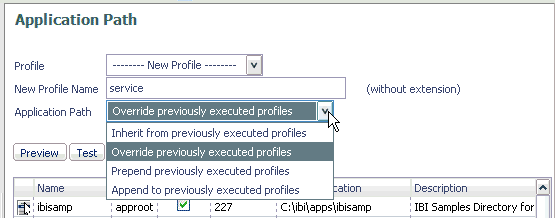
The options are:
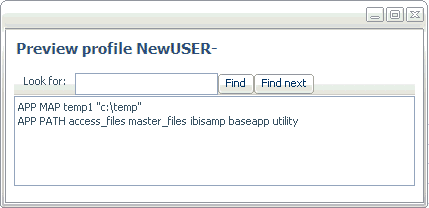
The profile opens in a text editor with its current path displayed.
Tip: You can also edit a profile search path by selecting and saving configuration options. Follow instructions for configuring the application path.
How to: |
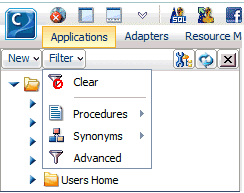
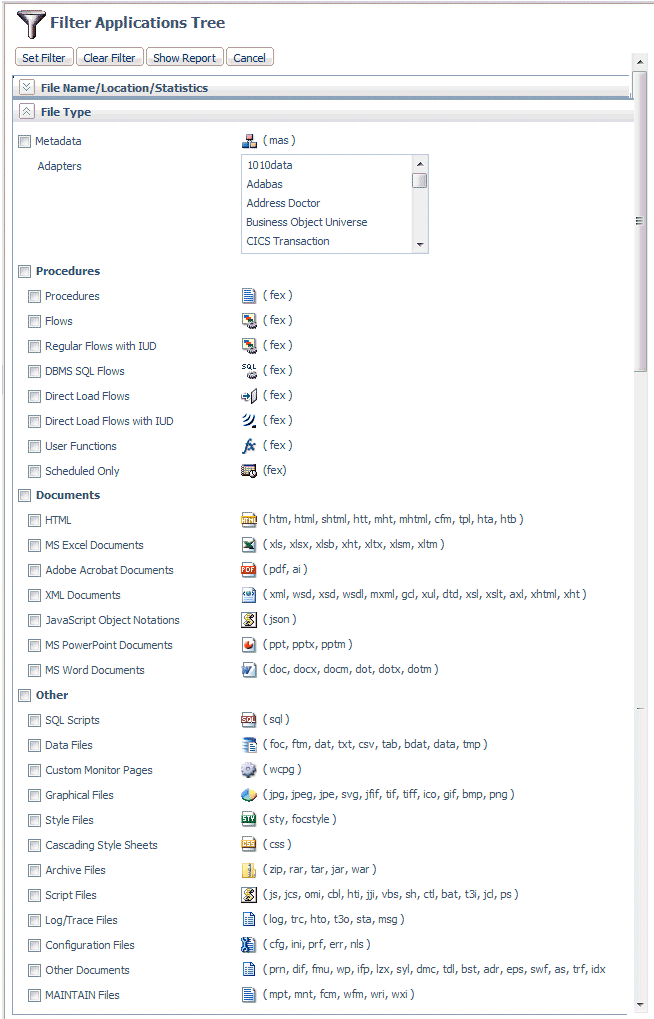
Filtering enables you to customize the file listings on the Application tree, displaying only the files you choose. It can be based on file type, name, extension, or any combination of items matching a number of criteria.
You can customize the items that display on the Application Tree by filtering. Your filtering selections apply to all applications displayed in the navigation pane.
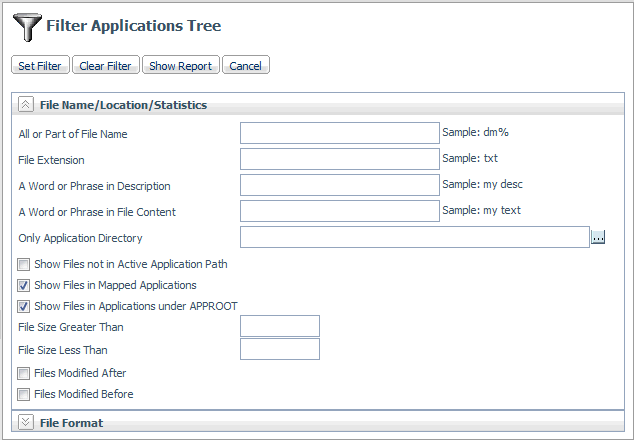
Using the top section, you can filter by name, location, or statistics, as shown in the following image. To filter the name, you can use the percent sign (%) as a wildcard character. Specifying e% displays all files whose name begins with the letter e.
Note: This entry is case-sensitive.
Note: This entry is case-sensitive.
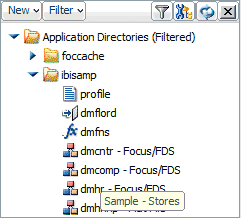
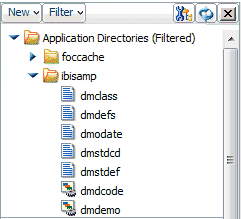
When a filter is applied, the Application Directories tree label includes (Filtered), as shown in the following image.
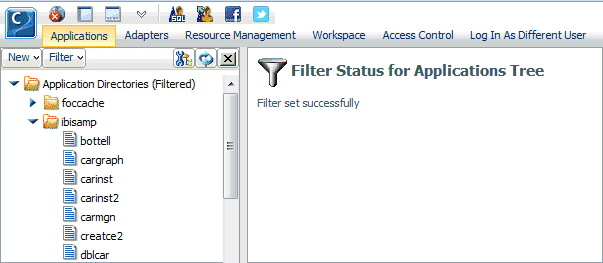
Note: You can remove the filter by clicking the Clear Filter button.
You can see the filter results by clicking Show Report, as shown in the following image.
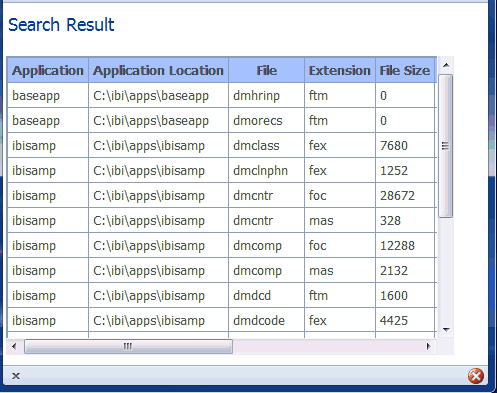
Note: Show Report is used to search files, and replaces the File Search tool available in earlier releases.
How to: |
Sorting enables you to change the order in which items are listed on the application tree.
How to: |
You can copy and move files between applications, delete them from applications, and refresh synonyms in applications. You can also copy, move, or delete subfolders from one application to another. The subfolders will be copied, moved, or deleted with all of its files and all of its own subfolders.
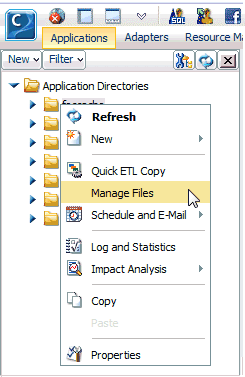
The Manage Files page opens.
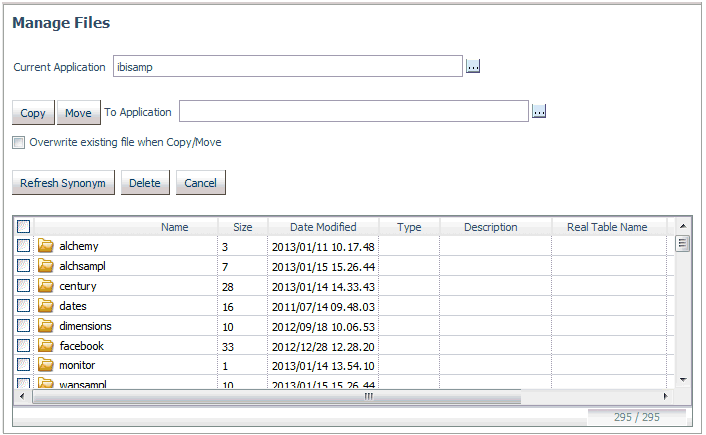
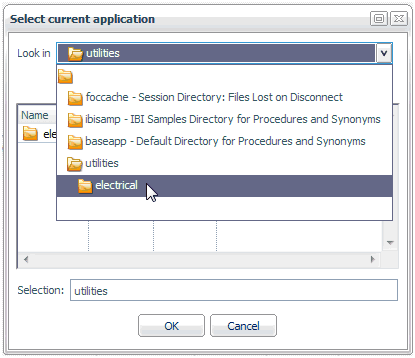
The selector (...) button opens the Select current application dialog box which allows you to navigate to the application, as shown in the following image.
The file(s) are copied or moved to the selected application.
The Manage Files page opens.
To refresh all listed synonyms in the selected application, click Select All.
| iWay Software |