The
following procedure describes how to set up active dashboard prompts
for two reports on a dashboard. In the example that is used, the
first report contains information about the categories of electronics
products sold in various regions. The Region field will be bound
to a group of radio buttons. Each radio button will represent a
particular region in which the electronics are sold. When you select
a radio button for a region, for example, NorthEast, the report
will be filtered by your selection.
The second report contains
information about the gender and age group of electronics consumers.
The Gender field will be bound to a drop-down list. The list will
display the values, male and female. When you select a gender from
the drop-down list, the report will be filtered by your selection.
-
With InfoAssist
open in Document view, and at least two reports on the canvas, add
two active dashboard prompts, as described in How to Add an Active Technologies Dashboard Prompt to a Dashboard.
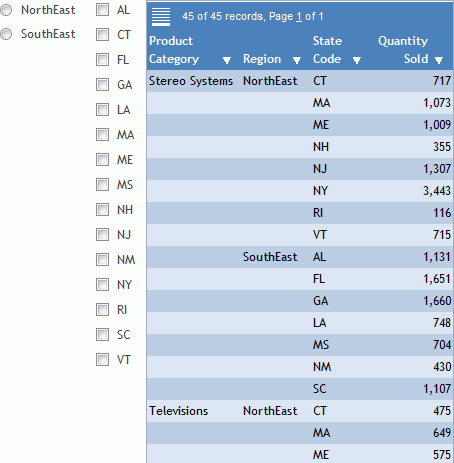
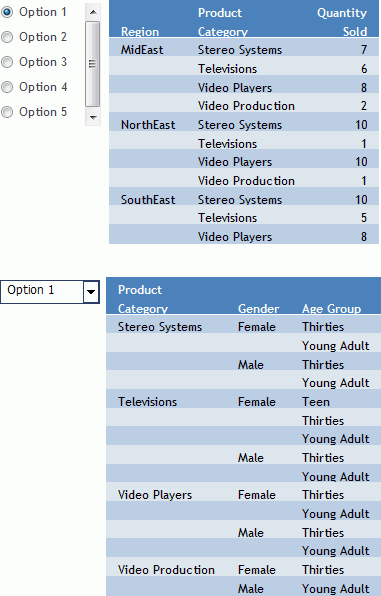
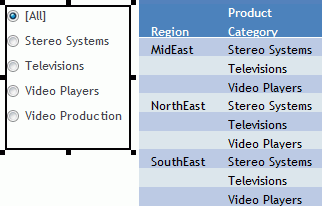
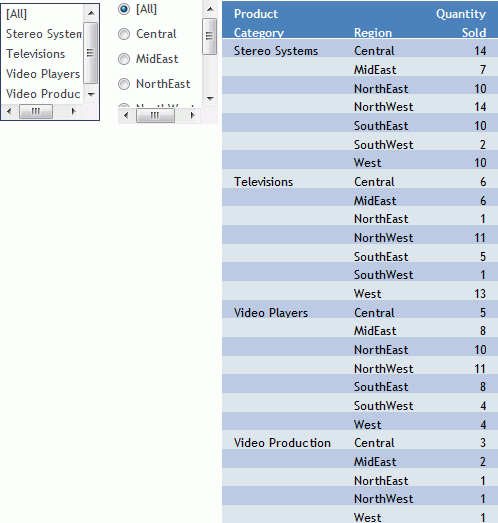
The following image shows a dashboard with the region report
and the gender report described in the introduction. Next to the
region report is a radio box. Next to the gender report is a drop-down
list prompt. The prompts are not yet bound to any report fields.
-
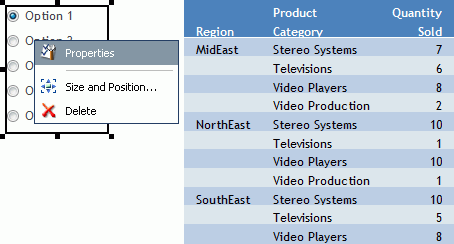
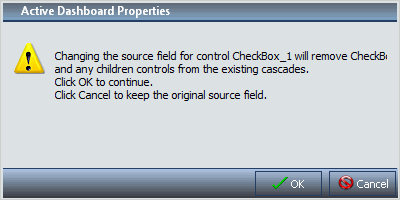
Right-click
the active dashboard prompt you want to bind a field to and click Properties.
For example, in the following image, the right-click menu
for the radio button prompt is open.
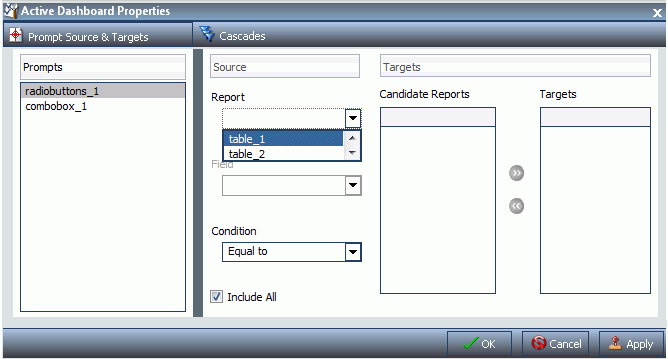
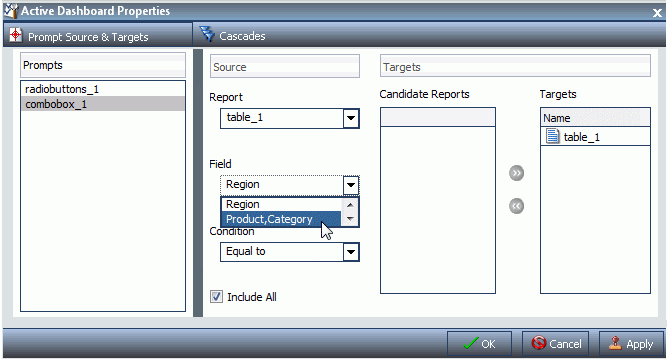
The
active dashboard properties dialog box opens, as shown in the following image.
The
Prompts list displays the two prompts (radiobuttons_1 and combobox_1)
that were added to the dashboard in step 1. The prompt titled radiobuttons_1
is highlighted because it was selected in step 2.

-
From the
Report drop-down menu, select the report that contains the field
you want to bind an active dashboard prompt to.
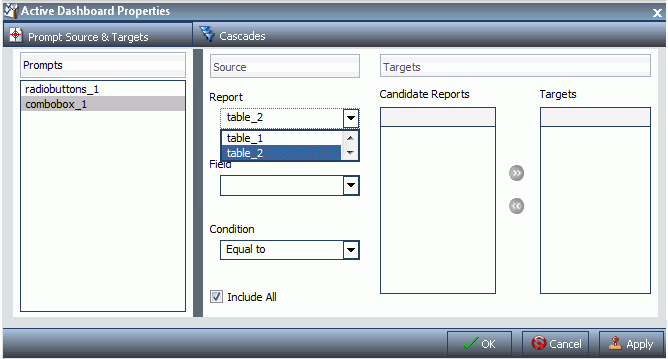
In this example, shown in the following image, the radio
buttons list (radiobuttons_1) has been selected as the prompt for
the region report (table_1).
The
next step describes how to bind the Region field from the region
report to the radio buttons list to filter that report.
-
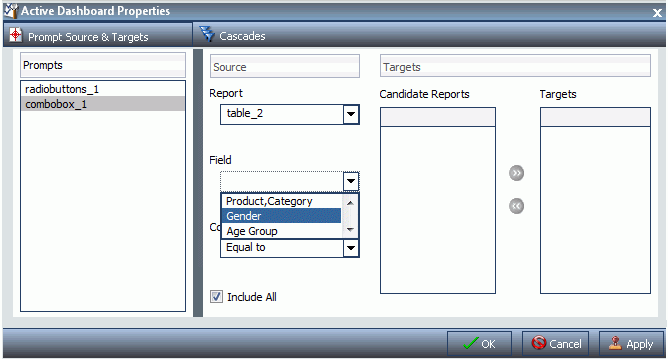
From the
Field drop-down menu, select the field to which you want to bind
the active dashboard prompt.
In this example, the Region field has been selected for
the radio buttons list (radiobuttons_1), as shown in the following
image.
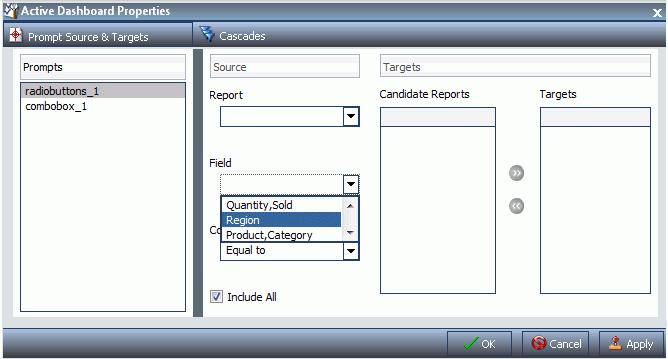
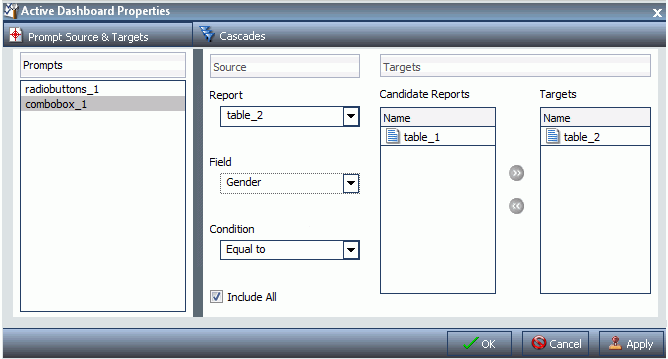
The
following image shows Region as the selected field for the radio
buttons list. The region report (table_1) is a target report because
it is the one from which you selected the field. In addition, table_2,
the gender report, now appears in the Candidate Reports list.

-
Click OK.
The prompt is now bound to the field on the dashboard.
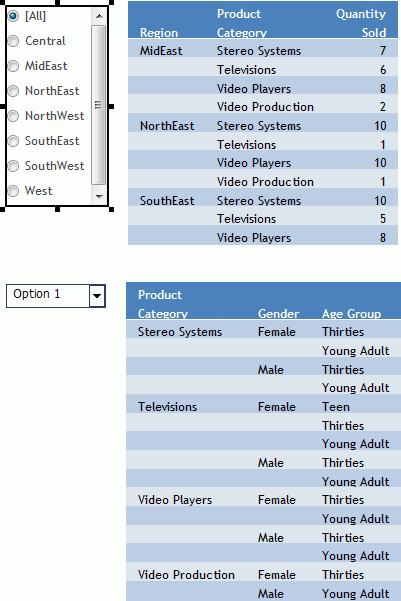
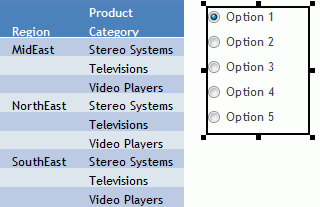
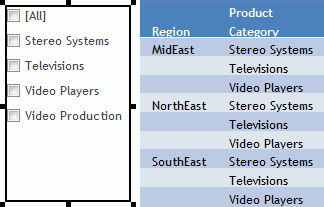
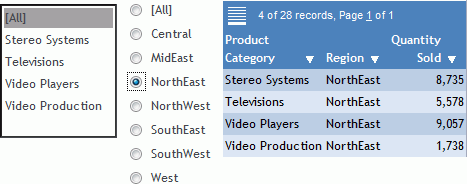
In
the following image, the radio buttons list is bound to the Region
field. It displays all regions by which a user can filter the report.
The
following steps describe how to bind the Gender field in the gender
report (table_2) to the drop-down list prompt.
-
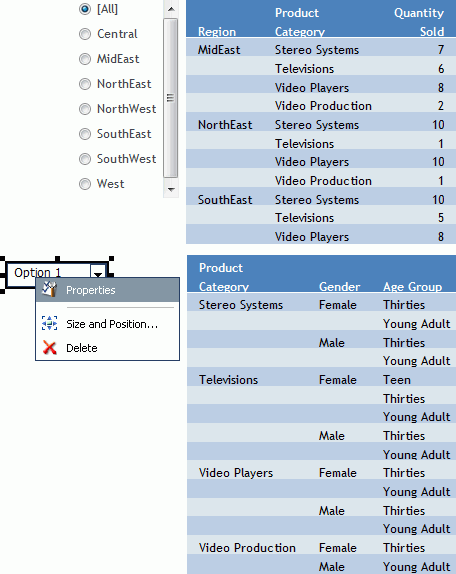
Right-click
the next active dashboard prompt to which you want to bind a field
and click Properties.
For example, in the following image, the drop-down list
prompt on the gender report is selected.
The
active dashboard properties dialog box opens again, as shown in
the following image.
Notice
that combobox_1, the prompt selected on the dashboard, is selected
in the Prompts list.
-
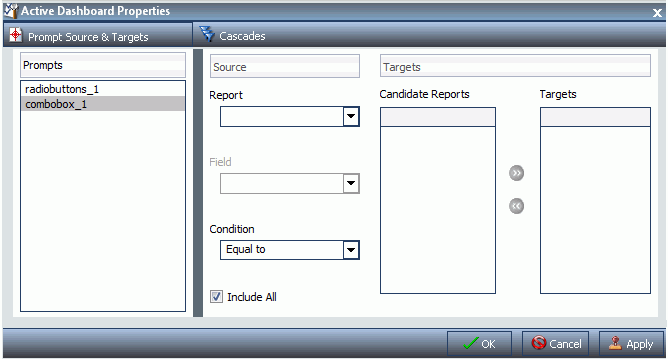
From the
Report drop-down menu, select the report that contains the field
you want to bind an active dashboard prompt to.
In this example, shown in the following image, the drop
down list (combobox_1) has been selected as the prompt for the gender
report (table_2).
The
next step describes how to bind the Gender field from the gender
report to the drop down list to filter that report.
-
From the
Field drop-down menu, select the field to which you want to bind
the active dashboard prompt.
In this example, the Gender field has been selected for
the drop-down list (combobox_1), as shown in the following image.
Once
the Gender field has been selected, table_2 (gender report) appears
in the Target list and table_1 (region report) appears in the Candidate
Reports list.
Note: To
move a report from the Candidate Reports list box to the Targets list
box, select it and click the Add to List arrow.
To remove a report from the Targets list box, select it and click
the Remove from List arrow. You can select
multiple reports by holding down the Ctrl key and clicking each
one.
-
Click OK.
The prompt is now bound to the field on the dashboard.
In
this example, the drop-down list is bound to the Gender field. A
user could filter the gender report by male or female.
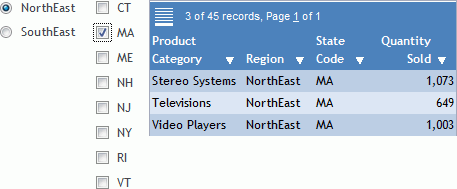
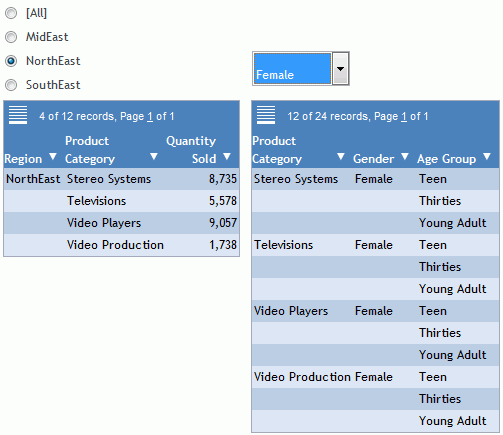
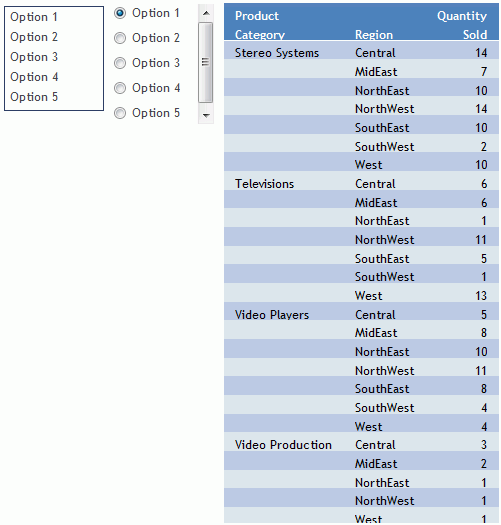
The
following image shows the final dashboard with two reports and two prompts.
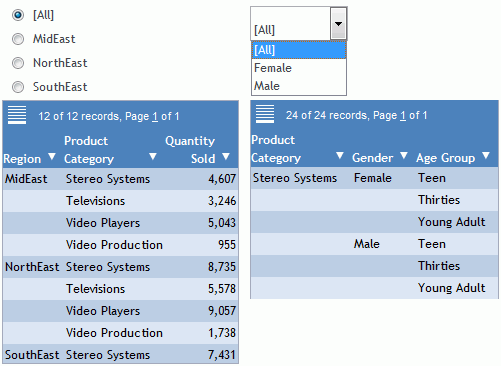
In
this example, the region report has been filtered by the NorthEast
region and the gender report has been filtered by Female.

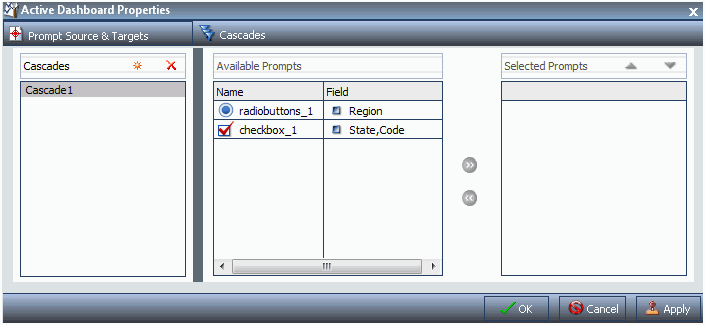
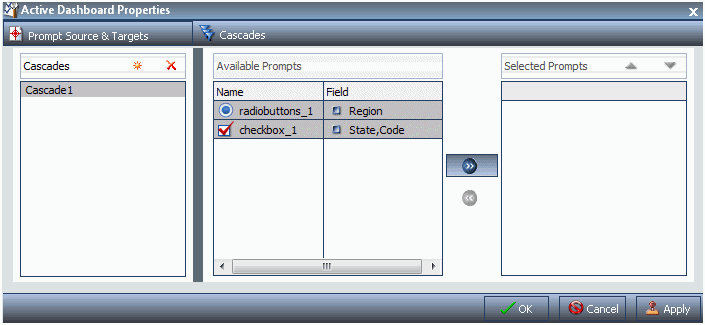
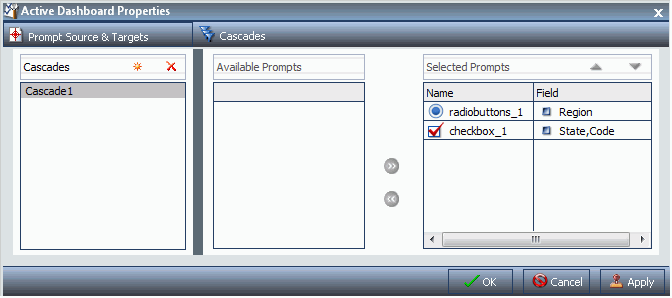
 button
to create a new cascade.
button
to create a new cascade. button
to delete the selected cascade.
button
to delete the selected cascade.