-
Do one
of the following:
- Right-click the Projects on environment name node and choose New Project.
or
- Highlight the Projects
on environment name node and click the New icon
 on
the Main toolbar.
on
the Main toolbar.
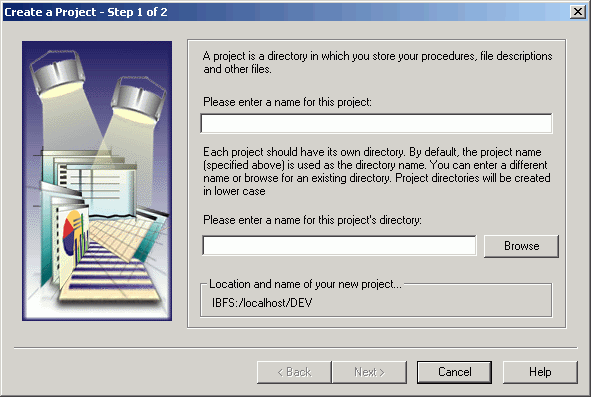
The Create a Project - Step 1 of 2 dialog box opens, as shown in the following image.
-
In the
first input field, type a name for the new project. The name can be
up to 64 characters in length. It can include spaces.
Developer Studio creates a new subdirectory on the WebFOCUS Reporting Server under APPROOT. APPROOT is a variable defined in the edaserve.cfg file. The default setting for APPROOT is install_drive:\ibi\apps.
For example, if you create a project named Sales, Developer Studio creates a directory named Sales under APPROOT. The newly created directory will contain all project files, including the .gfa file. The .gfa file is an XML control file that contains Information about the project, such as associated deployment scenarios, folder names and file types visible in the project, files used in the project, and search path configuration.
Important: Do not modify the .gfa file manually. Modification may corrupt the project.
Directory names do not support spaces. If you include a space in the project name (for example, human resources), Developer Studio replaces the space with an underscore in the subdirectory name (for example, human_resources).
-
The
Project Wizard displays the project name as the default directory
in the second input field.
In the second input field, you can optionally enter the name of a directory associated with another project. In that case, the new project and the existing project will share project files.
Note: Project directories are created in lowercase.
-
Before
you entered information on the dialog box, the default location and
name of the new project was shown as IBFS:/environment_hostname/DEV. This
value represents the location of the project in the Information
Builders File System (IBFS), where environment hostname is
the name of the WebFOCUS server on which the project will be created,
and DEV is an internal string indicating that you are working in
the project (development) area. The value of the IBFS location translates
to the value of APPROOT.
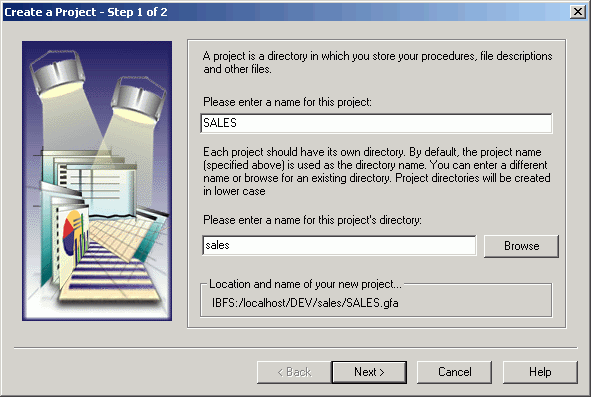
Once you enter information on the dialog box, the location and name changes to a value like IBFS:/localhost/DEV/sales/Sales.gfa, where Sales is the project directory, and Sales.gfa is the project control file created by the Project Wizard.
The following image shows a completed dialog box.
- Click Next to continue.
-
A message
is displayed if the directory does not exist. Click Yes to
create the new directory. Click No to change
the name.
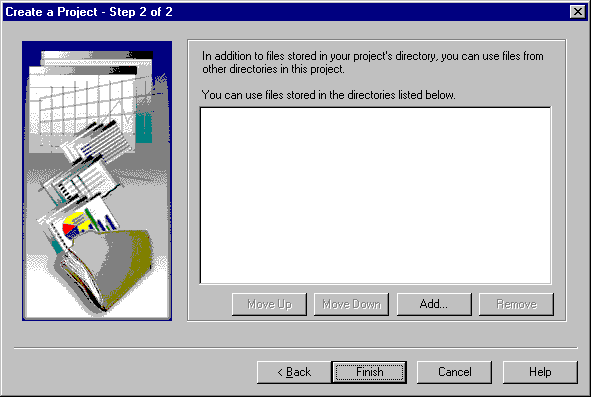
The Create a Project - Step 2 of 2 dialog box opens, as shown in the following image.
-
From
this dialog box, you can add other directories to the project path. Files
in those directories are visible to the project and can be made
accessible for development and deployment. The order of directories
in the list box represents the search sequence that the project
uses.
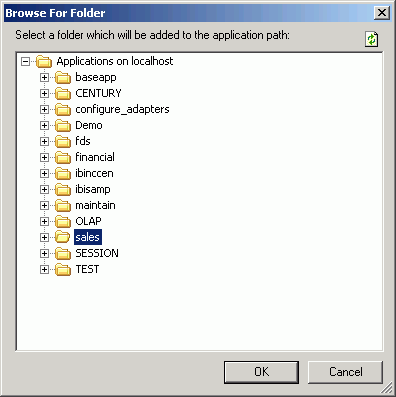
To add directories to the project, click Add. From the Browse For Folder dialog box, select a folder to add to the project path. The dialog box displays the folders available on the WebFOCUS Reporting Server based on the value of APPROOT.
By default, baseapp is automatically added to the search path for project resources. You can use the baseapp folder to place common (shared) files in a central location. This is shown in the following image.
Click OK. The directory (folder) is added. To add more directories, repeat this step.
If you highlight a directory in the list box on the Create a Project dialog box, click Add, and select a directory in the Browse For Folder dialog box, the new directory will be added after the highlighted directory.
- To change the order of the directories, select the directory and click Move Up or Move Down.
- To remove a directory from the list, select the directory and click Remove.
When you are satisfied with the order of the directories and have no other changes, click Finish, and the new project is added to the Explorer.
Tip: You can change directory paths for a project after you exit the Project Wizard. See Viewing and Modifying Project Properties.
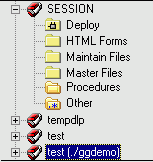
Note: If you create a project with the same name as another project, the location of the gfa file directory is shown next to it in the Explorer window. The following image shows the gfa file directory.