Configuring IBM WebSphere

In this section:

This section explains how to set up IBM WebSphere Application Server for use with WebFOCUS and ReportCaster. It is assumed that WebSphere components are installed and configured. For additional information, see the WebSphere documentation. In WebFOCUS 8.0, you can easily use WebSphere Application Server without the external IBM HTTP Server by deploying the approot.war file.


Top of page

x
Java Version Requirement

How to:

As of WebFOCUS Version 8, Java Version 1.6 is required on the system that is hosting the application server where the WebFOCUS Reporting Server and ReportCaster Distribution Server are deployed.

The default Java version for IBM WebSphere 8 is Version 1.6. If your Java version is lower, then you must set it to Version 1.6, as explained in the following section.


x
Procedure: How to Set the Java Version
  1. In the WebSphere Administrative Console, expand the Servers and Server Types node.
  2. Select WebSphere Application Servers.
  3. Click the server to which the custom property is to be applied.
  4. Under the Configuration tab, in the Configuration Settings section, expand the Web Container Settings node, and select Web Container.
  5. Under the Additional Properties section, click Custom Properties.

    The Custom Properties page opens.

  6. Click New.
  7. Enter the following in the Name field:
    com.ibm.ws.jsp.jdksourcelevel
  8. Enter the following in the Value field.
    16
  9. Click OK.
  10. Click Save.


x
Procedure: How to Configure Access to the Derby Database
  1. Log on to the WebSphere Integrated Solutions Console.

    The WebSphere Integrated Solutions Console opens.

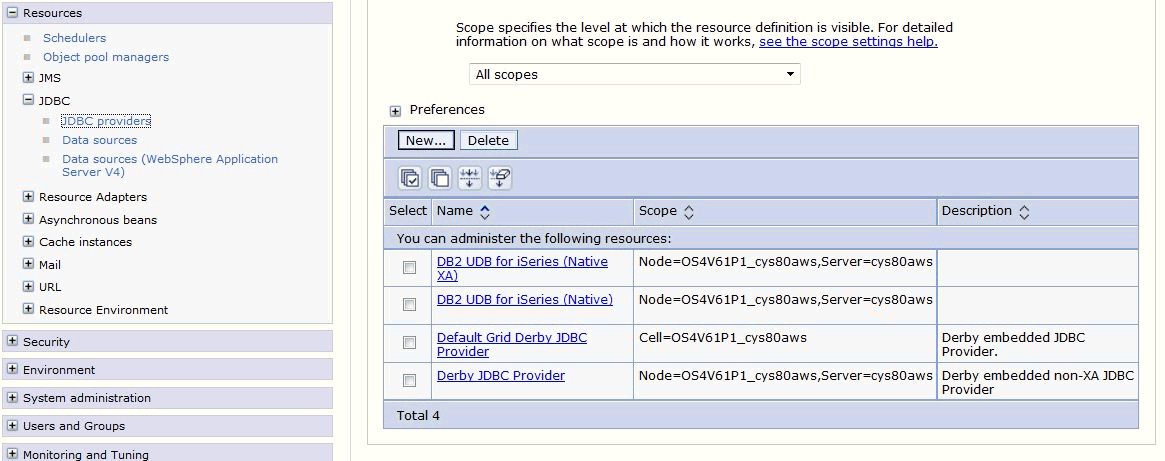
  2. Expand Resources, JDBC, and then click JDBC Providers in the left pane, as shown in the following image.
  3. Configure a new resource (for example, Derby JDBC Provider) with the following scope:
    Node=xxxxx,Server=xxxxx

    where:

    xxxxx

    Is the name of your application server instance.

  4. Click New.

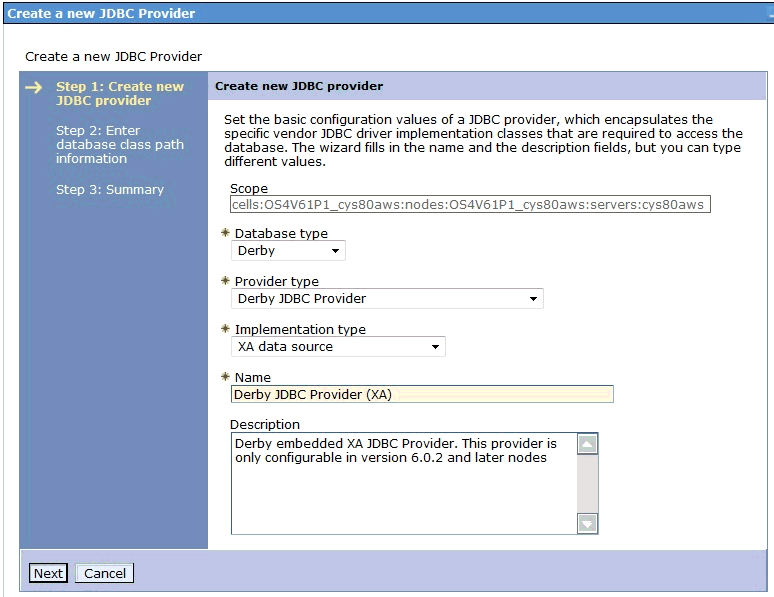
    The Create a new JDBC Provider wizard opens, as shown in the following image.
  5. Select the following values:
    • Database type: Derby
    • Provider type: Derby JDBC Provider
    • Implementation type: XA Data Source

    For more information on configuring JDBC providers, see your IBM WebSphere Application Server documentation.

  6. Click Next.
  7. Click Finish.
  8. Click Save.

Top of page

x
New File and Directory Authorities

How to:

You must assign read, write, and execute authorities to new files created by the Java programs. This will define Public access to files created by the Java programs.


x
Procedure: How to Set Authorities to New Files and Directories
  1. Open the WebSphere Administration console.
  2. Select Servers, then Server types, and then WebSphere application servers.
  3. Select your application server.
  4. Select Server Infrastructure, then Java and Process Management, then Process Definition, then Java Virtual Machine, and then Custom properties.
  5. Create two new properties:

    Name

    Value

    os400.dir.create.auth
    RWX
    os400.file.create.auth
    RWX
  6. Click Save.


x
WebSphere Pre-Deployment Steps

How to:

Before deploying WebFOCUS web applications, you should configure WebSphere for WebFOCUS graphs and for the ReportCaster Repository.


x
Procedure: How to Configure WebSphere for WebFOCUS Graphs

To generate graphs, WebFOCUS Servlets either need access to an X Windows Server (through the DISPLAY variable), or they can use the Java VM headless option.

DISPLAY. If an X Windows Server is available, you should set a DISPLAY environment variable.

  1. Open the Administrative Console.
  2. Select Servers, Application Servers, server_name, Java and Process Management, Process Definition, Java Virtual Machine, and then click Custom Properties.
  3. Click New.
  4. Create two new name value pairs:
    DISPLAY     hostname:n.0
    XAUTHORITY     /pathname/.Xauthority

    where:

    n

    Is the display number of the X Server.

    pathname

    Is the location of the X Server .Xauthority file.

  5. Click OK.
  6. Save the changes to the master configuration.

Note: Graphs are not actually displayed on the machine you set to DISPLAY, but WebFOCUS must access this X Server to generate graphs. For additional information on configuring and starting an X Server, see Verifying and Troubleshooting Server Side Graphics (PCHOLD).

Headless. If an X Windows Server is not available, you can set the headless Java option using the WebSphere Administrative Console. However, be aware that headless does not support GIF files or the older WebFOCUS GRAPH32 engine.

  1. Open the Administrative Console.
  2. Select Servers, Application Servers, server_name, Java and Process Management, Process Definition, Java Virtual Machine, and then Custom Properties.
  3. Click New.
  4. Specify the name as java.awt.headless and the value as true.
  5. Click Apply, then OK.
  6. Save the configuration changes.


x
Procedure: How to Set the WebSphere CLASSPATH for Repository Access

The CLASSPATH variable must include the JDBC driver of your repository. You can set CLASSPATH using the WebSphere Administrative Console.

  1. In the WebSphere Administrative Console, expand the Servers and Server Types node (if present).
  2. Select WebSphere Application Servers.
  3. Click the server to which the custom property is to be applied.
  4. Under the Configuration tab, in the Server Infrastructure section, expand the Java and Process Management node, and select Process Definition.
  5. Under the Additional Properties section, click Java Virtual Machine.

    The Java Virtual Machine page opens.

  6. Enter the classpath for the jdbc driver. For example:

    For DB2:

    /QIBM/ProdData/HTTP/Public/jt400/lib/jt400.jar

    For Apache Derby:

    /home/custom/ibi/derby/derbyclient.jar

    Note: Your driver locations may differ. For additional information, consult the documentation for your database repository.

  7. Click OK.
  8. Click Save.

Top of page

x
Deploying Web Applications

How to:

Use the WebSphere Administrative Console, to deploy (install) the WebFOCUS web application. Repeat this procedure for each web application you need to deploy.

The web applications are located in the following directory:

/install_directory/ibi/WebFOCUS80/webapps

Web Application

Purpose

webfocus.war

Always deploy this web application.

ibi_help.war

Always deploy this web application.

approot.war

Deploy this web application if you are using an application server only configuration.

You can use the default WebSphere instance or create a new instance using the WebSphere Administrative Console. See your IBM documentation if you wish to create new instances or virtual hosts.


x
Procedure: How to Deploy (Install) a Web Application With WebSphere 8.0
  1. If it is not open, access the WebSphere Administrative Console through a browser. For example:
    https://hostname:9060/admin
  2. On the left, expand Applications, then New Applications.

    Note: If you want to deploy new instances of WebFOCUS but keep your old version, you must install WebFOCUS with different ports and new context roots.

  3. On the left, click New Enterprise Application.
  4. On the right, select the Remote file system radio button.
  5. In the path field, type the location of the web application you are deploying. For example:
    /install_directory/ibi/WebFOCUS80/webapps/webfocus.war
    /install_directory/ibi/WebFOCUS80/webapps/ibi_help.war

    and

    /install_directory/ibi/WebFOCUS80/webapps/approot.war
  6. Click Next.

    This process may take some time to complete.

    The Preparing for the application installation page opens.

  7. Select the Fast path radio button, and then click Next.
  8. Click Next on the Select installation options page.

    The Map modules to servers page opens.

  9. Click the Select checkbox for your module
  10. In the Clusters and Servers text area, select both the application server and the web server you are using with WebFOCUS.

    Warning: It is critical that you select both the application server and the web server in the Clusters and Servers text area.

  11. Click Apply and then click Next.

    The Map virtual hosts for Web modules page opens.

  12. Click Next to accept the defaults unless you created a new virtual host or new application server.

    If you created a new virtual host, select it from the drop-down menu, check the Select checkbox for your web module, then click Next.

    The Map context roots for Web modules page opens.

  13. In the Context Root field, type the context root for the web application you are deploying. The default context roots are:

    Web Application

    Default Context Root

    webfocus.war
    ibi_apps
    ibi_help.war
    ibi_help
    approot.war
    approot

  14. Click Next.

    The summary page appears.

  15. Click Finish to complete the installation of the web application.

    Information appears while the installation takes place.

  16. When the installation completes, click the Save to Master Configuration link. You may need to scroll down to view this link. This step may take some time.
  17. On the left, click Applications, Application Types, then WebSphere enterprise applications.
  18. On the right, click the check box for the application you just deployed. For example:
    webfocus_war
  19. Click the Start button.
  20. Repeat this procedure for each web application you need to deploy (for example, ibi_help.war and approot.war).
  21. Restart your HTTP Server and/or WebSphere Application Server.


x
Verifying the WebFOCUS Configuration With IBM WebSphere

How to:

After finishing the configuration, run test calls to verify operability.


x
Procedure: How to Verify the WebFOCUS Configuration
  1. Restart the following:
    • WebFOCUS Reporting Server
    • IBM WebSphere Application Server
  2. Enter the following URL in your browser:
    http://hostname:port/ibi_apps/

    where:

    hostname:port

    Are the host name and port of the web server. However, if you use an application server only configuration, then these are the host name and HTTP port of the application server. For Tomcat standalone configurations, the default port is 8080. If you require SSL, use https instead of http.

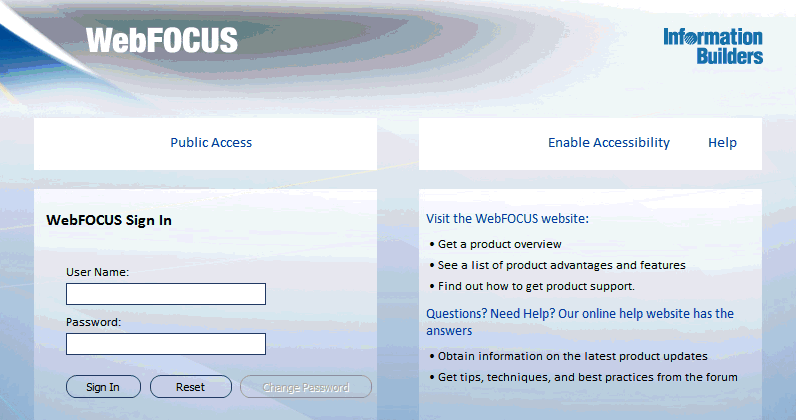
    The WebFOCUS Sign In page opens, as shown in the following image.

  3. Sign in as an administrator. The default user name and password is admin and admin.

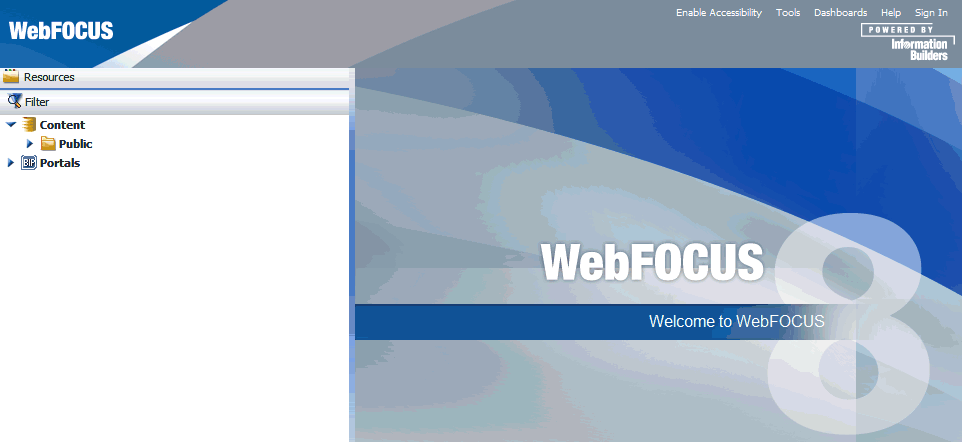
    The WebFOCUS Business Intelligence Portal Welcome page opens in your web browser. Your Welcome page may have different folders displayed.

  4. Click Administration in the top pane, and then select Administration Console, as shown in the following image.

    The WebFOCUS Administration Console opens.

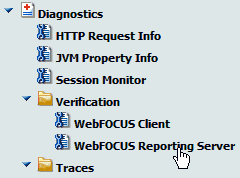
  5. Expand Diagnostics, Verification, and then WebFOCUS Reporting Server, as shown in the following image.

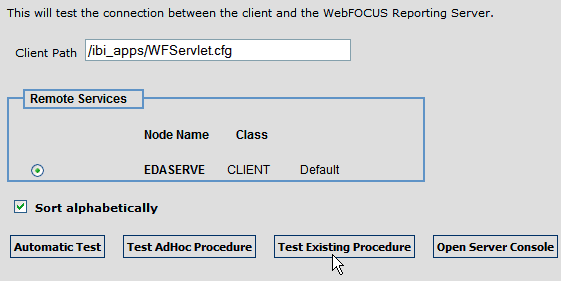
    The following page opens, which lists your WebFOCUS Reporting Server instance if it is available.

  6. Click Test Existing Procedure.

    If your WebFOCUS Reporting Server is running with Security enabled (ON), then you are prompted for WebFOCUS Reporting Server credentials, as shown in the following image.

    If you receive an error, ensure that your WebFOCUS Reporting Server is running and that valid credentials are used.

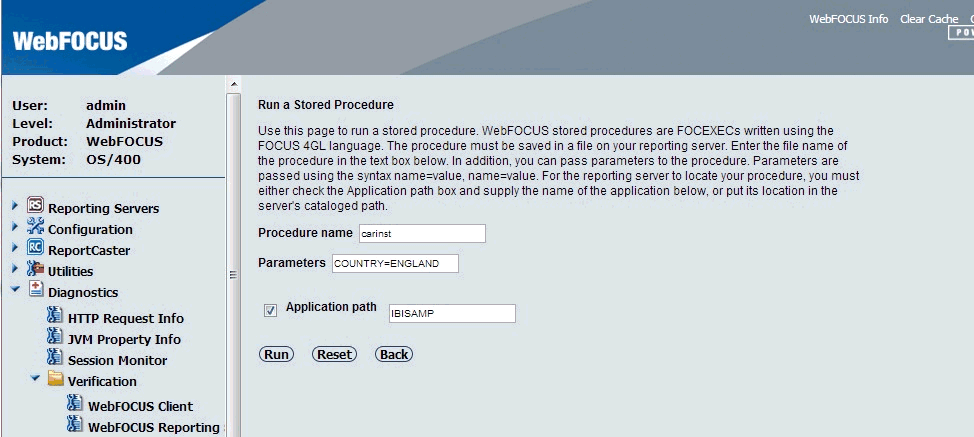
    The Run a Stored Procedure page opens, as shown in the following image.

  7. Click Run to execute the test procedure.

    A procedure is normally launched using the WebFOCUS Servlet and a sample report should display. You can also call the servlet directly to run a specific procedure, such as carinst.fex. For example:

    http://host:port/ibi_apps/WFServlet?IBIF_ex=carinst

Be aware that you may need to increase your Java memory settings if you are using InfoAssist. For more information, see Java Memory Issues.


WebFOCUS