In this section: |
This section describes how to configure WebFOCUS 8.0 on a Windows 2008 server that is using Microsoft IIS version 7.x. As a prerequisite, ensure that Microsoft IIS version 7.x is already installed.
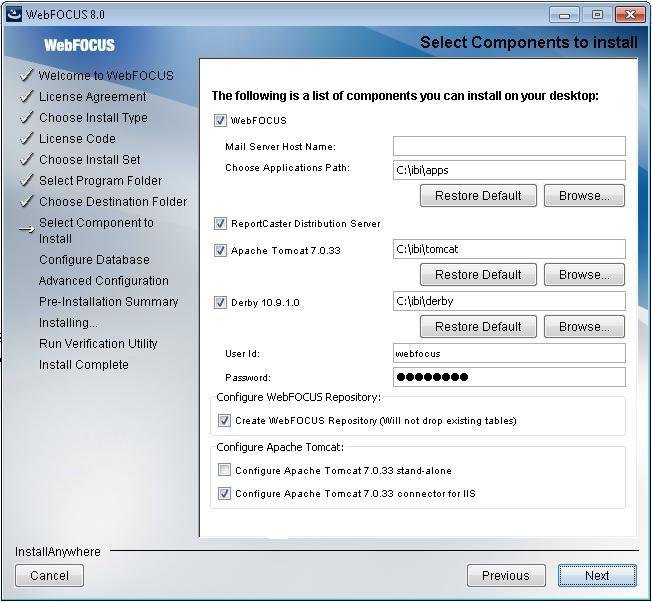
During the WebFOCUS installation, the Select Components to install screen opens, as shown in the following image.
Select Configure Apache Tomcat 7.0.33 connector for IIS and click Next to continue with the installation.
Before configuring Microsoft IIS version 7.x, test your configuration by accessing the following application server port:
http://localhost:8080/ibi_apps/
The installation will now configure Microsoft IIS version 7.x.
How to: |
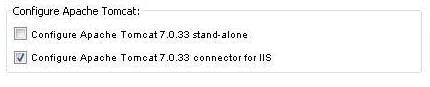
When installing the WebFOCUS client, if you have Configure Apache Tomcat 7.0.33 connector for IIS selected, as shown in the following image,
and you receive a message that you must configure the IIS Tomcat plug-in, as shown in the following image,
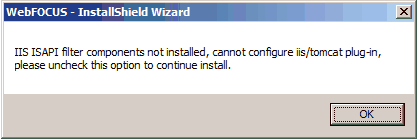
finish the installation, and then run the following procedure.
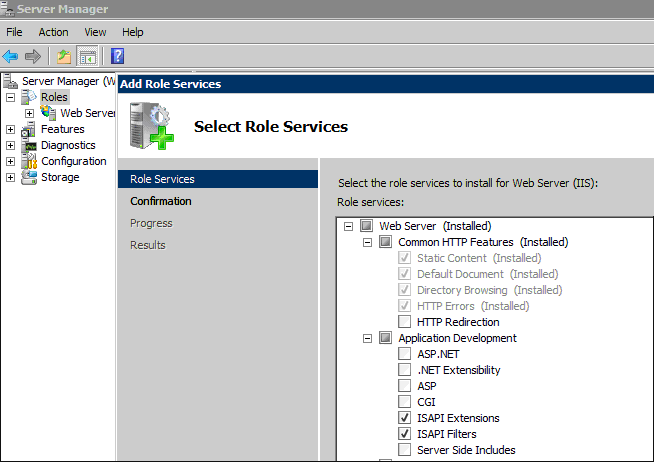
To manually configure Microsoft IIS version 7.x on the Windows 2008 server:
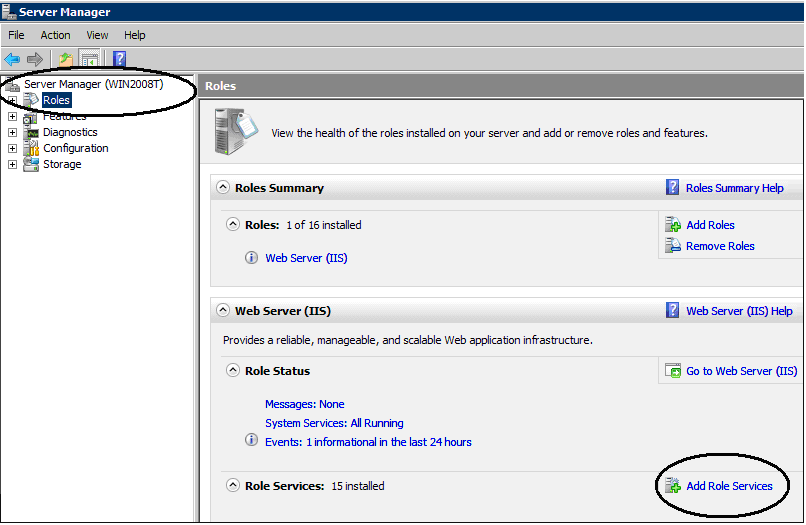
The Add Role Services dialog box opens, as shown in the following image.
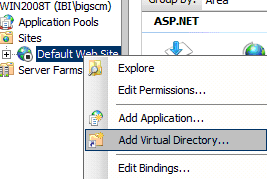
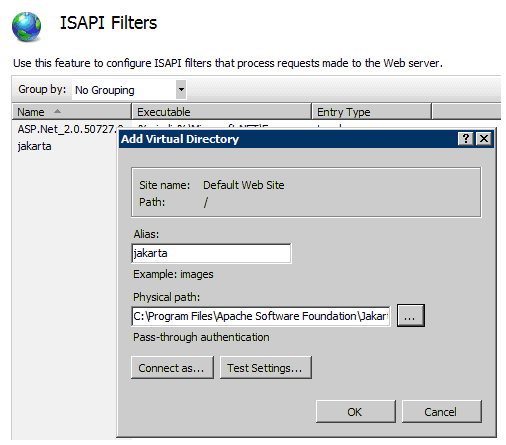
The Add Virtual Directory dialog box opens, as shown in the following image.

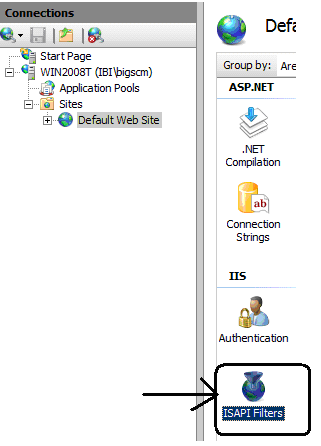
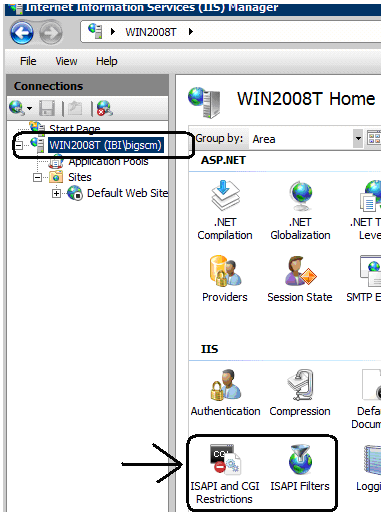
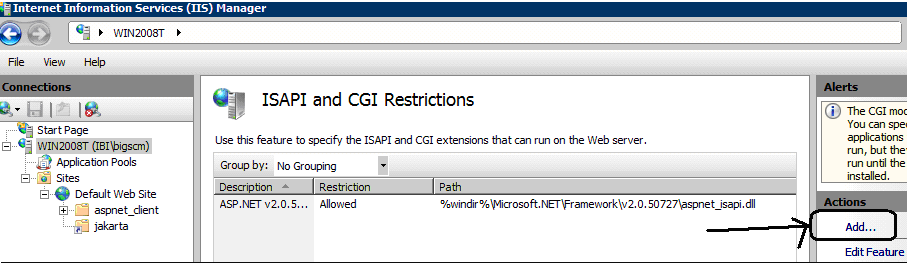
The ISAPI Filters pane opens, as shown in the following image.

The Add Virtual Directory dialog box opens, as shown in the following image.
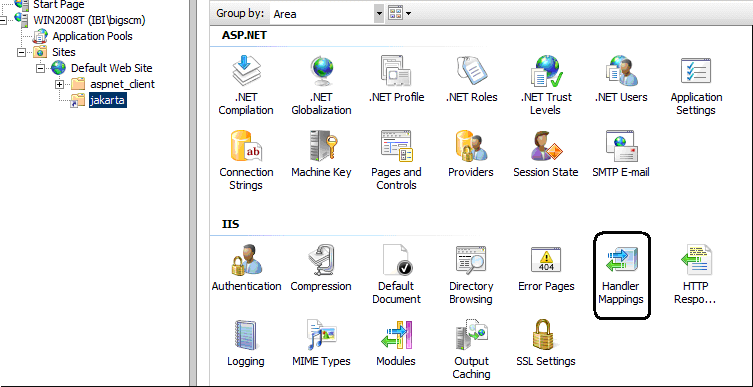
The Handler Mappings pane opens.
If the ISAPI module is not already available, then perform steps 20 through 28.
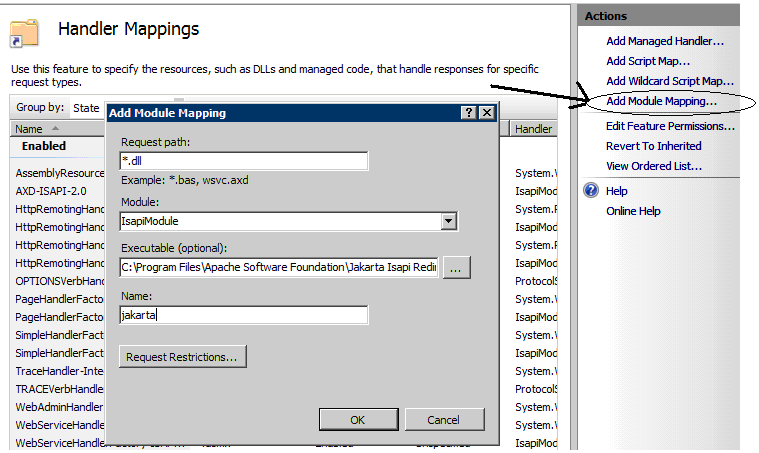
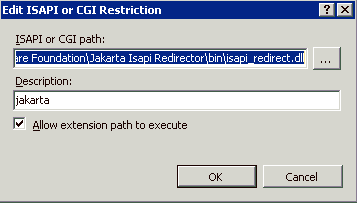
The Add Module Mapping dialog box opens, as shown in the following image.
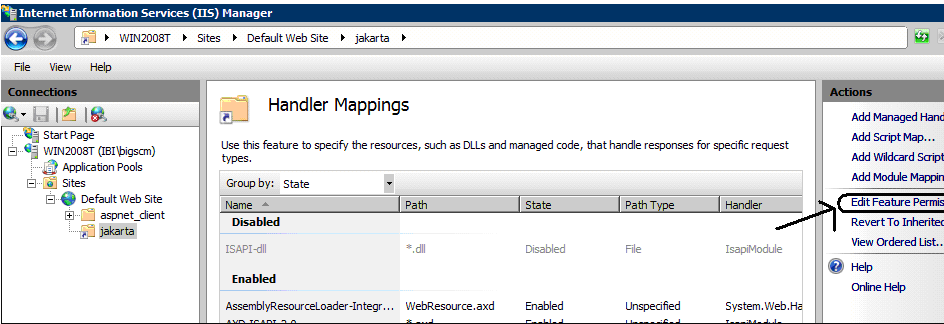
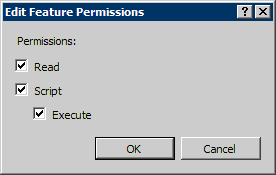
The Edit Feature Permissions dialog box opens, as shown in the following image.
http://hostname:port/ibi_apps/
| WebFOCUS |