-
Copy the
irpfsty.js file from the WebFOCUS Reporting Server default location
(\home\etc directory), and paste it to your application folder.
This should be the same directory as the location of the active report or active dashboard. For example, from the Projects on localhost area of the Developer Studio Desktop, paste irpfsty.js in the Other subfolder of the project folder.
The section of the irpfsty.js file that controls how a report container is styled is as follows.
.arReportObject { borderColor: #b7babc; dropShadowEnabled: true; shadowDistance: 10; shadowDirection: right; dropShadowColor: #666666; fontSize: 12; borderStyle: solid; verticalGap: 0; backgroundColor: white; horizontalAlign: center; } -
Adjust
the values for the properties as desired. For example, you can:
- Accept the default value, true, for the dropShadowEnabled property to display a shadow behind a report container.
- Change the value
of the dropShadowEnabled property to false to suppress the shadow
behind a report container. The code for suppressing the shadow is:
dropShadowEnabled: false;
In this example, do the following:
- Accept the dropShadowEnabled default value of true.
- Change the dropShadowColor
default value (#666666) to a shade of blue, such as #009dff.
The code looks like this:
dropShadowEnabled: true;
.
.
.
dropShadowColor: #009dff
- Save and close the irpfsty.js file.
-
Run the
procedure. Your styling choices for report containers are applied.
On the following sample active dashboard, there is a blue shadow behind all report containers.
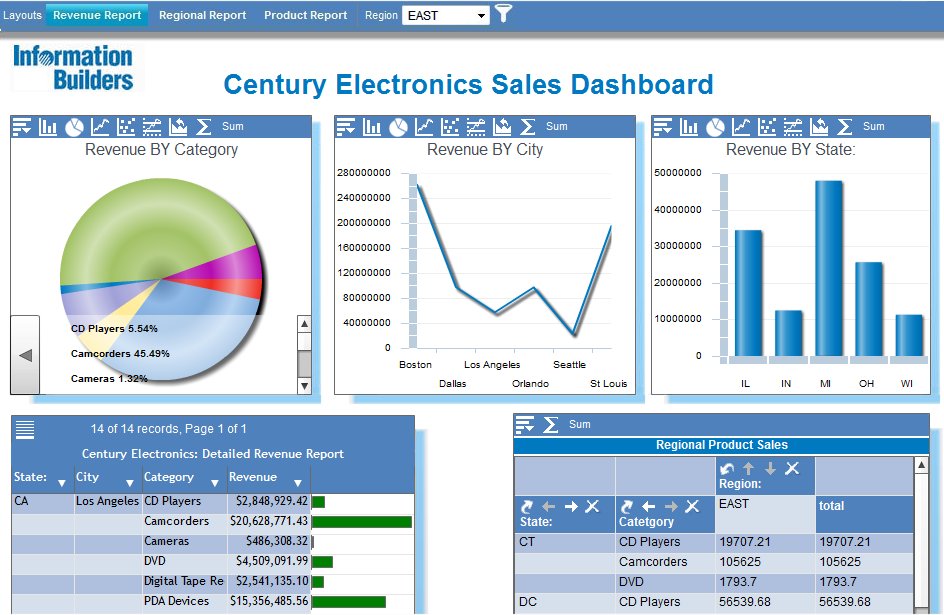
-
You can
also style a window container.
The section of the irpfsty.js file that controls how a window container is styled is as follows.
.arWindow{
   dropShadowEnabled: true;
   shadowDistance: 10;
   shadowDirection: right;
   dropShadowColor: #666666;
   fontSize: 12;
}
Adjust the values for the properties as desired. For example, you can:
- Accept the default value of true for the dropShadowEnabled property to display a shadow behind a window container.
- Change the value
of the dropShadowEnabled property to false to suppress the shadow
behind a window container. The code for suppressing the shadow is:
dropShadowEnabled: false;
In this example, do the following:
- Accept the dropShadowEnabled default value of true.
- Change the dropShadowColor
default value (#666666) to a shade of magenta, such as #b60cb0.
The code looks like this:
dropShadowEnabled: true;
.
.
.
dropShadowColor: #b60cb0;
- Save and close the irpfsty.js file.
-
Run the
procedure. Your styling choices for window containers are applied.
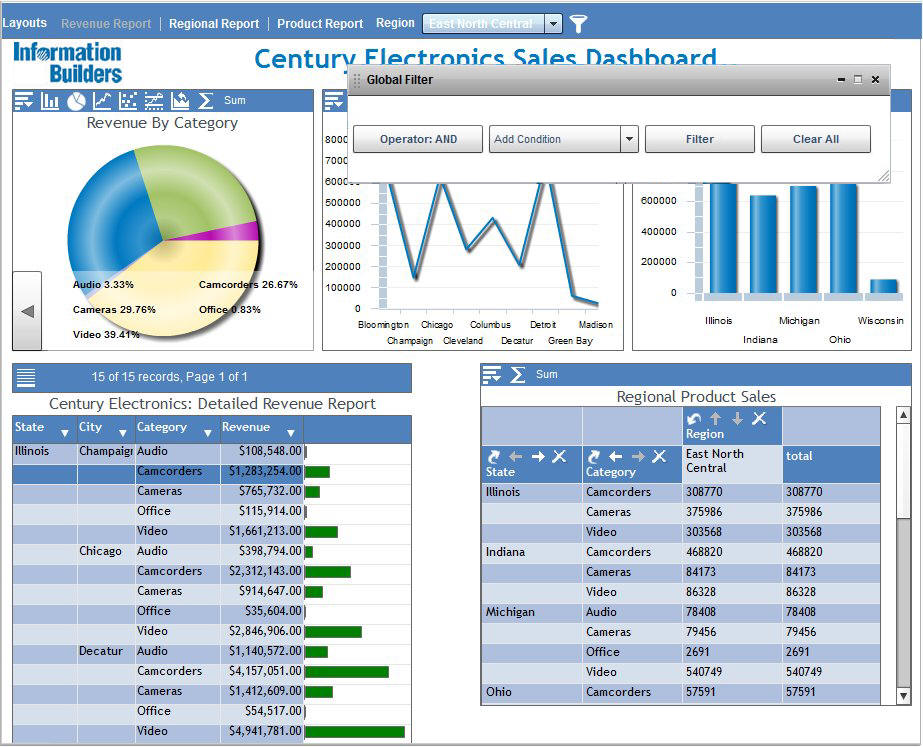
On the following sample active dashboard, there is a magenta shadow behind the container for the filter selection window.
-
You can
also style the dashboard bar on an active dashboard.
The default section of the irpfsty.js file that controls how the dashboard bar is styled is as follows.
.arDashboardBar {
   backgroundColor: #ffffff;
   borderColor: #cccccc;
   selectionColor: #7FCEFF;
   color: #003300;
   textRollOverColor: #0b333c;
   textSelectedColor: #0b333c;
   themeColor: #009dff;
   fontSize: 12;
   fontWeight: bold;
   textAlign: left;
   paddingTop:2;
   paddingBottom:2;
   paddingLeft:4;
   paddingRight:4;
   borderStyle: outset;
   borderThickness: 10;
}
By default, an active dashboard displays a shadow underneath the dashboard bar. You can add the following line of code to the .arDashboardBar section of the irpfsty.js file to suppress the shadow:
dropShadowEnabled: false;
For the purpose of this example, suppress the shadow underneath the dashboard bar by adding the preceding line of code to the irpfsty.js file.
The code looks like this:
.arDashboardBar { backgroundColor: #ffffff; borderColor: #cccccc; dropShadowEnabled: false; . . . - Save and close the irpfsty.js file.
-
Run the
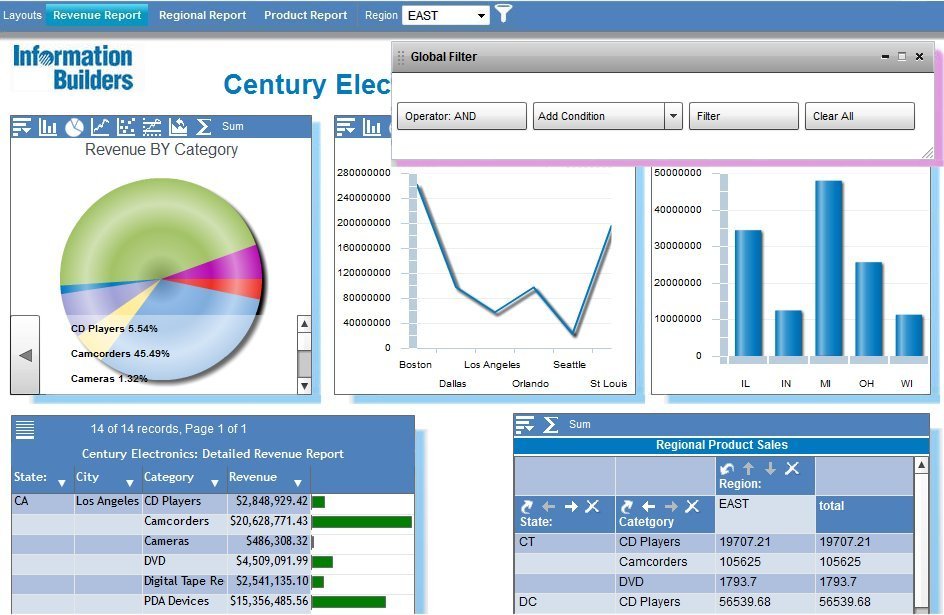
procedure. Your styling choices have been applied.
Based on the sample values used in this procedure, there is:
- A blue shadow behind each report container on the dashboard.
- A magenta shadow around the window containers (such as the container for the Filter Selection window).
- No shadow underneath the dashboard bar.
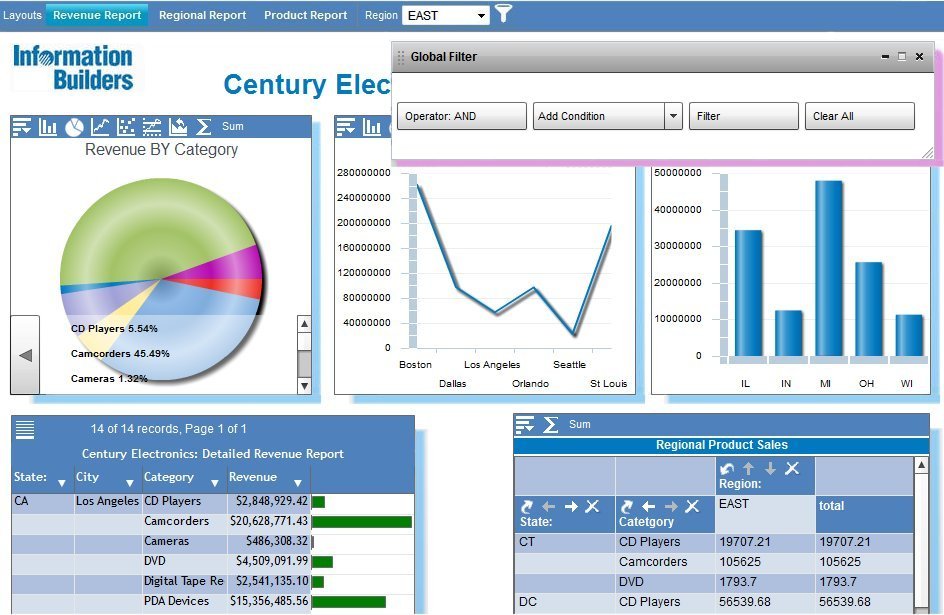
If you had also chosen to suppress all the shadows behind the report containers and the window containers (dropShadowEnabled: false;), the dashboard would look like the following.