This section describes new Web Console features.
xDisplaying the Live EDAPRINT Log File
You can now display the live EDAPRINT log file, enabling
you to see current server activity as it is posted. The live EDAPRINT
log file is available from the right-click menu of the Workspace
folder and from the ribbon. You can also open a copy of the EDAPRINT
log file.
x
Procedure: How to Display the Live EDAPRINT Log File
To display the live EDAPRINT log file:
-
From the main menu, select Workspace.
-
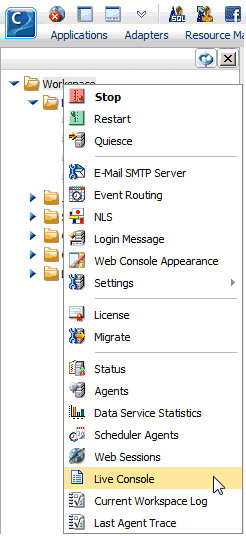
Right-click the Workspace folder
and select Live Console, as shown in the
following image.
The EDAPRINT log opens
in a separate browser tab, as shown in the following image.

You can also access the live EDAPRINT log by selecting Live Console from
the Monitor section of the ribbon, as shown in the following image.

Note: This option is only available when using
a Firefox or Chrome browser.
xRibbon and WebFOCUS Version 8 Compatibility Defaults
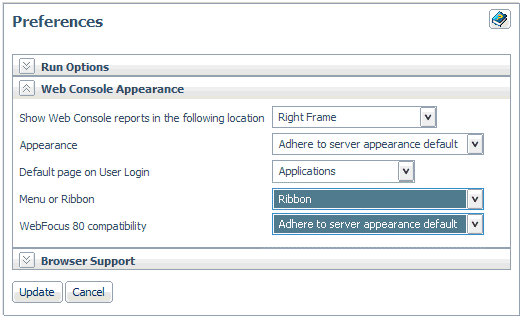
Two defaults for the Web Console Preferences have been
changed.
- The Ribbon is now the default, rather than the Menu.
- Compatibility with WebFOCUS Version 8 is now the default.
These settings are found by clicking the Console icon and selecting Preferences.
The Preferences page is shown in the following image.
xCreating a New Application When Saving Content
The Save As feature now enables you to create a nested
application folder to hold the item that you are saving. This ability
is available for procedures, synonyms, custom pages, and samples.
It is also available when uploading files.
x
Procedure: How to Create an Application When Saving a New Item
You can create a nested application folder to hold procedures,
synonyms, custom pages, and samples when saving them.
-
From the Applications page, click the New icon,
and then select the type of item from the drop-down menu.
or
Right-click an application
folder in the navigation pane, select New,
and then select the type of item from the drop-down menu.
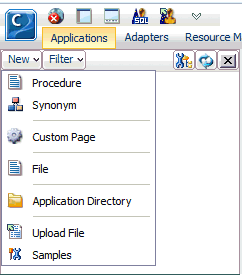
The choices include Procedure, Synonym, Custom
Page, Upload File, and Samples,
as shown in the following image.
-
Create the item.
-
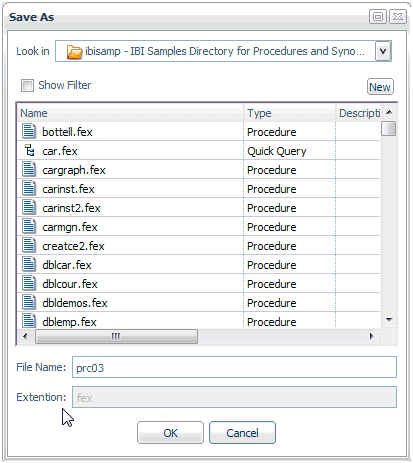
Click the Save As icon.
The Save As dialog box opens, as shown in
the following image.
-
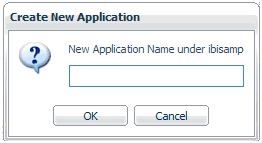
Click the New button.
The Create New Application dialog box opens,
as shown in the following image.
-
Enter a name for the new application folder and click OK.
-
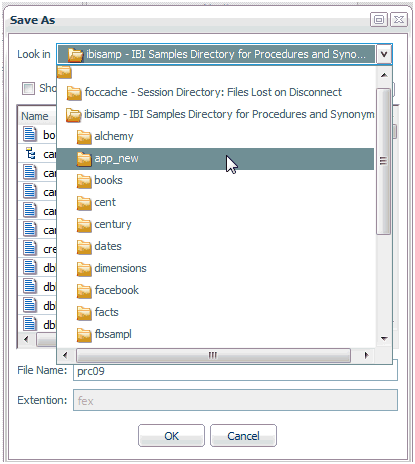
Select the new application folder from the Look in drop-down
menu, as shown in the following image.
-
Enter a name in the File Name field,
and click OK to close the Save as dialog
box.
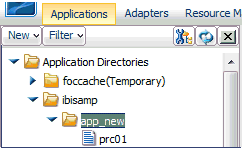
The item and the application folder are added to the navigation
pane, as shown in the following image.
xPaging Support for Data Selection Values
When creating a DEFINE, COMPUTE or FILTER expression
in a synonym, the server now supports paging to select from a large
list of values.
x
Procedure: How to Use Paging to Select Data Values
-
From the Applications page, right-click
a synonym and select Open.
The Synonym Edit page opens.
-
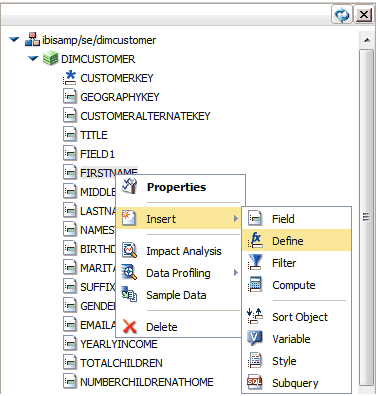
Right-click a field and select Insert and
then Define, as shown in the following image.
-
Click the selector button (...) next to the EXPRESSION field.
The Expression Builder opens.
-
Click the Relational Expression tab.
-
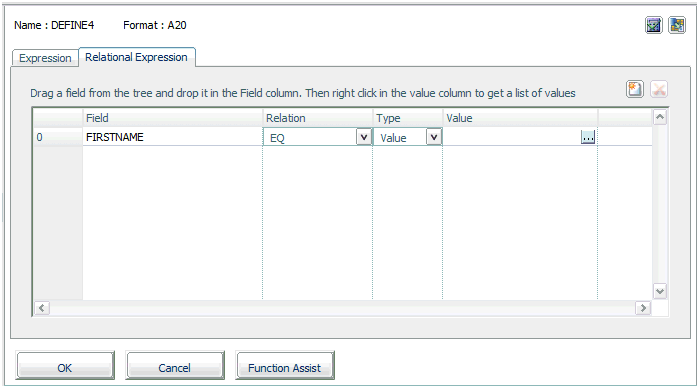
Double-click the field to add it to the expression, as
shown in the following image.
-
Click the selector button (...) in the Value field.
The values are displayed on a series of pages.
-
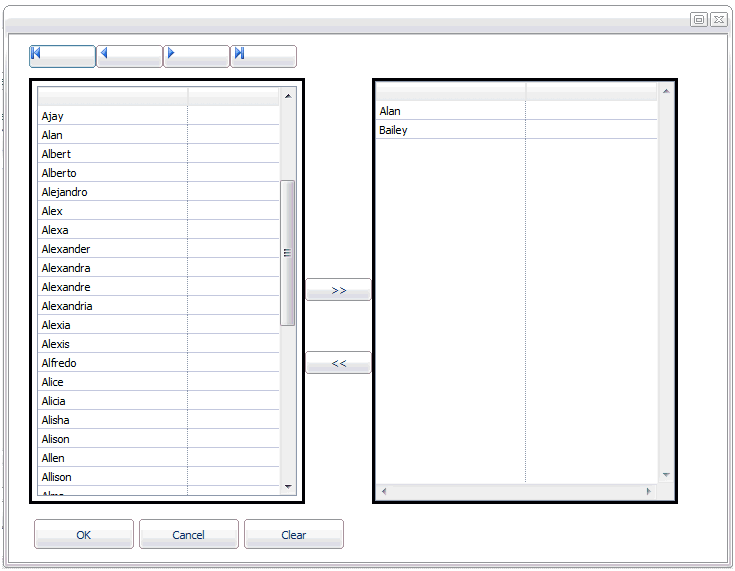
Navigate among the pages using the arrow keys at the
top of the page, as shown in the following image.
-
Select values and add them by clicking the double arrow button.
The single arrows advance the pages one at a time. The  arrows move to the first or last
page of values.
You can use the same procedure to
select values for a Filter or a COMPUTE expression.
xDimension Builder Enhancements for Synonym Editor
The Synonym Editor available from the Web Console has
been enhanced to allow the selection of fields to be grouped as
Measures and Dimensions. A field can also be selected as an attribute
or grouped within levels.


 arrows move to the first or last
page of values.