Migrating Dashboard Data and Settings
A utility is provided to migrate the Business Intelligence
Dashboard (BID). The
Dashboard migration utility copies Dashboard files for use with
the latest WebFOCUS release from the following directory:
/install_directory/ibi/WebFOCUS7x/worp
The entire worp directory is not migrated. Only the following
selected files and directories are migrated.
Folders
../worp/worp_users
../worp/worp_custom
../worp/components/userdata (if folder exists)
Custom Templates
The template directories must be prefixed with custom_ under
the\worp\worp_html directory. Otherwise, the custom templates need
to be copied manually to the WebFOCUS80\worp_html directory.
Files Migrated From /worp/conf
mpv.xml
xxx.tbx (if file exists)
To properly migrate, you must use the Dashboard migration utility.
Manually copying directories and files into the WebFOCUS80 directory
structure does not guarantee a functioning Dashboard environment.
Note:
Migration Steps
The migration consists of the following steps:
- Extract.
This step
extracts data from the earlier (source) release into a file named migrate.zip.
- Load.
This step
loads the data in the migrate.zip file.
The following WebFOCUS Version 8.x directory must be copied to
the \ibi\WebFOCUS7x\utilities directory prior to the start of migration:
\ibi\WebFOCUS80\utilities\mr
The following migration utility file is used to migrate:
Windows
\ibi\WebFOCUS80\utilities\mr\bidmigrate.bat
UNIX
/ibi/WebFOCUS80/utilities/mr/bidmigrate
After the extraction process, your source data is placed in the
migrate.zip file under a newly created export directory found under
the \utilities\mr directory.
For example:
\ibi\WebFOCUS77\utilities\mr\export\migrate.zip
The .zip file contains the extracted contents. A bid_extract.log
file is also created in the export directory.
The migrate.zip file must be copied to the \ibi\WebFOCUS80\migration_import directory
on the WebFOCUS 8.x machine, so the bidmigrate utility finds it
when loading data into WebFOCUS Version 8.x.
x
Procedure: How to Run the Extract Step on a Windows Platform
-
Stop your
web and application servers.
-
Start the
migration utility.
-
Execute
the following:
drive:\ibi\WebFOCUS77\utilities\mr>bidmigrate
extract                 WebFOCUS_worp_directory_location
 WebFOCUS_Release_to_be_migrated
For example,
C:\ibi\WebFOCUS77\utilities\mr>bidmigrate
extract
c:\ibi\WebFOCUS77\worp 77
or
drive:\ibi\WebFOCUS77\utilities\mr>bidmigrate
The
main menu opens, as shown in the following image.
-
Select Extract
an existing Dashboard environment and click Next.
You are prompted for the Dashboard directory for the release
that you are migrating. A directory may appear by default if the
worp directory exists under the WebFOCUS installation directory.
-
Identify
the worp directory for the release that you are migrating from and
click Next.
The migration utility also migrates three directories outside
of the worp directory under the /ibi_html directory (publish, template,
prepared).
-
Choose which
release you are migrating from and click Next.
When the extract completes, you receive the following message.
The
migrate.zip and bid_extract.log files are created under:
\ibi\WebFOCUS77\utilities\mr\export\migrate.zip
x
Procedure: How to Run the Extract Step on a UNIX Platform
-
Stop your
web and application servers.
-
Start the
migration utility.
Execute the following:
/install_directory/ibi/WebFOCUS77/utilities/mr  ./bidmigrate
extract WebFOCUS_worp_directory_location                WebFOCUS_Release_to_be_migrated
For
example,
/install_directory/ibi/WebFOCUS77/utilities/mr  ./bidmigrate
extract /ibi/webfocus77/worp 77
or
/install_directory/ibi/WebFOCUS77/utilities/mr ./bidmigrate
The
following prompt is displayed:
-
Type 1.
You are prompted for the Dashboard directory
for the release that you are migrating. A directory may appear,
by default, if the worp directory exists under the WebFOCUS installation
directory.
-
If the default
path is correct, press Enter. Otherwise, specify the path to the
worp directory.
Note: The migration utility also migrates three
directories outside of the worp directory under the /ibi_html directory
(published, template, prepared).
The utility prompts for the
WebFOCUS release number that you are migrating from, as shown in
the following image:
-
Specify
the number in the list for the release that you are extracting from.
When the extract completes, you receive the
following message:

The migrate.zip and bid_extract.log files are created under:
/ibi/WebFOCUS77/utilities/mr/export/migrate.zip
x
Procedure: How to Perform the Load Step on a Windows Platform
The load step loads the contents of migrate.zip for the
new WebFOCUS release.
You must copy the migrate.zip file from the /ibi/WebFOCUS7x/utilities/mr
directory to the \ibi\WebFOCUS80\migration_import directory on the
WebFOCUS 8.x machine.
To run the load step on
the Windows platform:
-
Stop your
web and application servers.
-
Start the
migration utility.
-
Execute
the following:
C:\ibi\WebFOCUS80\utilities\mr>bidmigrate
load                Release_of_WebFOCUS_to_be_migrated
For example:
C:\ibi\WebFOCUS80\utilities\mr>bidmigrate
load 77
or
C:\ibi\WebFOCUS80\utilities\mr>bidmigrate
The main menu appears, as shown in the following
image.
-
Select Load
and upgrade the extracted environment to the current installation and
click Next.
When the load completes, you receive the
following message:
The bid_load.log file is created under the ibi\WebFOCUS80\migration_import directory.
x
Procedure: How to Perform the Load Step on a UNIX Platform
-
Stop your
web and application servers.
-
Start the
migration utility.
Execute the following
/install_directory/ibi/WebFOCUS80/utilities/mr  ./bidmigrate
load 77
or
/install_directory/ibi/WebFOCUS80/utilities/mr ./bidmigrate
The following prompt is displayed:
-
Type 2.
When the load completes, you receive the
following message:

The bid_load.log file is created under the /install_directory/ibi/WebFOCUS80/migration_import directory.
xBusiness Intelligence Dashboard Post-Migration Steps
The following section describes the BI Dashboard post-migration steps.
Public user configurations performed from View Builder in releases
prior to WebFOCUS Version 8 are not migrated. This included defining
a Public user for Public Views other than the Public ID and a Public
user Reporting Server ID and password.
Public user authorization in a Public view is based on user
permissions. In WebFOCUS Version 8, the Public ID is migrated and
automatically assigned the WF_Role_Public role. An alternate user
ID designated as the Public user needs to be assigned the WF_Role_Public role.
Defining a Public user for Public Views other than the default
Public ID and assigning a Public user Reporting Server ID and password
require the following post-migration steps.
x
Procedure: How to Configure the Public User
-
From the
Administration menu, select Administration Console.
The Administration Console opens.
-
From the
navigation pane, click Configuration.
-
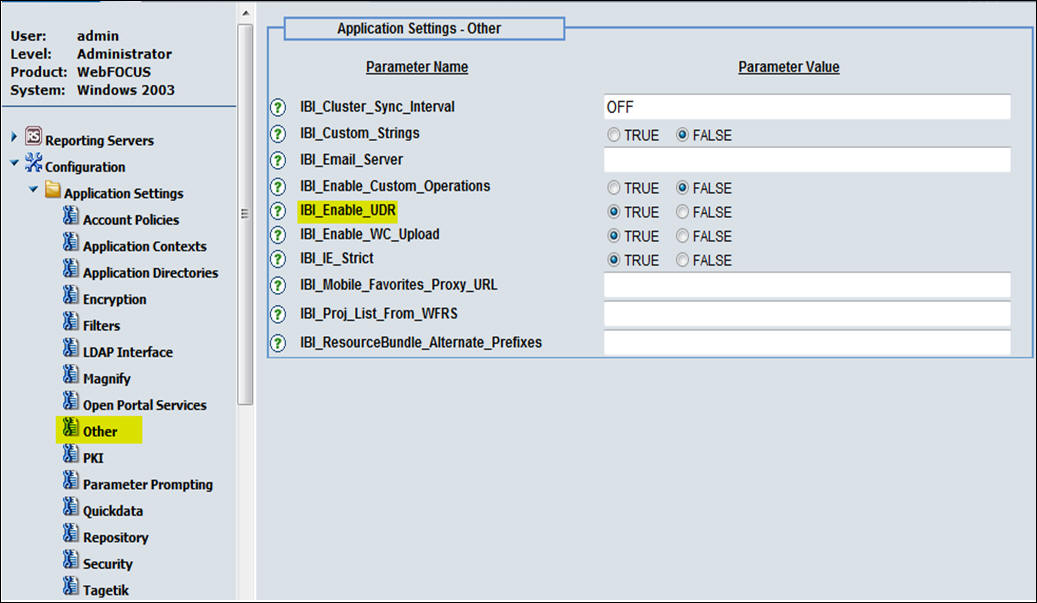
Under Application
Settings, click Other.
-
For the
IBI_Enable_UDR parameter, select the TRUE radio
button, as shown in the following image.
Note: This will
enable the UDR (User Default Role) tab in the Security Center User
dialog box.
-
Under Application
Settings, click Security.
-
In the IBI_Anonymous_User field,
enter the Public user ID, as shown in the following image. The default
user name is public.
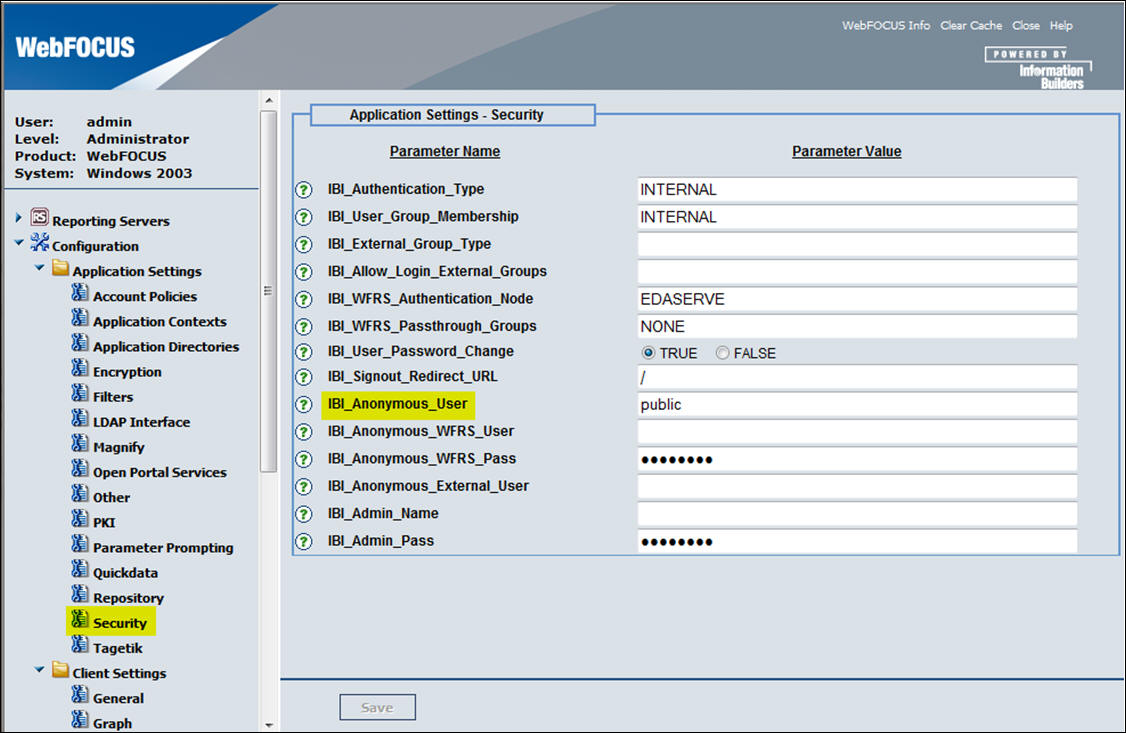
-
To configure
the Public user Reporting Server ID and password, enter the ID and
password in the IBI_Anonymous_WFRS_User and IBI_Anonymous_WFRS_Pass fields.
-
Click Save.
-
Recycle
the Application Server.
-
To assign
the User Default Role for the Public Named user, select Security
Center from the Administration menu. The Security Center
opens.
-
Select the
Public Named user, right-click, and select Edit.
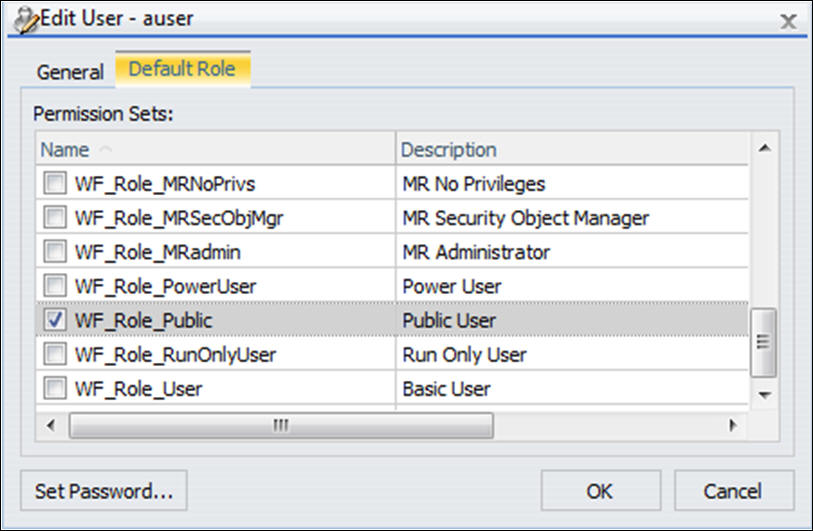
-
Click the Default
Role tab. Verify that the user has the WF_Role_Public
permission set check box selected. If not, remove the existing permission
sets.
-
Select the
WF_Role_Public permission set, as shown in the following image,
and click OK.
-
Add the
Public named user to the Anonymous Group.
-
Click Close.