To configure a synthetic map service:
-
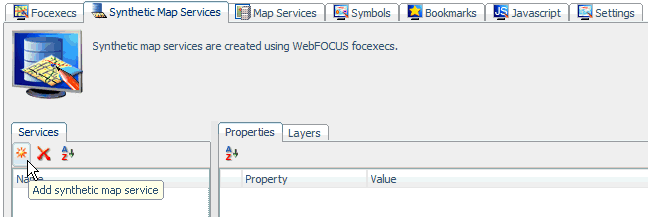
Click the Synthetic
Map Services tab located at the top of the ESRI Configuration
Utility.
-
Click Add
synthetic map service in the left pane.
The Create New Synthetic Map Service dialog opens, as shown in the following image.
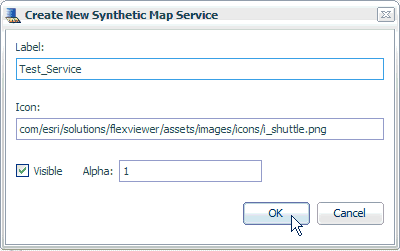
- Enter a name for the synthetic map service in the Label field.
-
Enter the
path to the icon that is used to represent the map service by the
WebFOCUS GIS Flex Viewer in the Icon field.
The Visible check box determines if the map is visible by default. The default value in the Alpha field is 1.
-
Click OK.
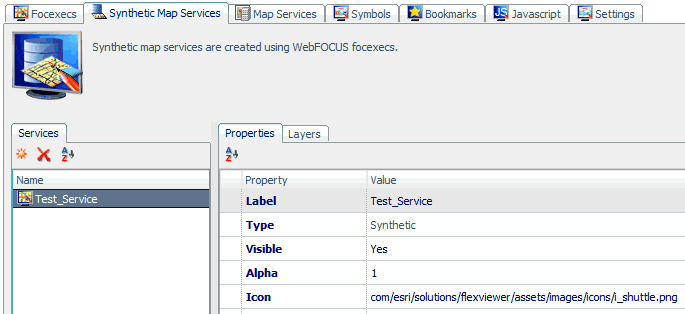
The new synthetic map service is added to the Services pane in the ESRI Configuration Utility, as shown in the following image.
You must now define a synthetic layer for the synthetic map service.
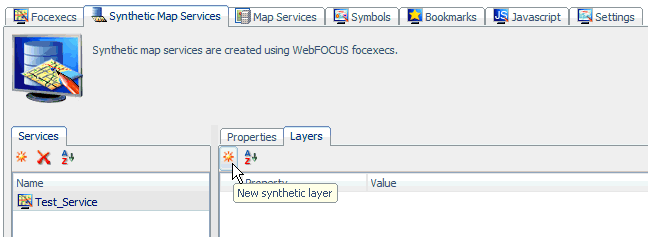
-
Click the Layers tab
and then New synthetic layer.
The Create a New Synthetic Layer dialog opens, as shown in the following image.

- Enter a name for the synthetic layer that is easy for the end user to understand in the Layer Name field.
-
Select one
of the following shapes from the drop-down list:
- Point
- Line
- Polygon
-
Click Next.
The following FOCEXEC selection dialog opens, which allows you to specify a FOCEXEC to draw a synthetic layer.
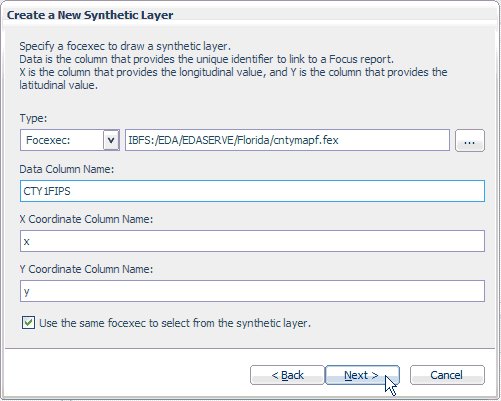
- Browse to and select an available FOCEXEC from your application directory.
- Enter a column name that provides the unique identifier to link to the FOCEXEC.
- Enter an X coordinate column name that will contain the longitude value from the output of the specified FOCEXEC.
- Enter a Y coordinate column name that will contain the latitude value from the output of the specified FOCEXEC.
- Select the Use the same focexec to select from the synthetic layer check box if you want to use the same FOCEXEC for the selection.
-
Click Next.
The following FOCEXEC selection dialog opens, which allows you to specify a FOCEXEC to select from the synthetic layer.
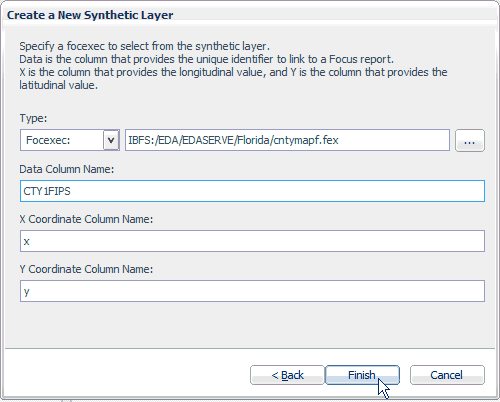
- Browse to and select an available FOCEXEC from your application directory.
- Enter a column name that provides the unique identifier to link to the FOCEXEC.
- Enter an X coordinate column name that will contain the longitude value from the output of the specified FOCEXEC.
- Enter a Y coordinate column name that will contain the latitude value from the output of the specified FOCEXEC.
-
Click Finish.
The new synthetic layer definition is listed in the Layers tab of the synthetic map services configuration area, as shown in the following image.

-
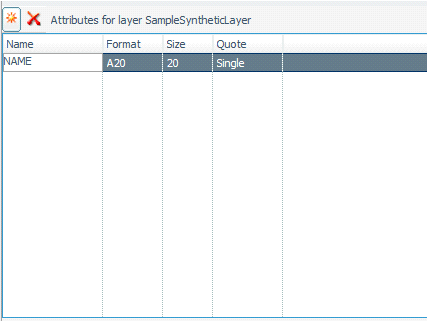
Define new attributes for the synthetic layer definition
based on the output of the FOCEXEC that was used to create the synthetic
layer. The attributes should correspond to the BY fields in the
Foxexec.